Budget DIY Kitchen Remodel: Repainting the Hallway

File this one under “minor change that made a huge difference”.  When we moved in, I declared the yellow unihabitable and painted over it with a pale beige.  But the beige now clashes with the kitchen’s mint green wherever they meet.  So we bid farewell to our beige hall and turned it green to match the kitchen.

The result: seamless, wonderful pale green from the moment you step into the hallway. It even makes the kitchen feel bigger! One color = win.

20120423-080747.jpg

20120423-080934.jpg

Sanding Kitchen Cabinet Doors Before Priming

Welcome to our Budget DIY Kitchen Remodel project. Links to each step of the project can be found on our Budget DIY Kitchen Remodel home page.

With the stripping done, the next step is to sand the cabinet doors. Sanding kitchen cabinet doors is easy, even if you’ve never done it before (I hadn’t!):

  1. Sand with a coarse grit to remove varnish
  2. Wipe clean
  3. Sand with a fine grit to smooth everything out
  4. Wipe super clean

Sanding part 1: Coarse Grit (60)

A powered sander (I use a corner sander) is absolutely essential if you’re going to be refinishing your own cabinets. Do not attempt this using sandpaper alone – you’ll go crazy, and you probably won’t get as smooth a finish. My sanders are a Black and Decker and a Ryobi, and both are excellent.

If you’re in the market for a corner sander, this Genesis corner sander is Amazon’s best rated and it’s cheaper than what I paid for either of mine.

corner_sander

The Genesis corner sander even comes with sandpaper pads!

I first used 60 grit sandpaper to remove any remaining varnish from each cabinet door face.

sanding cabinet faces with coarse grit

BRBRBRBRBRBRRBRBRBRBRBRBR!

Sanding part 2: Fine Grit (200)

I did a second sanding pass with a finer grit sand paper (grit 200) to make the faces smoother.

sanding cabinet faces in preparation for painting

brbrbrbrbrbrbrbrbr!

I don’t have a scientific method for knowing when to switch grits or knowing when I’m done.  Basically, when the wood looked shine-free (no varnish) and had a smooth texture, I was done.  I did both sides and all the edges of the cabinets before handing them off to Jim for final wiping and drying.

I wiped each cabinet down with a wet towel to remove any lingering dust or sanding debris before moving onto the next step: primer!

Quick Project: Crisp laundry… doors!

Our laundry machines occupy a small closet in the entry hall guarded by a fierce pair of louvered doors.  But we’re not ready to replace functional doors just because they’re old and dirty, and bearing the scars of a lifetime of defending the washer and dryer from the angry hordes of the hallway.  A bit of white paint might be all they really need!

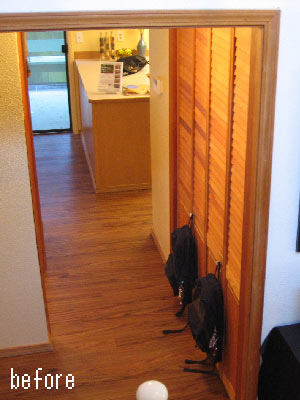
Here they are in their original state, photographed during our first visit to the house.   Yes, that orange hue is 100% true-to-life.


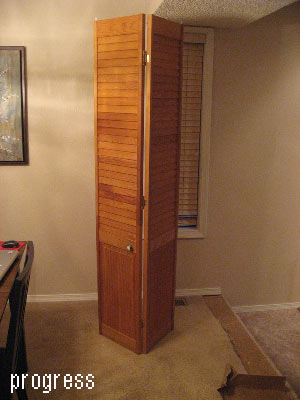
First up: removing the doors.   Jim just wiggled ’em out of their tracks and we hauled ’em into our dining room, which thanks to its still-original carpet doubles as our “messy project”  room.    (Once we finish the flooring downstairs, the garage will take over that responsibility!)


A half-hour of scrubbing with a ret wag  removed the thick layer of dust and lint from front and back.  While they dried, I ventured to our paint stash and busted out a can of the same paint we used on the floor trims, which happens to be just regular ‘ole wall paint from Home Depot: Behr brand semi-gloss latex paint in a color known as “Popped Corn”.

These doors have hardly any finish on them, so I didn’t bother sanding them.  Thank goodness the paint stuck anyway.  The thought of sanding all those louvers was somewhat terrifying.

Before I show you the “after”, first take a gander at the battle damage these babies have suffered.  Dings, dents, water warping galore, but all cosmetic issues easily covered with a nice creamy coat of paint.  A nice creamy coat of paint that took me about six hours to apply to both doors (2 coats each).   To save time, I did not paint the back sides.  It’ll be my dirty little secret. ;)


We let ’em dry overnight and then put them back in their tracks.  I was stunned at what a difference this made!  Before they were shouting “CLOSET!”.  Now they just whisper it. :)