Popcorn Ceiling Removal: Hiring a Professional for the win

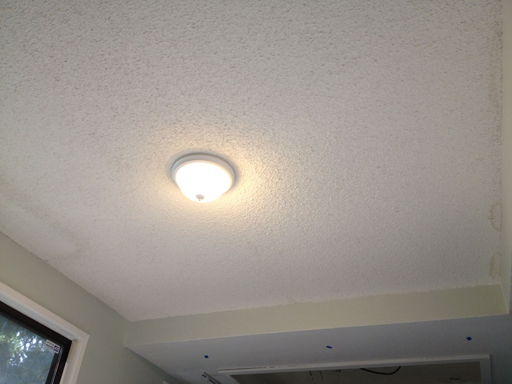
Oh, how I hate popcorn ceiling texture. But we are in the “popcorn ceiling” income bracket. The houses we looked at… they’ve got a history! Very dark histories involving a very ugly, lumpy ceiling texture. It’s gross: it falls down on its own, it traps cobwebs, and if you’ve got any water stains on your ceiling, well, they’re impossible to remove if you’ve also got popcorn.

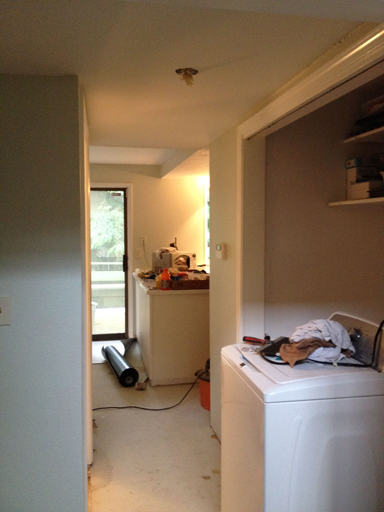
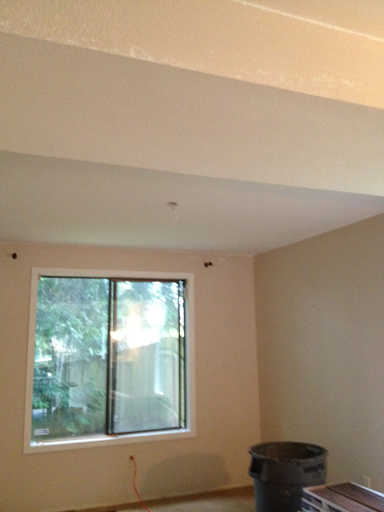
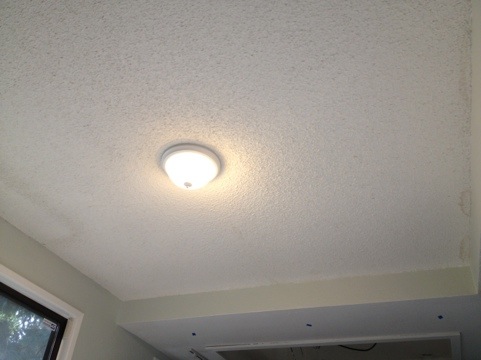
Behold:

I tried my hand at popcorn removal a year ago, but that was more a practice in mess-making and cursing.

I found a contractor online who would do the job for the kitchen, dining room, living room, and entry hall for about $1300. The end result was absolutely 100% worth it, but I didn’t really know what to expect going in. I’m gonna lay it all out here for other folks who might be interested in professional ceiling texture popcorn removal.

Step 1: You have to test your popcorn ceiling texture for asbestos content. A pro won’t touch this job unless you do this step first. We let this discourage us for a long time because we thought it’d be difficult, but it’s quite simple. You scrape some into a plastic sandwich bag and take it to (or mail it, perhaps) to a testing facility. Our test facility was right in town and all we had to do was drop it off and pay $35. We had results in two days. Results = NOT ASBESTOS!

Step 2: Find a contractor (or a few) and get a bid!

$1300 bought me:

  • half a house full of plastic (half the kitchen, entry hallway, dining room, living room: about 300 square feet total)
  • light fixture removal (they do NOT put them back up though!)
  • rapid-fire popcorn removal from ceilings
  • fresh, silky smooth ceiling texturing
  • two coats of white paint
  • garbage haul away

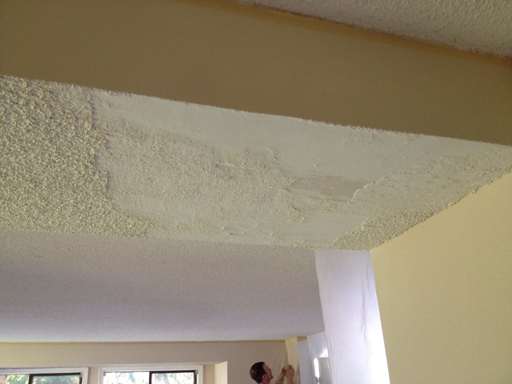
Day 1, Monday afternoon: Steve and his assistant (just two guys!) got down to business: in 20 minutes the entire work area was covered in plastic. Two hours later, the popcorn was history. I don’t know what sorcery they used to remove it, but that crap came down turbo speed. They then hauled away all the popcorn mush and left for the day.

Side note: the stilts they used were freaking awesome.

Monday night: We now live in the house from ET.

Day 2, Tuesday afternoon: Steve returned to blast texture all over the ceiling. With some kind of paint gun. It was awesome. He was in and out in under 2 hours. Living amid all this plastic was starting to wear on us, but Wednesday was the final day of work.

Day 3, Wednesday: Steve’s first visit on Wednesday was to blast on the first coat of paint, and then he left, promising to return around 3pm to shoot on a second coat of paint if the ceiling happened to be dry by then.

If not, it would have to wait until Thursday, but that would conflict with our flooring so it that ceiling had to get DRY! Jim and I rushed home over our lunch break and the three of us (Jim, Dad, and myself) blasted the ceiling with hairdryers and fans. After the paint was power-dried, Steve returned in the afternoon, declared it dry enough, and completed the last coat.

Cleanup was fast, and with the project fully behind us it’s safe to say now that it was TOTALLY WORTH IT!! Look at these flat, shiny ceilings. You could ice skate on these babies.

Hallway:

Dining room:

Living room:

Wow, what an improvement!! Of course, the house remains a mess as flooring is already underway. Scheduling back to back contractors was risky, but everything’s worked out perfectly. The living room is so much more sleek, shiny, and bright!!


Kitchen Update, Part 4: Solid Surface Countertop & New Sink

OMG, I super love it!! I didn’t know I could feel this way about a counter top.  Our new counter top by Samsung, under their “Staron” brand.

2013 update: I think Samsung stopped making it.  The Staron website is dead and Home Depot doesn’t carry samples for it anymore. Wtf, why?  My solid surface countertop is AMAZING.

Countertop Before

Old pinkish laminate counter top which was miraculously undamaged, despite our best efforts to “test it”.  Also: crappy two-bowl sink that always looks dirty and is too small for anything.

Countertop After

Our new Samsung Staron counter top is a BEAUTY!  Perfect little white flakes give the surface an almost shimmery snow-like quality.  I especially love the lack of grey flecks.  Most of the “white with flecks” counter top options looked too much like cookies ‘n cream to me.  This one is like gazing into a gorgeous blizzard.

Quick, look now before we crap it up with appliances and dirty dishes:

20120424-175508.jpg

Way to diversify your biz, Samsung. TVs, phones, and countertops? Why the hell not…

Solid Surface Countertop Seam

The seam is practically invisible.  I can only find it because I know where it is, but even then it takes me a moment to spot it sometimes.  The “seam-baking” step of the countertop installation was my favorite.

The installers glued little blocks (small Staron samples?) to the countertop then put these strong clips on while the seam “baked”.  Dad and I both were looking at these when one suddenly EXPLODED off and freaked us both out!!  We didn’t go near it again after that.  At this point I thought the seam was huge and hideous, but it cleaned up so nice the seam has really all but vanished.

New Kraus Sink

20120424-175808.jpg

LOOK AT THIS HUGE SINK, OMG!!!  It’s a Kraus 31 1/2″ undermount single bowl 16 gauge stainless steel sink and it is AWESOME.  That water bottle holds 20 oz.  Every pan I own can fit into this sink.  

I ordered the sink from Amazon, mostly due to not being able to find anything like it locally but also because it was only $370, way less than I expected to pay for such a gigantic sink.  The sink is very light weight and all I had to do was hand it off to the guy who came to measure our countertop.

All in all, this new countertop is a huge raging success.  The solid surface is beautiful, the gigantic sink is amazing.

Budget DIY Kitchen Remodel: Repainting the Hallway

File this one under “minor change that made a huge difference”.  When we moved in, I declared the yellow unihabitable and painted over it with a pale beige.  But the beige now clashes with the kitchen’s mint green wherever they meet.  So we bid farewell to our beige hall and turned it green to match the kitchen.

The result: seamless, wonderful pale green from the moment you step into the hallway. It even makes the kitchen feel bigger! One color = win.

20120423-080747.jpg

20120423-080934.jpg

Budget DIY Kitchen Remodel: Contractors for Heavy Lifting

There are some things beyond our abilities/time as DIYers.  Those things are:

  • Countertop installation
  • Sink installation
  • Range hood installation
  • Flooring installation
  • Popcorn ceiling removal

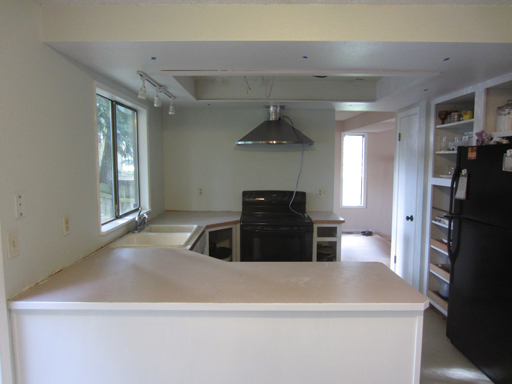
To make ourselves go extra crazy, four of those things are going in over the course of the next five days.  Here are two last looks at our kitchen in its “before” state.

Bidding Adieu to Laminate Countertops

I think laminate gets an unfairly bad reputation.  Knowing that we were soon going to replace this countertop, we started going rough on it just to see what it could take.  Tools, hot pans, sharp knives – this counter survived it all!   We couldn’t destroy the laminate even when we tried.

For like, 10 bucks a square foot or whatever it is, this stuff is kitchen gold.  Sure, you won’t brag about it in your real estate listing, but it’s functional stuff!

The real villain here is the sink: its double bowl design means that our larger cookwear can’t fit into either bowl, making dish duty even more sucky than usual.  It’s a weird coated surface sink, too, and the pale surface shows every bit of dirt. Furthermore, the over-mount design means the seam between it and the countertop collects loads of filth and mold.  As far as First World middle-class problems go, this one is pretty crappy.

So, don’t feel bad about getting laminate countertops.  Do feel bad about getting a too-small double-bowled not-stainless sink.

20120423-081443.jpg


Smell ya later, popcorn ceiling

Apparently this junk looked good in the 70s, but it’s just a horrid trap for cobwebs and water stains (which cannot be scrubbed off or painted).   It’s disgusting, and it falls down on its own, bit by bit.  Our contractor will be removing the popcorn, “re-mudding” the ceiling, and then painting it in the kitchen, dining room, and living room.

20120423-081535.jpg


And so it begins…