Hauling Away an Old Concrete Patio

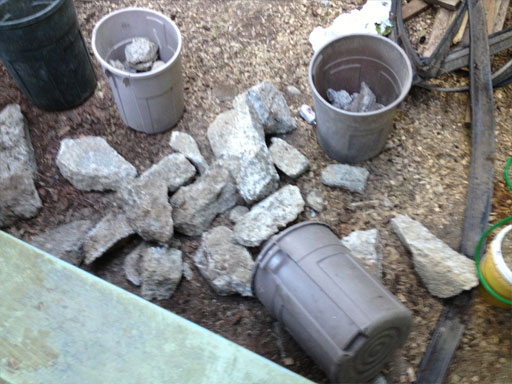
Underneath our deck are the remains of …another deck. Someone just chopped up the old patio and just built a new deck over it.

concrete under wooden deck

Old patio in a chopped up heap under our wooden deck.

Well, whoever you are, you win the lazy award, and I win the I cleaned your mess up award.

The age-old DIY’ers dilemma applied here big time: was this job worth calling a pro?  Surely Jim and I can haul concrete.  Let me say, after watching these two guys toil away for two hours, I’m very glad I called a pro for this job.  The workers crawled around in rugged terrain, pulling the chunks out by hand, and hauling them up our hill and to their truck in a roughneck bin. If you’re in the Puget Sound area and you need some debris hauled, give Low Rate Hauling & Demolition a call – they were crazy hard-working and they came out just hours after I called.

Apparently, no matter how unwanted your cement pile might be to you, there’s someone out there willing to haul it away for a couple hundred bucks.

deckDebris_4

deckDebris_2

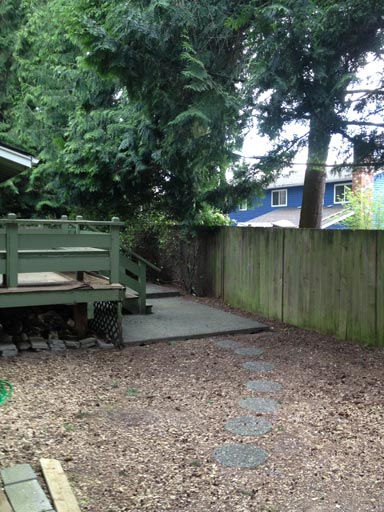
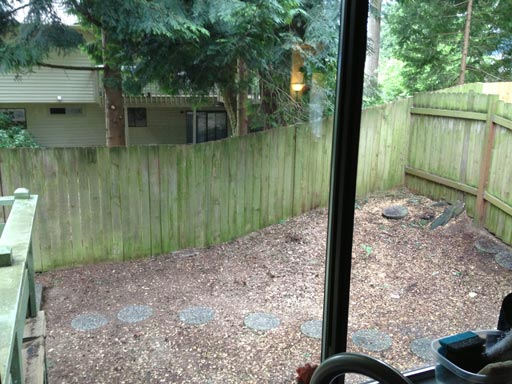
Beautiful! Never thought I’d say that about a space under a deck, but yup – this is beautiful.

deckDebris_3

They also hauled away our pile of scrap wood from the shed tear-down and the toilet we replaced a few months ago.
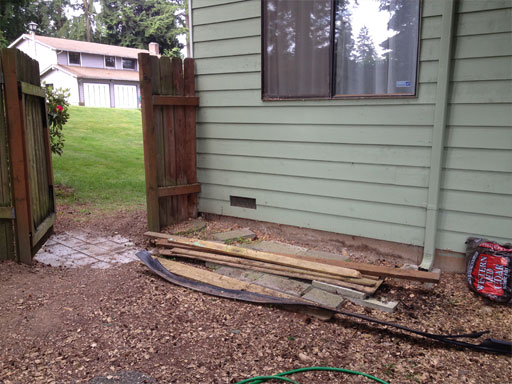
yardDebris_wood

Good riddance!

Tree Removal: Tree Trimming & Removal Complete

The tree removal and trimming is complete!  Only one thing didn’t go as hoped: the company that cut the tree down doesn’t actually remove the pieces.  Oops.  I didn’t even think to ask about this when we were getting the estimate.  After all, who wants this in their yard?

YardTrim_After1

Fortunately, the owner knew a guy who seemed eager to haul it off in his truck.  Must be worth major bucks or something…

Anyway, here’s the backyard, which is no longer crowded by neighbor trees.  We liked the cave-like atmosphere, but we want to take a first whack at installing some legitimate landscaping back here.

YardTrim_After2

The backyard’s basically blank canvas now.  Unfortunately, I have neither the design talent nor the money for anything sophisticated.  We’re going to plant some aborvitaes a few feet off the fence and see where that takes us.

YardTrim_After3

Onwards to weekend!  Where we will purchase plants and put them in the ground!

Tree Removal: Cutting Down the Hemlock

Today we met with Adam from AGTree, a local tree trimming business here in Kirkland, about cleaning up some of our yard’s trees.

EXCITING! I know, right? I took some convincing, too. I don’t spend a lot of time with trees on my property. I don’t even look at them half the time I’m coming and going. Plus, doesn’t trimming reduce shade? And, well, I WANT shade!

But there is one thing worth getting excited about: NOT HAVING A TREE FALL ON YOUR HOUSE! This is a genuine concern, especially here in the PNW when the trees are friggin’ huge, like twice+ the height of the house. When one of those falls down, it’s not going to be nice. Other benefits: less tree debris on the ground to pick up before mowing, no bridge for critters to use to get onto your roof (and mess it up), and general Pride of Ownership™ feelings.

So here’s what we’re doing this coming Monday:

1) Clearing out dead twigs from the twin cedars in our front yard

TreeTrim0

2) Trimming the cedars away from the house so we don’t get so many squirrels on the roof (who may or may not be making a fluffy bed out of our blow-in insulation)

TreeTrim1

3) Trimming the branches that are crowding our backyard. I emphasized that these trees actually give us privacy from the tenants who occupy the house on the other side of the fence, so we don’t want to lose that coverage. But we do want less of a barrier to walking through our yard.

Technically, these overgrown branches are from our backyard neighbor’s tree, but they like when we pay for their maintenance. After all, they approached us two summers ago about paying for their fence repair. So, I’m sure they’ll appreciate us trimming their trees. (Besides, the law allows us to trim up to the fence on our side.)

TreeTrim3

4) Removing this ridiculously tall and awesome hemlock which, sadly, has a long vertical split going up most of its trunk. I’m always sad when we have to remove a tree, but I’ll be more sad if it splits and falls on the house. TreeTrim4


Popcorn Ceiling Removal: Hiring a Professional for the win

Oh, how I hate popcorn ceiling texture. But we are in the “popcorn ceiling” income bracket. The houses we looked at… they’ve got a history! Very dark histories involving a very ugly, lumpy ceiling texture. It’s gross: it falls down on its own, it traps cobwebs, and if you’ve got any water stains on your ceiling, well, they’re impossible to remove if you’ve also got popcorn.

Behold:

I tried my hand at popcorn removal a year ago, but that was more a practice in mess-making and cursing.

I found a contractor online who would do the job for the kitchen, dining room, living room, and entry hall for about $1300. The end result was absolutely 100% worth it, but I didn’t really know what to expect going in. I’m gonna lay it all out here for other folks who might be interested in professional ceiling texture popcorn removal.

Step 1: You have to test your popcorn ceiling texture for asbestos content. A pro won’t touch this job unless you do this step first. We let this discourage us for a long time because we thought it’d be difficult, but it’s quite simple. You scrape some into a plastic sandwich bag and take it to (or mail it, perhaps) to a testing facility. Our test facility was right in town and all we had to do was drop it off and pay $35. We had results in two days. Results = NOT ASBESTOS!

Step 2: Find a contractor (or a few) and get a bid!

$1300 bought me:

  • half a house full of plastic (half the kitchen, entry hallway, dining room, living room: about 300 square feet total)
  • light fixture removal (they do NOT put them back up though!)
  • rapid-fire popcorn removal from ceilings
  • fresh, silky smooth ceiling texturing
  • two coats of white paint
  • garbage haul away

Day 1, Monday afternoon: Steve and his assistant (just two guys!) got down to business: in 20 minutes the entire work area was covered in plastic. Two hours later, the popcorn was history. I don’t know what sorcery they used to remove it, but that crap came down turbo speed. They then hauled away all the popcorn mush and left for the day.

Side note: the stilts they used were freaking awesome.

Monday night: We now live in the house from ET.

Day 2, Tuesday afternoon: Steve returned to blast texture all over the ceiling. With some kind of paint gun. It was awesome. He was in and out in under 2 hours. Living amid all this plastic was starting to wear on us, but Wednesday was the final day of work.

Day 3, Wednesday: Steve’s first visit on Wednesday was to blast on the first coat of paint, and then he left, promising to return around 3pm to shoot on a second coat of paint if the ceiling happened to be dry by then.

If not, it would have to wait until Thursday, but that would conflict with our flooring so it that ceiling had to get DRY! Jim and I rushed home over our lunch break and the three of us (Jim, Dad, and myself) blasted the ceiling with hairdryers and fans. After the paint was power-dried, Steve returned in the afternoon, declared it dry enough, and completed the last coat.

Cleanup was fast, and with the project fully behind us it’s safe to say now that it was TOTALLY WORTH IT!! Look at these flat, shiny ceilings. You could ice skate on these babies.

Hallway:

Dining room:

Living room:

Wow, what an improvement!! Of course, the house remains a mess as flooring is already underway. Scheduling back to back contractors was risky, but everything’s worked out perfectly. The living room is so much more sleek, shiny, and bright!!