Budget DIY Kitchen Remodel: Pantry Makeover (Part 1)

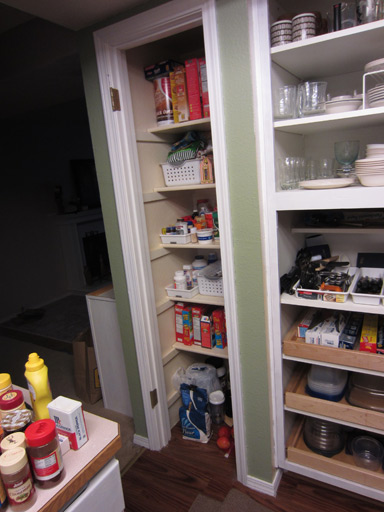
Our kitchen includes a narrow pantry.  Judging by the craftsmanship, it was probably some previous owner’s project.  All they did was nail some thin strips of wood to the walls and set shelves on top.  Not bad.  I would’ve done it differently, but I don’t have bandwidth to change it up significantly.  So I’m going to just give it a makeover, rather than complete cosmetic surgery.

Here’s a “before”:

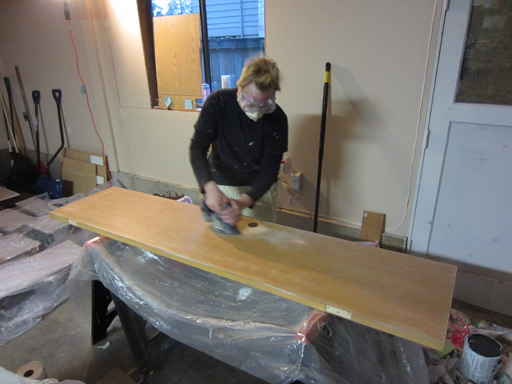
First thing I did was pull all our food out and put it in the living room.  Jim worked inside, deglossing the pantry interior and shelves while I got to work on sanding the pantry door.

Next up: priming the door, the shelves, and the interior of the pantry.  All told, it only took about an hour and a half or so to accomplish all that and get back to the “waiting” step as it all dries!  Best of all, these were the last primer-related steps.  On to enamel!
 

Priming Kitchen Cabinet Doors Before Painting

Welcome to our Budget DIY Kitchen Remodel project. Links to each step of the project can be found on our Budget DIY Kitchen Remodel home page.

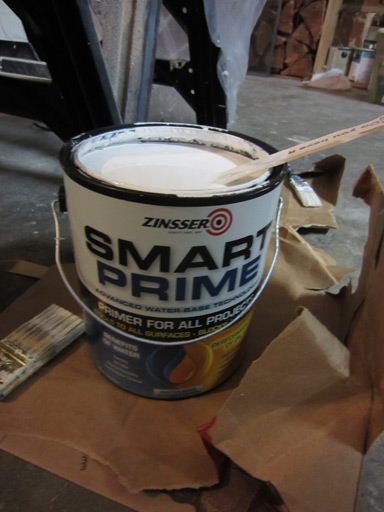
With the cabinets sanded, wiped, and dried, it’s finally time to put some primer on. Primer is a special kind of “paint” that helps real paint stick to the wood, and for this project I used Zinsser Smart Prime.

2014 Update: It’s been 2 years and the cabinets still look newly painted. I highly recommend Zinsser smart prime and the priming steps that follow.

Priming the Cabinets

After the sanding was complete, I prepared my Zinsser Smart Prime just like normal paint: open can, stir, pour into a small roller tray.

My 4” foam roller is not pictured, but getting the primer on was a straightforward process:  wet the roller with primer and roll it onto the cabinet door in a thin coat!  I worked quickly to get everything done while the primer was still wet, and I was careful not to let primer pool in corners.

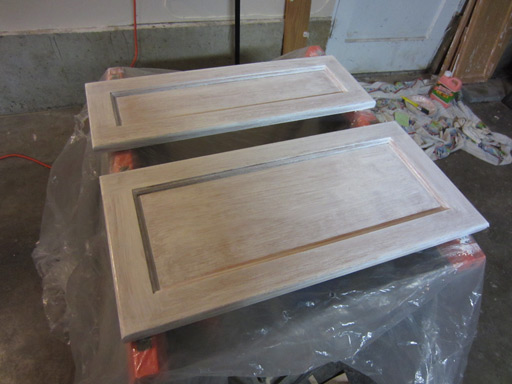
Primer seems to lack the thick coverage of latex paint, but the idea is to help paint adhere to a surface, so maybe it’s more like a glue.  This is one coat:

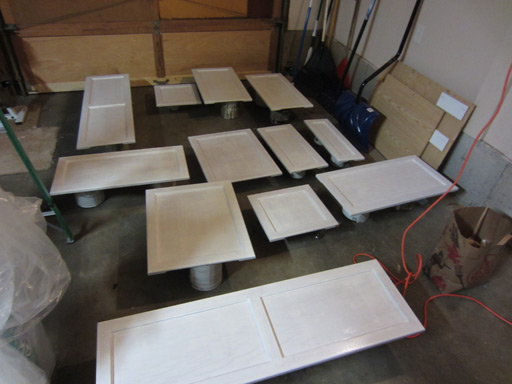
An hour or so later, all the cabinet doors are drying!  We propped them up on paint cans (we have a lot of paint cans) so the primed sides can dry “floating”.

I finished these Tuesday night, and they sat like this drying for 4 days until Saturday morning when I flipped them all over and primed the backs.

On Tuesday and Wednesday evening we stripped, deglossed, sanded, and primed all of the cabinet framework inside the kitchen itself.   This part went surprisingly quick, even though the framework required considerably more precision than the cabinet doors.

Sanding Kitchen Cabinet Doors Before Priming

Welcome to our Budget DIY Kitchen Remodel project. Links to each step of the project can be found on our Budget DIY Kitchen Remodel home page.

With the stripping done, the next step is to sand the cabinet doors. Sanding kitchen cabinet doors is easy, even if you’ve never done it before (I hadn’t!):

  1. Sand with a coarse grit to remove varnish
  2. Wipe clean
  3. Sand with a fine grit to smooth everything out
  4. Wipe super clean

Sanding part 1: Coarse Grit (60)

A powered sander (I use a corner sander) is absolutely essential if you’re going to be refinishing your own cabinets. Do not attempt this using sandpaper alone – you’ll go crazy, and you probably won’t get as smooth a finish. My sanders are a Black and Decker and a Ryobi, and both are excellent.

If you’re in the market for a corner sander, this Genesis corner sander is Amazon’s best rated and it’s cheaper than what I paid for either of mine.

corner_sander

The Genesis corner sander even comes with sandpaper pads!

I first used 60 grit sandpaper to remove any remaining varnish from each cabinet door face.

sanding cabinet faces with coarse grit

BRBRBRBRBRBRRBRBRBRBRBRBR!

Sanding part 2: Fine Grit (200)

I did a second sanding pass with a finer grit sand paper (grit 200) to make the faces smoother.

sanding cabinet faces in preparation for painting

brbrbrbrbrbrbrbrbr!

I don’t have a scientific method for knowing when to switch grits or knowing when I’m done.  Basically, when the wood looked shine-free (no varnish) and had a smooth texture, I was done.  I did both sides and all the edges of the cabinets before handing them off to Jim for final wiping and drying.

I wiped each cabinet down with a wet towel to remove any lingering dust or sanding debris before moving onto the next step: primer!

Preparing Kitchen Cabinets for Painting: Stripping and Scraping

Welcome to our Budget DIY Kitchen Remodel project. Links to each step of the project can be found on our Budget DIY Kitchen Remodel home page.

My kitchen’s cabinets aren’t anything too special, and they’ve even got a bit of wear and water damage, but they are wood – and that means I can strip them clean and paint or stain them however I like! Preparing kitchen cabinets for painting is a project in and of itself.

The whole cabinet painting process is going to go like this:

  1. Strip existing paint/varnish with Citristrip and a scraper (this post!)
  2. Sand cabinets with an electric hand sander (next post!)
  3. Prime cabinets with a primer
  4. Paint cabinets with a quality enamel 

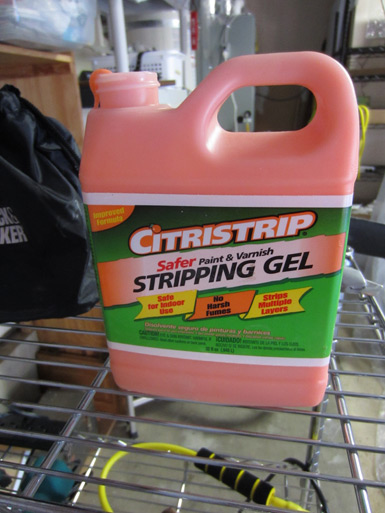
This step is about stripping the cabinets. I hauled each cabinet door into the garage, smeared them with Citristrip gel, and let ’em sit for a while.

Citristrip stripping gel for kitchen cabinet painting

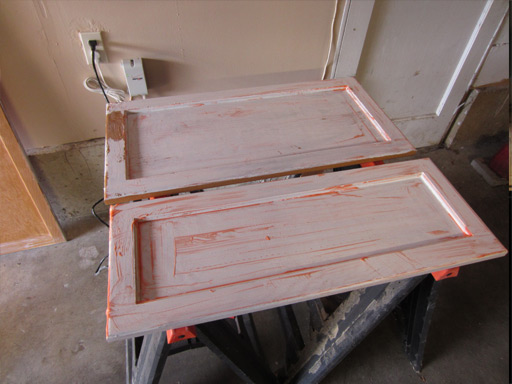
Below are two cabinet doors coated with paint stripper. Why are they already painted? Let’s just say that was a failed experiment at putting latex paint directly onto the cabinets. Do not put latex paint directly onto the cabinets, it will not stick – it will flake off and look crazy ugly.

preparing kitchen cabinets for painting with stripping gel

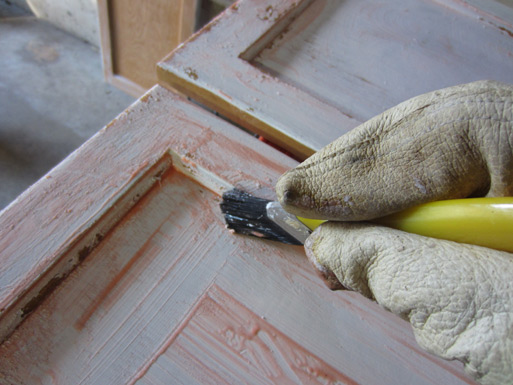
I used a plastic paintbrush to get the stripping gel into every nook and cranny.

preparing kitchen cabinets for painting with stripping gel and a brush

Citristrip works fast – after about 30 minutes I was able to start scraping. This was messy and tedious work.

preparing kitchen cabinets for painting by scraping off existing paint and varnish

It took most of the afternoon to strip and scrape each of the cabinet doors, but they are now paint- and varnish-free.

preparing kitchen cabinets for painting ready for sanding

Next step: sanding the cabinet doors.