DIY Standing Desk: Planning and Building

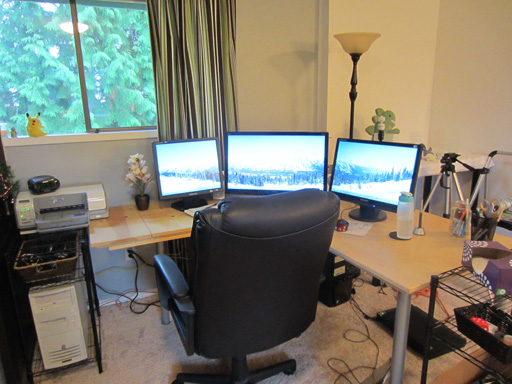
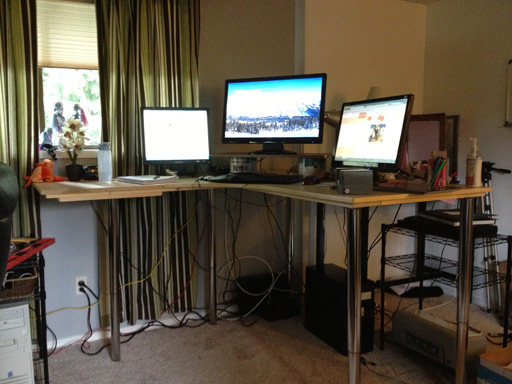
My last workplace had a nice perk: a standing desk option! In the midst of layoff-day packing up, I grabbed a photo to help me remember how nice this setup was:

The question that’s been on my mind since then is, of course, How can I bring home the awesomeness of standing up all day?

Other/better articles have already covered in depth the benefits (and risks) of standing, but my motivation is simple: it just feels better. Sitting 8-10 hours makes my butt and legs sore, makes me have to exercise a lot more to feel tired by the end of the day, and just feels slouchy and lazy. I did not adapt to sitting again, so I set out to build my own DIY standing desk.

My Current Desk

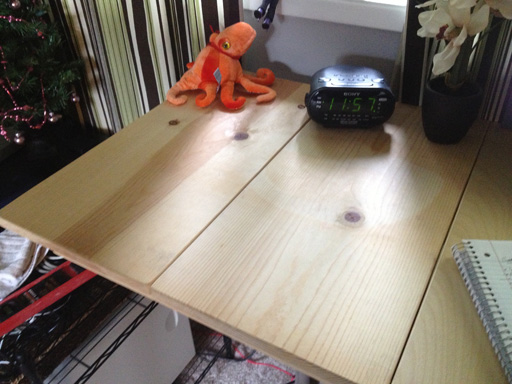
My current desk is an IKEA GALANT, with two additional sections attached the left side to widen it. Someone already modded/IKEA-hacked this desk in its previous life, but this same desk plus extensions can still be found at IKEA as of 2013.

The simplest/most obvious solution to elevate this desk to standing height by swapping out its existing legs in favor of legs that would extend to at least 41”, which is the distance between the floor and my elbow. Fortunately, IKEA provides such legs, the VIKA BYSKE, which go to a maximum of 42”. (This max-height works for me, but not for my husband who will need a height of 47” in his own standing desk.)

Anyway, we picked up the 5 legs from IKEA for $30 each and got to work on attaching them.

Three Complications

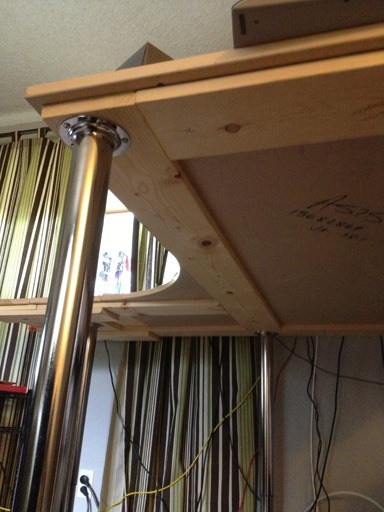
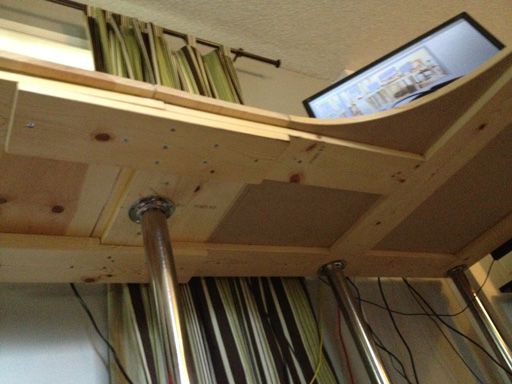
  • VIKA BYSKE legs come with their own “bracket”, they don’t screw into a separate bracket like other legs of this style. This meant we had to remove the existing brackets from the table, even though they were IKEA and look exactly the same
  • IKEA has slightly changed the size/arrangement of screw holes on its leg brackets, so these new legs with their fused-on brackets couldn’t re-use the existing holes from the previous brackets
  • VIKA BYSKE legs are SUPER ANNOYING to extend. It took my husband and I about 20 minutes of wrist-agony to twist all five legs to 41”.

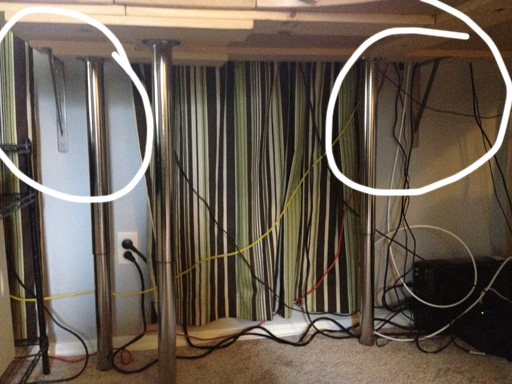
Some shots of the underside of the desk:


Attaching Longer Legs

We took everything off the desk and flipped it upside down to attach the legs.  Once the new legs were on and we stood it back up, several new problems were revealed:

  • My monitors are too low by at least 6 inches
  • The desk is WOBBLY 

I first took a trip to Staples where I was disappointed by their selection of monitor stands. They aren’t tall enough, and they didn’t seem robust enough the widescreens. Ultimately, just to make the desk usable in the meantime, I balanced a book shelf over four small paint cans and put the center monitor onto that. This disrupts my usual workflow, though, as using the other two monitors is rather unpleasant on my neck/upper back. But I think I could build or find something with a bit more looking, so I’m not particularly worried about this problem.

The wobbly feeling has me much more concerned.

We could attach more legs, but will it be enough? The one leg at left is definitely underpowered for the kind of support it needs to provide now.

Anchoring to the Wall 

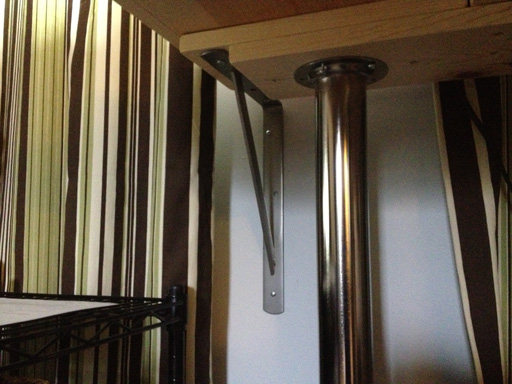
I was wandering around Home Depot when inspiration struck: shelf brackets!  Two shelf brackets and a about 20 minutes of EZ-Anchors and drilling later, the desk was anchored to the wall and completely stabilized. I anchored it 1 inch off the wall to leave room for curtains and wires.  The desk is rock solid now, woohoo!

wrapup_deskanchor3

wrapup_deskanchor1

Project Cost

IKEA GALANT desktop – free (picked it up off the curb)
5 VIKA BYSKE legs – $125 ($25/each)
2 heavy duty shelf brackets – $12

TOTAL: $137

What’s Next?

With that resolved, it’s time to move onto a more challenging project.  Next up: I’m going to build one for my husband, who is 6’4” and too tall for the solution we used for mine.

Some “ready made” standing desks I’ve found online go high enough for him, but they have many shortcomings:

  • Insufficient monitor space (most seem built for one monitor, tops)
  • Too expensive (largely thanks to features we don’t need, like electrically powered up/down)
  • Too small in general – no one makes a standing corner desk… but I will be the first. >:)

Update: We built it!  Check out my husband’s super tall standing desk right here.

Kitchen Update: Finishing the Lighting Recess

This post is about how we updated our kitchen lighting recess without tearing down ceilings or calling in expensive contractors.

Our house was built in 1977 and I am sure that low ceilings with recessed lights were all the rage back then.

Shortly after moving in, we discovered just how fragile these plastic covers were when we knocked one down.  It shattered on the floor.  Silver lining: we loved the open ceiling.  So much less claustrophobic!

We took all three covers down and left it like this for a whole year while we worked on more important projects.  The below photo was taken around the time we pulled out our cabinets and our microwave.

Eventually, we yanked out the fluorescent lights and replaced them with these LED can lights. That process involved cutting the wires to the fluorescent lights, drilling two very large can-sized holes, and wiring in the new LED fixtures.  Everything worked great for a few months and then suddenly stopped working. I hired a professional electrician to re-wire it.  (Some things are beyond our DIY capabilities, but hiring a guy to do wires is way less expensive than hiring a guy to do the whole job.)

The fluorescent lights left a few holes to patch, which I patched using drywall spackle.  Patching the square was the toughest part of this repair, and before he left, my dad mounted a thin strip of wood inside the recess to which I could later attach a drywall square.

But now the time has come to finish this project.  The to-do list fit into the scope of one day’s worth of work, including dry times:

  1. Spackling any remaining gaps
  2. Plastic-wrapping the work area
  3. Sanding spackled areas to smooth them out
  4. Spraying ceiling texture
  5. Waiting on ceiling texture to dry
  6. Final painting

Step 1: Spackle – this step is easy, just smear it on (I use my fingers) and let it dry

Step 2:  Plastic wrapping the work area I used two large clear plastic drop sheets (the kind you find at Home Depot for a few dollars) and masking tape to secure the sheets to the trim that borders the ceiling recess.  This step is very important – the mess made in the next few steps is INSANE.  The floor was protected with a few layers of plastic and towels.

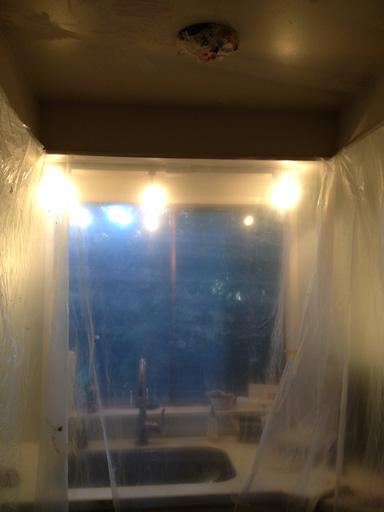
A view from inside, just to give you a better understanding of the cocoon I built:

I also wrapped the ceiling lights by cutting a giant circle from a grocery bag and taping it around the edge of the lights.


Step 3: Sanding.  I used a fine grit sanding block and went slowly.  This makes a colossal mess, so I’m glad I plastic wrapped before starting the sanding.  I also wore goggles (the junior high science class variety, ordinary glasses won’t do when there’s dust everywhere).

Step 4: Ceiling texture came from a can of texture designed for this purpose, Homax Ceiling orange peel purchased at Home Depot.  The reviews on this product are terribly bad, and I don’t know why because this stuff worked fine for me.

I did, however, soak the can in hot water (like the instructions tell you to) for several minutes before using it.  My can soak process went something like this: 20 seconds of shaking, 20 seconds in the warm bath, 20 seconds of shaking, 20 seconds in the warm bath, until shaking it did not create a noticeable drop in the can’s touch temperature.

Anyway, this is what the can looks like with the applicator tube in place:

Spraying this stuff goes EVERYWHERE.  Don’t let the black tube trick you into thinking this is going to be a precision process.  It goes UP and EVERYWHERE.  It’s like being in a shower, and it rains back down.  You’ll need to be protected head to toe.

Quick interlude: check out my cheap painting hat! I made a hat out of a grocery bag to cover my hair, which turned out so well (and saved me a few $$ on an actual “painting hat”) I thought I’d share it here. All I did was put an ordinary grocery bag over my hair and tied the loops behind my neck.

Anyway, back to texturing the ceiling.  I tried to go in an orderly fashion and coat it evenly, but it was hard to see what I was doing in the first place and the wet ceiling texture rain made it that much more difficult.  The can only covered about the area of the recess anyway (the instructions lie when it says “80 sq feet”, good luck with that) anyway so I stopped when I ran out of ceiling texture.

Step 5:  This step is easy, just wait for it to dry. I spent the waiting time having lunch and painting my master bathroom (because I’m a crazy workaholic the paint was already out, so why not?).  I gave it about an hour then I took down the plastic walls to help the ceiling dry faster.  Normally I’d keep the plastic to re-use it, but in this case it was just way too messy so that was it for them (glad I used old ones in the first place).  Total dry time: I think I gave it about four hours.

Step 6: This step was also easy, I used my favorite Wooster brush and a foam mini roller to paint on a thin coat of the white paint I had on hand, Behr Ultra in Popped Corn in eggshell finish (I swear, we’re not sponsored by Home Depot here at leveluphouse but it would be nice if we were!).  It instantly looked a hundred times better with a coat of white paint covering the nicotine-stain yellow that used to be in there.

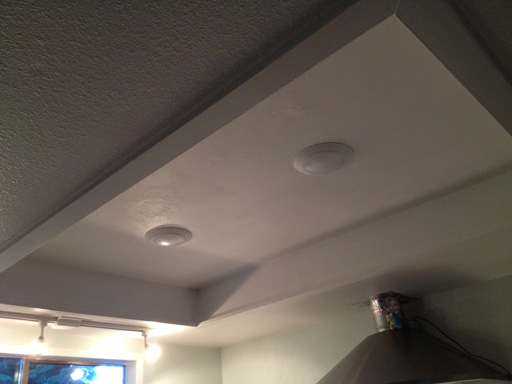
Here’s the finished result.

There’s a little roughness here and there (which probably could have been resolved with more/better sanding) but considering I did it myself for less than $20 it’s not bad at all!

Car Repair: Covering a Big Scratch

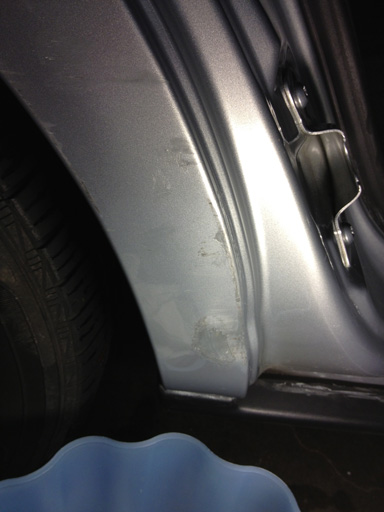
So, this is a thing that happened:

I don’t want to waste space or time ranting about the circumstances that led to this, but the end result is this: the car’s metal is exposed and needs to be covered before it explodes into a torrent of rust.

First, we visited a couple of body shops. They’d have to basically rebuild this section of the car.  The car is 11 years old and not worth this.  We also can’t afford it.

Thinking maybe we should attempt something DIY-ish, we next went to O’Reilly’s Auto Repair.  They had an overwhelming array of car body clays, potions, waxes, creams, etc, but their guys were convinced the car was going to rust no matter what we did and so missed an opportunity to sell us tons of car potions that (apparently) don’t work.

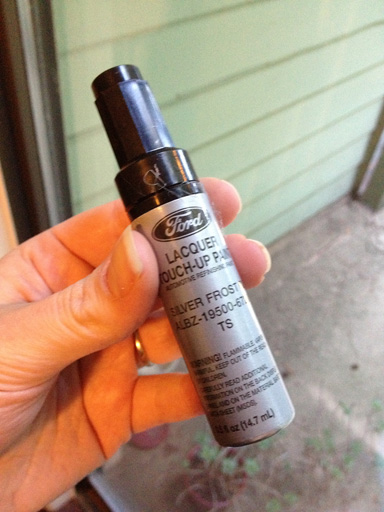
Finally, we went to the Ford dealer, where their guy told us to paint on a few coats from a little can of Ford paint (which I happen to already own) and then wax it.  SOLD!

Step 1: We scrubbed the hell out of the car. December in 40 degree weather is the best time to wash your car.  The icy water and frigid air make you work very fast.  We scrubbed until we were certain we had scrubbed off all the wax we so lovingly applied in October.

Step 2: We dried the car and pulled it into the garage. The car needs to be somewhat warm for this (the Internet seems to recommend 75 degrees, but that’s not gonna happen in December.)

Step 3:  Using a hair dryer, I warmed the area to paint.

Step 4:  I applied the first coat of touch up paint to the wound. This stuff is like thick nail polish and easy enough to apply (there’s a brush attached to the cap). No real technique here, since the angle is so awkward and the paint so goopy.  I tried my best to make the coat thin and even.

Step 5: Wait 2 hours dry time

Step 6: Apply second coat

Step 7: Wait 2 hours

Step 8: Apply third coat

Step 9: Dry for 20 hours. We were supposed to wait 24, but this would have to be close enough if we were going to wax it and still get to the grocery store before Sunday night ended.

Step 10: Wax the car (in the cold!)

Here’s our “after”:

This car doesn’t need to win any beauty pageants, but it does need to last a few more years.  Since we just applied this, I don’t know how it will work out.  It could chip off the moment the car hits 50 mph.  It could rust underneath the paint.  Rain could wash it off.

I’ll update when we know which it is!

2 Min Fix: Tighten a Toilet to the Floor!

Ah, just when I thought we were done with plumbing for the year… a wild leaky toilet appears!

While cleaning the computer room’s bathroom, I noticed a thin border of water between the toilet’s base and the floor.  My first reaction, of course, was to completely flip out and assume the worst – new toilet, new floor, new bathroom?!?!?

(Yes, the toilet seat doesn’t center on the bowl.  Yes, I would love to re-do this entire bathroom.)

BUT… the solution was simple: the toilet just needed to be tightened to the floor!  A gap nearly 1/4” in height existed between potty and floor.

Let’s get this potty on the floor.  (Let the potty hit the floor… let the potty hit the floor… )

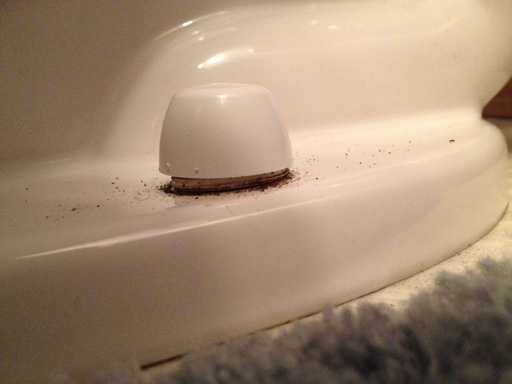
Step 1: Pop the caps off both of the bolts that hold the potty to the floor. This deserves its own step thanks to the thick seal of crusty crap holding the caps on, which I chiseled off with a screwdriver. I knew I was in trouble the second I saw this : the nut wasn’t even on the bolt anymore, it was trapped loose inside the cap.

Step 2: Put the nut on the bolt if it isn’t already, and use a wrench (or a wrench-like tool) to turn the nut clockwise, bringing it down towards the toilet. Apply this to both sides equally – do a few turns on the left, then a few on the right, then go back to the left, etc.

Step 3: Put the caps back on. In this case, the toilet is now too low for the caps and I’ll have to come back and saw the bolts to be a little shorter, but you might be luckier than I was.  Either way, this is a minor problem compared with a water leak.

Step 4: Check for leaks 24-48 hours later I like to use some TP for this step, as it’ll absorb anything it finds.

Phew, leak fixed!

Total cost: $0.
Time spent: a couple minutes
Crises averted? YES