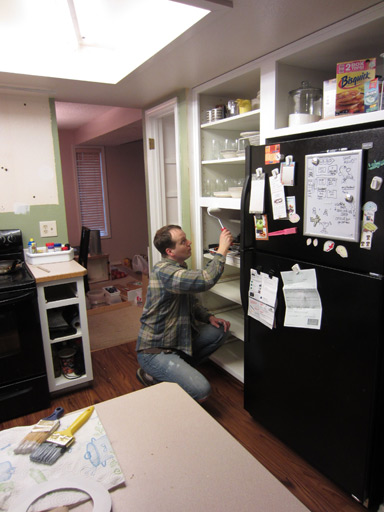
Today started early with the first coat of enamel on the cabinet fronts and the second inside on the cabinet framework. Here’s Jim carefully painting inside:
You’ve already seen a few posts about carefully painting cabinets though, so let’s get to some destruction!! You might recall that our oven-wall used to look like this.
We found this arrangement… lacking.
- We weren’t utilizing the cabinets well because they are too small and awkward for keeping much in
- The cabinets block the view at least half of the countertop and the range’s cook top.
- The over-the-range-microwave has been an aggravation since the day we moved in. It’s just a beast of a microwave, dimming the lights every time it starts up and unable to co-exist with a running toaster oven (blown circuit every time we forget!). We’re not big microwave users, and it always seemed rather ridiculous to be putting a tiny bowl of veggies into something sized for a turkey.
- Neither of us likes the idea of standing at the stove, cooking, with our head just inches from the microwave when it is on
- The microwave ventilation was AWFUL! Our downstairs suffers low visibility from steam and smoke pretty much every time we cook (twice a day!). We need a range hood that can keep up with two cooks!
- It’s just kinda… cramped. Like these cabinets are all up in my business every time I stand near the range or the sink. Like they don’t respect personal space.
There was only one thing to do.
Unscrewing these last two cabinets from the wall was as simple as using the drill to remove 4 long screws. But they remained just as firmly attached to the wall as ever (and to each other).
Mandi: I think these might be glued, look – they aren’t even wiggling when I pull on them.
Jim: Let me try *RIPS CABINETS OFF WALL*
Mandi and Jim: AHHHH OH MY GOD AHHHHHH I GOT IT KEEP HOLDING OKAY PUT IT DOWN AHHHH IT’S HEAVY
Anyway, we did safely lower the cabinet mass onto the countertop, and then we hauled it into the living room, which has become our project graveyard. Ahhhhhh, the kitchen breathes! It’s open! The room feels like it doubled in size. (Okay, maybe not double, but at least 25%. Maybe even 30%.)
Next up: removing the wood backsplash from around the edge of the countertop. Using a screwdriver, hammer, and a weak spot in the trim’s adhesion to the wall, I was able to start the prying-off process like so:
Once the gap was large enough for the crowbar, I used the crowbar to separate the backsplash from the wall.
I thought this method was pretty radical until accidentally punched a wide hole in the drywall with the crowbar, and until the longest portion of the backsplash split horizontally. Oops.
Still, considering the length of the backsplash on the sink wall, this seems like a minor setback. The majority of it came right off after some prying.
YAY!
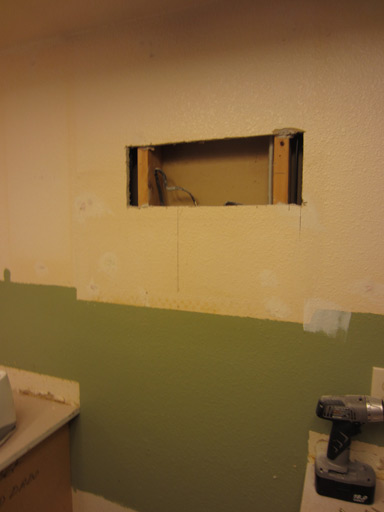
One more thing before we break for lunch and our regularly scheduled weekend chores: cutting out the damaged drywall from behind where the microwave used to be. I’ve seen Dad do this like, once, so that means I’m qualified, right?
I used the level to draw a rectangle around the damaged area and I overshot the studs to give the new drywall patch something to screw into. This was actually a pretty straightforward task, and I was careful not to ram any wires or the back side of our dining room wall. I am going to leave the hole unpatched until I am certain the contractor installing our range hood doesn’t need access to any of the wires inside here.
And here’s where we are now:
Do you like our mess? Admit it, you’re impressed.


