DIY Floor Removal: We struck MOLD!

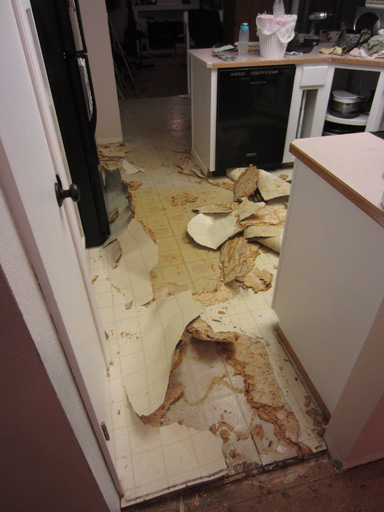
I tore a path through the plywood and vinyl to the dining area, just to say I did. Now it looks like the Tazmanian Devil tore through the kitchen:


But what’s this?! Moisture under the plywood? And MOLD?? Uh oh…


I broke off the plywood, threw it out, and wiped up the moisture. I’ve heard scary things about black mold in WA state, but … well, it can’t be harmful if we get rid of it really fast, can it? :D I have no idea how it got in there – maybe a dishwasher leak?
Budget DIY Kitchen Remodel: Removing Flooring

I’ve threatened it for over a year now, and that time is finally here!  The final reckoning for our house’s mosaic of downstairs flooring!

We’ve already carpeted everywhere we intend to carpet, but the “hard” floors have remained untouched until now.  We’ll be replacing old hardwoods in the entry and the bathroom, and cheap Allure/vinyl in the kitchen, and ancient carpet in the dining room.  Restoring the hard woods was an option, but I would rather have one seamless floor downstairs instead of a bunch of mismatched flooring. The transition pieces are awkward to step over.  I don’t know why the previous owner stopped the hardwoods where they did, because the steams are awkward and ugly.  So alas, the hardwoods are out.  Perhaps they can be removed without damaging them, and donated to a good cause?

This weekend was the first major step towards completing our flooring.  The more we remove ourselves, the more we save, so out came the crowbars!

Over the last few days we:

  • pulled up all of the Allure flooring in the kitchen and hall (it is now a giant scrap pile in the garage)
  • removed all carpeting and padding from the dining room
  • removed most of the woodwork trim from the kitchen, dining room, and hallway
  • tried (and mostly failed) to remove the hardwood flooring from the bathroom
  • removed all the brassy joiners that acted as seams for our patchwork flooring
  • ordered our Corian countertop for our kitchen
  • scheduled a measure with Haight Flooring for tomorrow

We are pooped!  But things are moving again, and that’s awesome!!  Here are some photos of our work:

Allure flooring gone!  Fortunately, it was only glued to itself, not the vinyl underneath.


This vinyl has seen MUCH better days. I have no idea what f’d this floor up so bad.  This damage is actually torn into the vinyl, and no, it wasn’t just pulled up by the Allure.  Whatever happened, it must have been pretty awesome to watch.

In the bathroom we removed the wood trim (revealing more of my favorite wallpaper ever) and pulled out a few of the hardwood planks to reveal what has got to be the final word on hideous vinyl.  And not just one layer, but TWO!  TWO ugly vinyls right on top of each other!!  It’s like an ugly vinyl sandwich.  The wood boards are nailed in, which makes pulling them out pretty difficult.  They break up when removed, which is a bummer.  We didn’t get too far.  We may have our new flooring installers take this one out.  It’s pretty beastly.

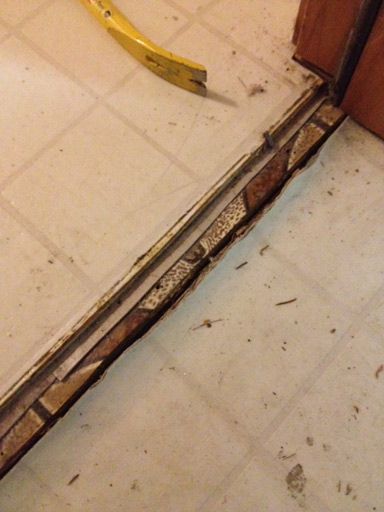
Pulling up the metal threshold transition between our garage stairs and our hallway revealed another ugly vinyl sandwich with a different ugly pattern.  I can’t imagine the eyesore that this house apparently was at some point in its 34 year life.

And finally, a large sample of our laminate flooring!  Shaw brand “Brazillian Vue” isn’t quite as red as it looks in this photo, and should be stunning next to white trim and our pale green and beige walls.  I like that it’s made in the US, too.

With this in place our former patchwork of 4 different floors will be transformed into one smooth and silky chocolately brown laminate covering.  Hooray!

Click here for more of our adventures in DIY flooring removal.

Budget DIY Kitchen Remodel: Tearing Out Cabinets

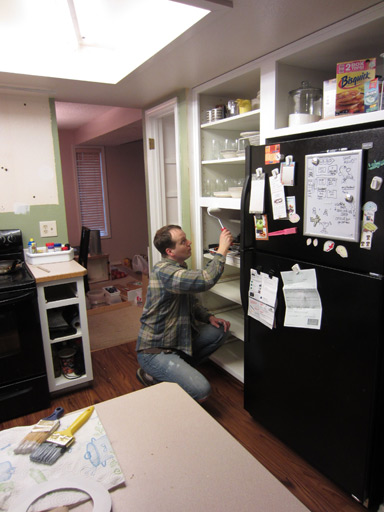
Today started early with the first coat of enamel on the cabinet fronts and the second inside on the cabinet framework. Here’s Jim carefully painting inside:

You’ve already seen a few posts about carefully painting cabinets though, so let’s get to some destruction!! You might recall that our oven-wall used to look like this.

We found this arrangement… lacking.

  • We weren’t utilizing the cabinets well because they are too small and awkward for keeping much in
  • The cabinets block the view at least half of the countertop and the range’s cook top.
  • The over-the-range-microwave has been an aggravation since the day we moved in. It’s just a beast of a microwave, dimming the lights every time it starts up and unable to co-exist with a running toaster oven (blown circuit every time we forget!). We’re not big microwave users, and it always seemed rather ridiculous to be putting a tiny bowl of veggies into something sized for a turkey.
  • Neither of us likes the idea of standing at the stove, cooking, with our head just inches from the microwave when it is on
  • The microwave ventilation was AWFUL! Our downstairs suffers low visibility from steam and smoke pretty much every time we cook (twice a day!). We need a range hood that can keep up with two cooks!
  • It’s just kinda… cramped. Like these cabinets are all up in my business every time I stand near the range or the sink. Like they don’t respect personal space.


There was only one thing to do.

Unscrewing these last two cabinets from the wall was as simple as using the drill to remove 4 long screws. But they remained just as firmly attached to the wall as ever (and to each other).

Mandi: I think these might be glued, look – they aren’t even wiggling when I pull on them.

Jim: Let me try *RIPS CABINETS OFF WALL*

Mandi and Jim: AHHHH OH MY GOD AHHHHHH I GOT IT KEEP HOLDING OKAY PUT IT DOWN AHHHH IT’S HEAVY

Anyway, we did safely lower the cabinet mass onto the countertop, and then we hauled it into the living room, which has become our project graveyard. Ahhhhhh, the kitchen breathes! It’s open! The room feels like it doubled in size. (Okay, maybe not double, but at least 25%. Maybe even 30%.)

Next up: removing the wood backsplash from around the edge of the countertop. Using a screwdriver, hammer, and a weak spot in the trim’s adhesion to the wall, I was able to start the prying-off process like so:

Once the gap was large enough for the crowbar, I used the crowbar to separate the backsplash from the wall.

I thought this method was pretty radical until accidentally punched a wide hole in the drywall with the crowbar, and until the longest portion of the backsplash split horizontally. Oops.

Still, considering the length of the backsplash on the sink wall, this seems like a minor setback. The majority of it came right off after some prying.

YAY!

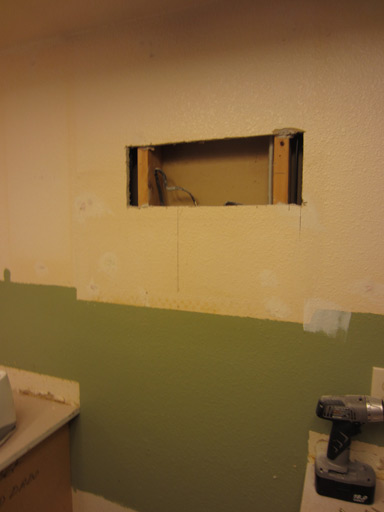
One more thing before we break for lunch and our regularly scheduled weekend chores: cutting out the damaged drywall from behind where the microwave used to be. I’ve seen Dad do this like, once, so that means I’m qualified, right?

I used the level to draw a rectangle around the damaged area and I overshot the studs to give the new drywall patch something to screw into. This was actually a pretty straightforward task, and I was careful not to ram any wires or the back side of our dining room wall. I am going to leave the hole unpatched until I am certain the contractor installing our range hood doesn’t need access to any of the wires inside here.

And here’s where we are now:

Do you like our mess? Admit it, you’re impressed.

Shedding the Shed

Here’s a summary of our shed story thus far:

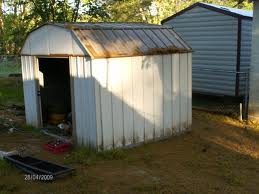
Our house came with a shed.  Said shed was ugly, old, and rusty.  Alas, I never took a photo of it before Jim spent an afternoon disassembling it.  Here’s a similar one from the web:

Here it is on our curb.

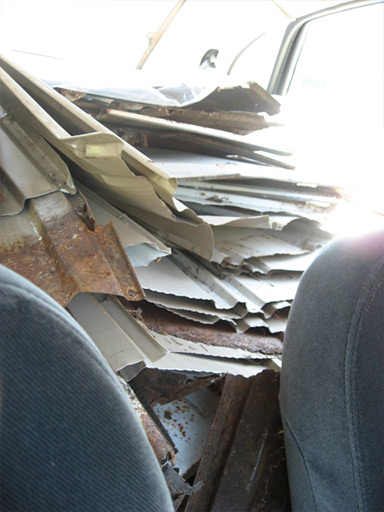
Unfortunately, the garbage pickup did not take any of this crap!  We hauled it all into our side-yard, which is more or less our dumping ground for stuff we can’t figure out how to dispose of.  It hides there until we figure out what to do with it.  It didn’t have to wait long:  a few weeks later, our city hosted a “bulk waste drop off” event for things like toilets and scrap metal.   We cut it up into small sheets and stuffed it into the car.

Here’s the shed, going to shed heaven via Ford Taurus.   Thanks to the plastic and sheets we put down first, the car suffered only a major dirtying, instead of a super extreme major dirtying.   Three trips later, we were rid of it!

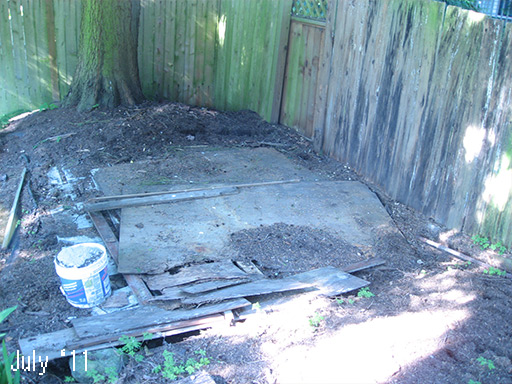
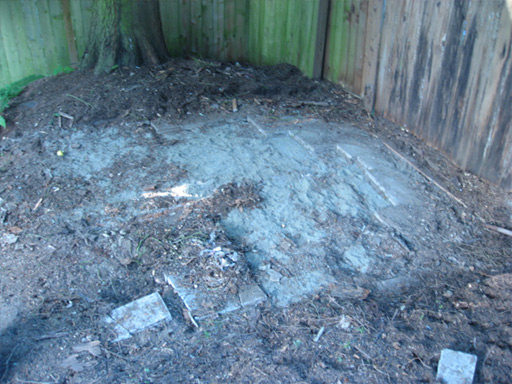
But we weren’t done yet.  The wood floor remained:

But our house came with a badass two-handed axe.  Jim happily chopped and chopped until these boards were broken into small enough pieces to fit into the normal yard waste and garbage pickup.

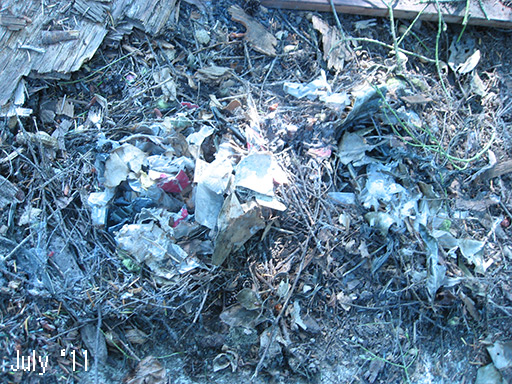
But what’s this?  There’s MORE?!  A nice layer of yard waste hid underneath the boards along with THREE rat nests!  Only one rat, though, and he scampered like hell when we tore up his home.  He ran right into the neighbor’s yard, where he may or may not have been promptly devoured by their dog.  Sorry, Mister Rat!

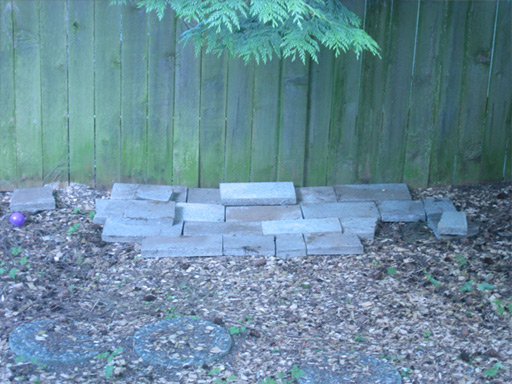
Underneath the yard debris of the ages is a layer of bricks!  We picked them up one by one and hauled them into the backyard, creating a few piles around the yard like so:

We’re only about halfway through the brick removal process, but when we’re done the entire shed area should finally be free of shed evidence!  Shevidence?

Either way, it’s good to be shed-free!