I’ve threatened it for over a year now, and that time is finally here! The final reckoning for our house’s mosaic of downstairs flooring!
We’ve already carpeted everywhere we intend to carpet, but the “hard” floors have remained untouched until now. We’ll be replacing old hardwoods in the entry and the bathroom, and cheap Allure/vinyl in the kitchen, and ancient carpet in the dining room. Restoring the hard woods was an option, but I would rather have one seamless floor downstairs instead of a bunch of mismatched flooring. The transition pieces are awkward to step over. I don’t know why the previous owner stopped the hardwoods where they did, because the steams are awkward and ugly. So alas, the hardwoods are out. Perhaps they can be removed without damaging them, and donated to a good cause?
This weekend was the first major step towards completing our flooring. The more we remove ourselves, the more we save, so out came the crowbars!
Over the last few days we:
- pulled up all of the Allure flooring in the kitchen and hall (it is now a giant scrap pile in the garage)
- removed all carpeting and padding from the dining room
- removed most of the woodwork trim from the kitchen, dining room, and hallway
- tried (and mostly failed) to remove the hardwood flooring from the bathroom
- removed all the brassy joiners that acted as seams for our patchwork flooring
- ordered our Corian countertop for our kitchen
- scheduled a measure with Haight Flooring for tomorrow
We are pooped! But things are moving again, and that’s awesome!! Here are some photos of our work:
Allure flooring gone! Fortunately, it was only glued to itself, not the vinyl underneath.
This vinyl has seen MUCH better days. I have no idea what f’d this floor up so bad. This damage is actually torn into the vinyl, and no, it wasn’t just pulled up by the Allure. Whatever happened, it must have been pretty awesome to watch.
In the bathroom we removed the wood trim (revealing more of my favorite wallpaper ever) and pulled out a few of the hardwood planks to reveal what has got to be the final word on hideous vinyl. And not just one layer, but TWO! TWO ugly vinyls right on top of each other!! It’s like an ugly vinyl sandwich. The wood boards are nailed in, which makes pulling them out pretty difficult. They break up when removed, which is a bummer. We didn’t get too far. We may have our new flooring installers take this one out. It’s pretty beastly.
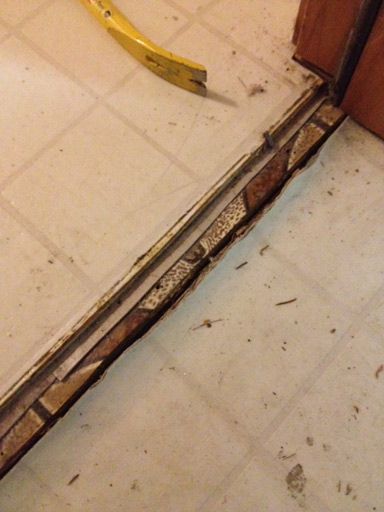
Pulling up the metal threshold transition between our garage stairs and our hallway revealed another ugly vinyl sandwich with a different ugly pattern. I can’t imagine the eyesore that this house apparently was at some point in its 34 year life.
And finally, a large sample of our laminate flooring! Shaw brand “Brazillian Vue” isn’t quite as red as it looks in this photo, and should be stunning next to white trim and our pale green and beige walls. I like that it’s made in the US, too.
With this in place our former patchwork of 4 different floors will be transformed into one smooth and silky chocolately brown laminate covering. Hooray!
Click here for more of our adventures in DIY flooring removal.


