DIY Kitchen Renovation: Painting a Pantry Door White

Welcome to our Budget DIY Kitchen Remodel project. Links to each step of the project can be found on our Budget DIY Kitchen Remodel home page.

The pantry door suffered the same ailment as everything else in the kitchen: it was shiny and orange-hued. But it’s wood, so there was no reason I couldn’t strip off the varnish and paint the pantry door white to match my painted cabinets! Painting a pantry door is easy – read on!

Supply List

Sanding the Door

After prepping all those cabinet doors for painting, the pantry door was basically just another, larger, cabinet to strip and sand. Here I am sanding my pantry door with my corner palm sander.

painting a pantry door white starts with sanding

Yellow pants for the win.

I have two sanders: a battery-powered sander and an electrically powered-sander, and for long jobs like this door I preferred the electric sander.  Do not attempt to sand a door by hand! Your arm will fall off. A good corner sander is only about $20, so grab one before you start a project like this. This Genesis-brand corner palm sander is highly rated on Amazon:

Genesis corner palm sander

Shop for a palm sander like this Genesis corner palm sander on Amazon.

Priming the Door

Once the pantry door was sanded smooth and completely free of varnish, I used the same Zinsser Smart Prime from the cabinets on the pantry door’s faces and edge. Since I work full time, I squeezed this painting in wherever I could – usually a session before work and another after work.

Primer’s job isn’t really coverage, it’s just to give something for the top coat to stick to, so I called it good enough after 3 thin coats on every surface of the door. I definitely recommend using a primer (especially this one, since it’s held up so well). Two years later, my cabinet and door paint has not chipped or scratched. This primer holds on tight!

I rolled the primer on with a small foam roller, which I highly recommend over a fluffy roller. The foam roller makes a much smoother, flatter finish than a fluffy roller.

painting a pantry door white letting primer dry

Kitchen cabinets and the pantry door in various stages of drying.

Zinsser smart primer for white kitchen cabinets

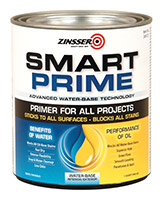
Zinsser Smart Prime works great for painted cabinets and pantry doors.

Painting the Door

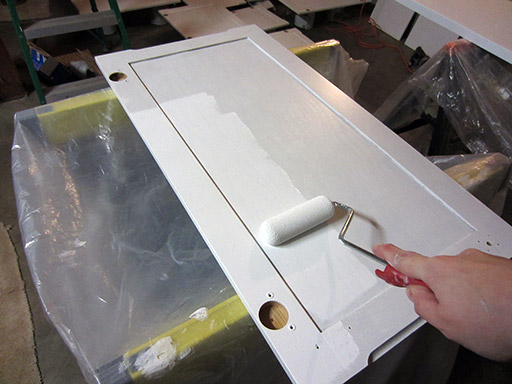
Isn’t it funny how much work goes in before you can actually start painting? Painting was quick and easy. I used the same Benjamin Moore Advance Alkyd paint I used on the cabinets, applying a three thin coats to each side of the pantry door with the mini foam roller.

This photo is from a cabinet, but I used the exact same foam roller and painting technique to paint the pantry door. The secret to an even paint job is thin coats evenly applied.

painting a pantry door white foam rolling on the paint

So that’s it: sand it, prime it, paint it. Don’t use a latex paint and don’t skip the sanding or priming steps if you want this paint job to be durable enough to survive life in the kitchen! With the cabinet doors and pantry door drying, the next big change was the professional installation of our new range hood.

Note to readers: Some links on LevelUpHouse are Amazon affiliate links, provided here to help you find our recommended products quickly. Your purchase through Amazon.com helps support this site at no cost to you – but as always, we encourage you to shop around for the best deal!

DIY Kitchen Renovation: Painting Kitchen Cabinets White

Welcome to our Budget DIY Kitchen Remodel project. Links to each step of the project can be found on our Budget DIY Kitchen Remodel home page.

I gave the cabinets 3 days to dry after their last coat of primer before moving onto the final coat. For painted kitchen cabinets, you can’t just slap on any latex paint – it has to be a tougher, more durable paint. For this job, I used Benjamin Moore Advance Waterborne Interior Alkyd.

Why this paint?  My heroes at Young House Love used it for their own cabinets!  That’s not like showing up to the prom in the same dress, is it? Anyway, it’s good stuff.

2014 Update: This post is 2 years old, but my cabinets still look like they were just painted! Benjamin Moore Advance has held up beautifully – I highly recommend this product.

Anyway, here’s the enamel going on with my little foam roller.  Enamel definitely has a different feel to it than latex paint.  It’s difficult to describe – I might use the term “less booger-like than latex”.  It lacks that rubbery stretchiness latex has.

And since it was $50 for the gallon, and went on over equally pricey primer, which went on over hours of sanding work, which followed some serious varnish stripping work, I get to feel like a pro painter and not just some amateur sloshing around cheap paint from the hardware store. 

Thin and even coats is the trick to perfectly painted kitchen cabinets. Don’t rush, this is the homestretch!

I am doing the backs first because I want the last, final dry wait to be with the fronts facing up so the finished fronts never touch the paint cans the doors sit on while they dry. I haven’t seen any evidence that this technique is in any way harmful to the paint, but just in case – the final “front coat” will not touch the support cans!

With Jim helping me, we painted all of the doors in about one hour.  We’re slower with the enamel because we’re being extra careful now.  When we finished the cabinet doors, we went inside and did a coat of enamel on all of the cabinet framework.  And thus begins another 3 day wait on drying…

PS: Yes, this was our Valentine’s Day.  True love = painting your kitchen cabinets together. Write a song about that, Taylor Swift! :)

While the final coat of paint on the cabinets dried, I repeated all of the steps on the pantry door.

Budget DIY Kitchen Remodel: Pantry Makeover (Part 1)

Our kitchen includes a narrow pantry.  Judging by the craftsmanship, it was probably some previous owner’s project.  All they did was nail some thin strips of wood to the walls and set shelves on top.  Not bad.  I would’ve done it differently, but I don’t have bandwidth to change it up significantly.  So I’m going to just give it a makeover, rather than complete cosmetic surgery.

Here’s a “before”:

First thing I did was pull all our food out and put it in the living room.  Jim worked inside, deglossing the pantry interior and shelves while I got to work on sanding the pantry door.

Next up: priming the door, the shelves, and the interior of the pantry.  All told, it only took about an hour and a half or so to accomplish all that and get back to the “waiting” step as it all dries!  Best of all, these were the last primer-related steps.  On to enamel!


Priming Kitchen Cabinet Doors Before Painting

Welcome to our Budget DIY Kitchen Remodel project. Links to each step of the project can be found on our Budget DIY Kitchen Remodel home page.

With the cabinets sanded, wiped, and dried, it’s finally time to put some primer on. Primer is a special kind of “paint” that helps real paint stick to the wood, and for this project I used Zinsser Smart Prime.

2014 Update: It’s been 2 years and the cabinets still look newly painted. I highly recommend Zinsser smart prime and the priming steps that follow.

Priming the Cabinets

After the sanding was complete, I prepared my Zinsser Smart Prime just like normal paint: open can, stir, pour into a small roller tray.

My 4” foam roller is not pictured, but getting the primer on was a straightforward process:  wet the roller with primer and roll it onto the cabinet door in a thin coat!  I worked quickly to get everything done while the primer was still wet, and I was careful not to let primer pool in corners.

Primer seems to lack the thick coverage of latex paint, but the idea is to help paint adhere to a surface, so maybe it’s more like a glue.  This is one coat:

An hour or so later, all the cabinet doors are drying!  We propped them up on paint cans (we have a lot of paint cans) so the primed sides can dry “floating”.

I finished these Tuesday night, and they sat like this drying for 4 days until Saturday morning when I flipped them all over and primed the backs.

On Tuesday and Wednesday evening we stripped, deglossed, sanded, and primed all of the cabinet framework inside the kitchen itself.   This part went surprisingly quick, even though the framework required considerably more precision than the cabinet doors.