Refinishing a Wood Bathroom Vanity (Part 2): Scraping and Sanding

bathroom_sand

Today we’re gonna scrape and sand and scrape and sand some more!

Welcome to Part 2 of this series on refinishing a wood bathroom vanity.

Catch up on Part 1 – Preparation & Stripping here.

Yesterday, we smeared stripping gel onto the vanity’s surface and left it to work for 24 hours. Next step: scraping and sanding the gel stripper and the varnish off the cabinet faces in preparation for painting.  This step is messy and time consuming: it took me about 40 minutes to prepare each individual cabinet door for painting.

Plan to spend at least a few hours scraping and sanding, depending on the size of your vanity.  Hang in there: this step is essential for getting your paint (or stain) to coat evenly and beautifully!

Cabinet Scraping & Sanding Supply List

Here’s a handy list of every tool I used to scrape and sand my wood vanity:

Paint Scraper

Paint scrapers are cheap but essential – you’ll need at least one to properly remove the stripping gel and varnish from your cabinet faces.

Handheld Corner Sander

You’ll need a “palm sander” for sanding the cabinet faces prior to painting.  I’ve tried, and do not recommend, trying to sand by hand.

black and decker mouse corner sander

My Black & Decker mouse corner sander has helped refinished both my kitchen and my bathroom cabinets.

Sanding Pads

The sandpaper that goes with corner sanders is special: they’re shaped like little pressing irons and the velcro backings are designed to hold them onto the sander.  I used both 80 grit pads (for varnish removal) and 220 grit pads (for lighter touchups).  You’ll need multiple pads, since they get gunked up.  I think I used 4-5 pads from the 80 grit set and 3-4 from the 220 set.

refinishing a bathroom vanity scraping and sanding grit

80 grit and 220 grit sandpaper for corner mouse sanders.

Paper Towels

You’ll need paper towels for wiping away used stripping gel and varnish.

Protect Thyself

Skipping this step is likely to leave you with debris in your eyes and lungs (which you will cough out over the next several days).  Here’s my el-cheapo solution, which has served me well for a few projects now:

This particular style of dust mask is nice because it has two separate elastic bands, one for going over your ear and one for going under.  This lets it avoid all my cartilage piercings. :)  It pinches nicely over the nose and somehow breathing into it does not fog the goggles.

The high school chemistry style goggles are much preferred over glasses due to the nature of dust floating everywhere.

Not shown are my earplugs, which I HIGHLY recommend when working with power sanders and shop vacs.  If something’s going to damage my hearing, it better be concerts and not power tools.

refinishing a bathroom vanity self protection

Sanding creates a lot of debris – keep it out of your eyes and lungs with some simple protection.

It’s not 100% perfect – there’s a small gap between the facemask and the goggles, but it works 99.9% of the time and was super cheap compared to some of the more serious protective masks I’ve seen for sale.

Scraping off the Citristip

Using your handheld paint scraper, push firmly and work with the grain of the wood.  I usually go over an area at least a few times before moving on.  Remove the clumpy Citristrip/varnish/paint bits with a paper towel. It’s important to remove all of the Citristrip and varnish before moving onto sanding: if you don’t, the leftover stripping gel will just crud up your sanding pad.

refinishing a wood vanity scraping off old varnish

You should remove the cabinet mounting hardware before beginning this step – I was so eager to start scraping that I removed it later, after it got full of Citristrip. Boo.

Sanding

Start with rough sandpaper (I use 80 grit for this step) to sand off whatever varnish and gel still remains.  I highly recommend my Black & Decker electric “mouse” sander.

repainting a bathroom vanity using a corner sander

This sander is LOUD. Wear your earplugs!

This whole process takes about 1 hour for a single door, 30-40 minutes for a drawer.  This was tedious and laborious and I split up the sanding over two real-life days.

refinishing a bathroom vanity sanding cabinet faces

The day’s done: here’s my progress on scraping and sanding this vanity’s doors and drawers.

Arms tired yet?  Part 3 demonstrates priming in preparation for painting!

Refinishing a Wood Bathroom Vanity (Part 1): Preparation & Stripping

pin_me_refinishing_bathroom_vanity

Click to add me to your favorite pin board!

We have absolutely no budget for a bathroom remodel, so I’m going into DIY mode to refinish this vanity using leftover supplies from my kitchen cabinet refinishing project. Due mostly to dry times, refinishing my master bathroom vanity was about a five day project with about 3-5 hours a day of work each day except the first (which was super quick).

In this series of posts, I’ll walk you through all the steps of refinishing a wood bathroom vanity:

  1. Stripping the wood varnish (or paint, if yours is painted)
  2. Sanding for a nice smooth surface
  3. Priming so the enamel sticks
  4. Painting a durable enamel

Let’s begin!

Empty the Bathroom

The very first step is to remove everything that isn’t related to this home improvement project.  It’s going to get extremely messy and dusty in here as we strip varnish and sand the cabinet faces.

Unless, of course, you can take your vanity or cabinet doors outside, which I couldn’t thanks to near constant rain during the week I spent refinishing this vanity.

refinishing a wood bathroom vanity

This is the cleanest this room will look for the next 5 days.

Remove Existing Hardware

Removing the cabinet hardware (knobs and such) is also essential – painting around things is bad. Very bad.

Apply Stripping Gel

CitriStrip worked very well on my kitchen cabinet project, so I’m using it again on this one.  One bottle has been enough for both my kitchen and now this bathroom.

Citristrip stripping gel great for refinishing a bathroom vanity DIY

Citristrip smells like an orange Popsicle.

Since all I’m removing here in the bathroom is a thin layer of varnish, I don’t need to lay the Citristrip on too thick: just a thin but consistent layer on every wood surface ought to do it.  For this step I use a cheap plastic paint brush and a few paper towels.

I’ll come back in 24 hours to scrape and sand the peeling varnish.

Citristrip on wood bathroom vanity

Hardware off, Citristrip on

Patching ceiling drywall next to range hood exhaust duct

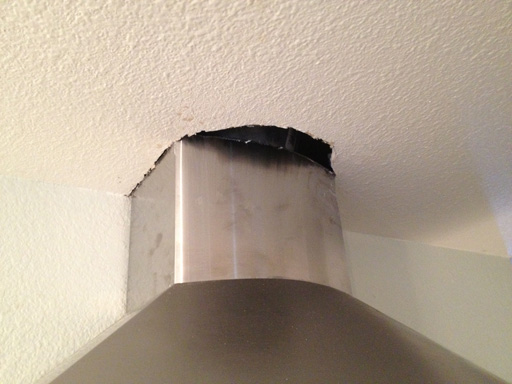
Our new range hood vent is smaller than the hole used by our old microwave’s exhaust duct. Here’s the problem: a 5” wide x 2” deep gap adjacent to the range hood’s ventilation duct.

patching ceiling drywall next to range hood exhaust duct

Funny how the crappy microwave needed a larger vent hole than our awesome range hood.

Here’s what didn’t work

Bad Idea #1):  Curved piece for curved hole

patching ceiling drywall template

Here’s my crescent-moon stencil, same shape as the ceiling hole

patching ceiling drywall cut out piece

And here’s the drywall piece I ended up with after 20 minutes of cutting and shaving.

rangehoodgap_curvepiece2

The piece fits!  …but what will keep it up there?

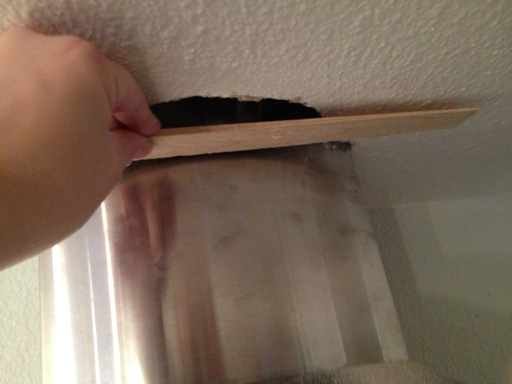
I wish I’d thought to try this before I cut the darn piece out: the anchor wood won’t fit into the hole with enough space for my fingers to hold it down while I drill it into place.

rangehoodgap_curvepiece3

This strip of wood has to straddle the hole – and my fingers need to hold it down. There’s no room for my fingers.

Solution: I made the hole bigger (and rectangular).

rangehoodgap_makesquare

Obviously, the solution is to make my ceiling hole even larger. (I did this when no one else was home to question my methodology, which was smart because this must have looked insane.)

Anyway, I was trucking along with this bigger/more rectangular hole.  I even found a thicker “anchor strip” of wood (if there’s a technical term for this, I don’t know it) to use.

rangehoodgap_cutwood

This bar of wood will give the new drywall piece something to hang from.

rangehoodgap_anchoredwood

New “wood bar” screwed into place. The new drywall will also screw onto the wood bar.

And that’s about when Bad Idea #2 revealed itself:  The new patch piece?  Yeah, it’s 1/4” thicker than the ceiling’s drywall.  There’s no way to “gloss over” this – I need to find thinner drywall, and cut another freaking piece (~20 minutes of cutting and shaving).

patching ceiling drywall drywall too thick

Derp, the drywall I chose for the second patch was too thick.

I can’t believe it didn’t occur to me that the piece I was making was hella thick:

rangehoodgap_drywallthick

Like, a lot thicker.

Anyway, I found a thinner scrap and cut another piece.  This time, it was the right thickness, the right shape, and I was able to anchor it to my “anchor wood”.

patching ceiling drywall screwed into anchor

Patch in place and screwed into the anchor wood.

Sweet!  I began smoothing everything over with a few layers of spackle.  Texture and painting will come later, once this has dried.

patching ceiling drywall spackling ceiling

Spackling the ceiling patch.

Something that isn’t obvious from these photos is the absolutely awkward angle I was working at.  The range hood is large, and the ceiling is low once I’m on the ladder, so I did most of this work bent at the waist with my head pressed against the ceiling, sideways, while standing on a stepladder.  Glad this one’s done!

Budget DIY Kitchen Remodel: Contractor for Range Hood Electrical

I can’t believe it’s been 9 months since this range hood went in and we’re still working around the dangling cord.  We thought we could handle wiring the cord into the wall, but to be honest, it’s beyond us.  The wall studs and the existing wiring are beyond our abilities.

So I hired Elkay Services to finish the job, plus knock several additional items off my to-do list:

  • wire the range hood into the wall (thus getting rid of its cord)
  • repair the overhead lights that lost power while I was hammering the ceiling
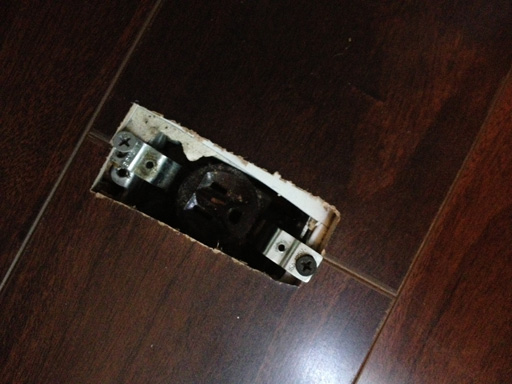
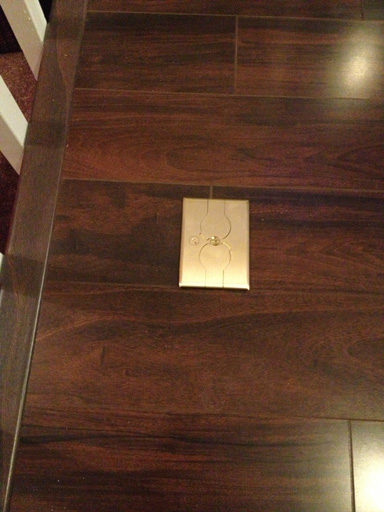
  • cover the floor outlet with an appropriate cover
  • cut and install the range hood’s duct cover (bonus project!)

For about $400 this was completely worth it.  Here’s how it all turned out!

Range hood before, with exposed/taped duct and dangly cord:

electrical_range_before


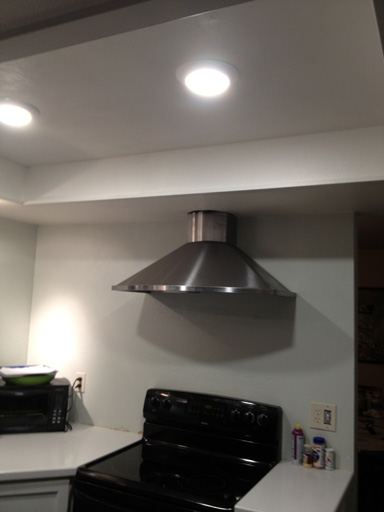
Range hood after, now wired into the electrical within the wall and with the duct cover cut to fit.  (Notice the gap between the duct cover and the ceiling – I’ll be patching that ceiling hole myself in the near future.)

electrical_no_cord


Floor outlet, before:

electrical_floor_outlet_before

electrical_floor_outlet_before2

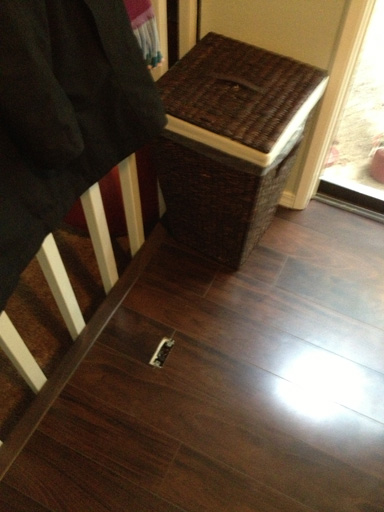
Floor outlet, after:

electrical_floor_outlet


Forward progress, whoo!  My next kitchen project will be patching the ceiling hole near the range hood duct exposed when the tape was removed:

kitchen_rangehoodgap