Yardmageddon 2013: Watering New Arborvitaes

I couldn’t find a good guide online for watering newly planted arborvitaes, so I’m writing one!  Since the arborvitaes have survived the dry Seattle summer, I thought I’d talk about my technique for watering new arborvitaes.

New Arborvitaes?!

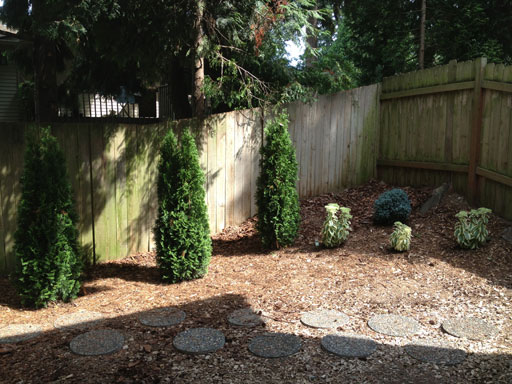
It’s been four months and our new arborvitaes are still alive!  Even better, they seem to be thriving.  (Last May, we planted three emerald green arborvitaes in our partially-shaded Seattle-area backyard.) They’re bright green and standing perfectly upright.  For two landscaping n00bs, the success of the arborvitaes is perhaps proof that we’re not completely incapable when it comes to landscaping.

Why watering new arborvitaes? Because all the advice I found online was different or not Seattle-specific, leaving me to guess at what was best for my arborvitaes. So here it is – this is what worked for me! I live in the hardiness zone 8a,planted the trees in May and watered regularly through September (when the natural rains finally returned).

Watering New Arborvitaes

I watered twice a week, 10-12 minutes per arborvitae. My watering schedule worked to be Saturday (anytime, usually mid-morning) and Wednesday (evening after work).

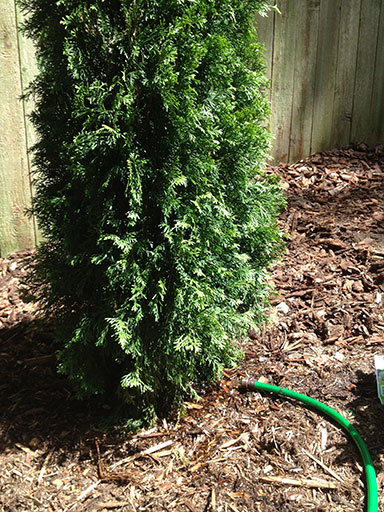
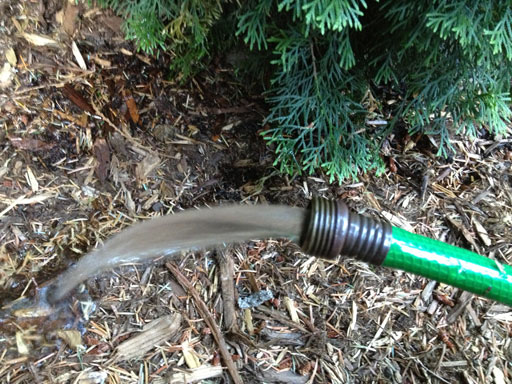
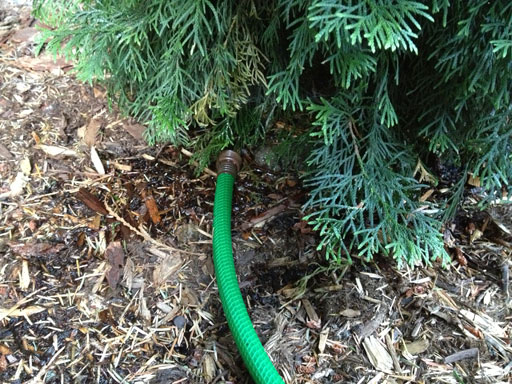
I set the hose to a steady small stream and placed the end of it at the arborvitae’s root ball.  I waited 5-6 minutes then moved the hose to the other side of the root ball.  (I sat in a lawn chair and read the Internet while I waited, it’s not a bad arrangement.)

water_arborvitae_water_pressure

watering new arborvitaes hose trickle

Each arborvitae got a good soaking, and the mulch seemed to do a good job of holding the water close to the plant’s roots.  Watering advice is all over the place on the Internet (use a hose! use a sprinkler! water daily! water weekly!), but a hose pointed right at the root ball is worked for me and required no special tools or hose attachments.

I watered the new arborvitaes deep and then let them dry out for a few days before watering again.

Full Sun for Arborvitaes?

We planted the arborvitaes in May specifically to take advantage of the uninterrupted stretch of sunshine over Seattle from June to September.  We figured we could water them ourselves and have a sort of “best of both worlds” thing going on: sky provides sun, we provide water.

arborvitae_update

They ended up needing quite a bit of water to get through the long dry spell.  After about the third month without any rain I was starting to give up hope that we’d ever see rain again.  (It has since returned, raining nearly every day of September so far this year.  Woohoo!)

The arborvitaes’ tags say they require “partial to full sun”.  Why would anyone sell a plant that requires “full sun” in the Seattle area? Surely there’s some wiggle room on the full sun requirement.

Besides, I see plenty of healthy arborvitaes around my neighborhood. The arborvitaes get about 4 hours of sunshine on a summer day, so I hope the they soaked up enough sun to carry them through the cloudy winter.

Arborvitae Growth Rate?

If the new arborvitaes have grown at all, I can’t detect it.  They’re exactly as high as the fence right now.  I suspect they don’t do much growing in the winter so it might be several years before these arborvitaes start serving their true purpose, which is blocking the view of the neighbor’s yard (and their mysterious room full of jars).

What’s Next?

I’m going to let the natural rain take over the watering business, and I’ll write an update in the spring on how the arborvitaes are growing.  Yardmageddon 2013 is drawing to a close, but I have a few more updates about our grass growing adventure and the suddenly-blooming rhodys to share in the coming days, so stay tuned! (I can’t believe growing grass counts as an adventure.)
Yardmageddon 2013: Part 3 – We Are Watching Grass Grow

It’s been 5 weeks since the start of Yardmageddon 2013.

Yardmageddon is our annual effort at DIY landscaping. We don’t know a damn thing about plants.

Yardmageddon Part 1 – Planting shrubs 

Yardmageddon Part 2 – Planting grass seeds

Our yard is pretty average

Some [retired, wealthy] people around us have made their yard their pride.  Others have so much yard it’s difficult to see the house hiding inside it.

We have the misfortune of living among the former sort, who are keen to remind us of their disdain for our landscaping.  (It’s not bad, really.  They’re just jerks.)

Doing it ourselves

But anyway, in effort to improve our resale value (and getting jerks to STFU), we’ve been working on the “beautifying” landscaping more this year. Our first year here we removed hazardous shrubs, picked up fifty pounds of dog crap from the backyard, and weeded like it was going out of style. Our second year we removed hazardous trees and weeded again.  Finally, in year 3, we are ready to beautify.

This is where well-heeled people obsessed with appearance would hire a landscaping designer and pay thousands of dollars for a yard that will cost thousands of dollars to maintain. I am neither of those things. And while I don’t know a lot about making yards pretty, I do know how to photograph pretty yards and then try to copy elements of them into my own yard. DIY landscaping at its finest, folks.

Here’s how things are growing.

Backyard shrubs:
The arborvitaes haven’t died.  Yay!  Small success there.  We’ve been watering twice a week, deeply.  Our arborvitae watering technique:

1) Point hose at base of arborvitae
2) Wait 8-10 minutes
3) Re-position hose at base of next arborvitae

4) Repeat twice a week, skip if it rains heavily.

diy landscaping: watering is so easy, even a hose can do it

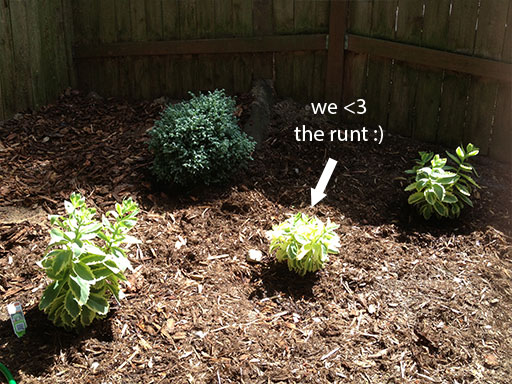
These little accent shrubs I planted in the backyard are also thriving.  They are named Stonecrop Sedumn Autumn Charm.  The middle one has stayed small but its two siblings have grown larger.  Dunno why.

diy landscaping: shrubs? shrug

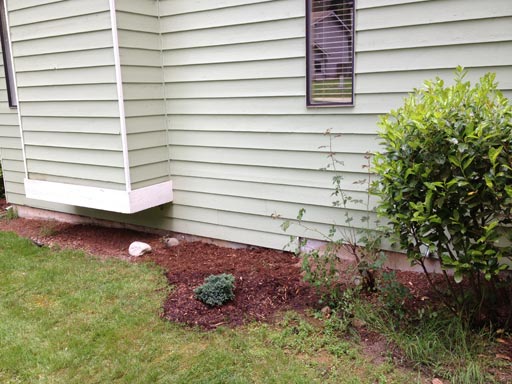
Side:

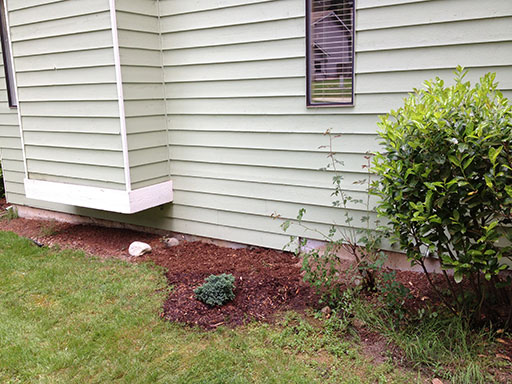
This dude’s doing well, too, although he hasn’t changed much in terms of size.  Since this side of the house is the sunniest, I expect him to do well over the long haul.

side_shrub

Grass:
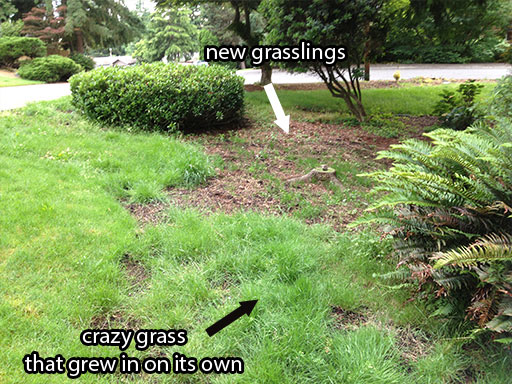
Our grass seeds are starting to sprout and fill in, but it’s pretty slow going. We water at 8am and 8pm, about 10 minutes each session. The grass that found its way here naturally is doing super well.  I hope it spreads to the bald areas. :P

diy landscaping: grass seed starting to sprout


Close up of the grasslings:

diy landscaping: growing grass from seeds


We’re about to enter the dry season (we’re on Seattle’s eastside) in which we’ll go a good 2-3 months without rainfall.  Traditionally, this is when our yard turns yellow until the rain returns in September/October.  We’ll water through the dry period (like we did last year to establish the sod) and hope that all these plants thrive with the combination of sunlight and regular watering.


Yardmageddon 2013: Part 1 – The Landscaping Death March

THE MISSION:  De-fugly this backyard!

YardTrim_After3

THE FUEL:  Factory Donuts!

SaturdayYard_Fuel

THE FULL DISCLOSURE:  We’ve never planted anything before.  We have no idea what we’re doing outside of a few hours of web research on this topic.

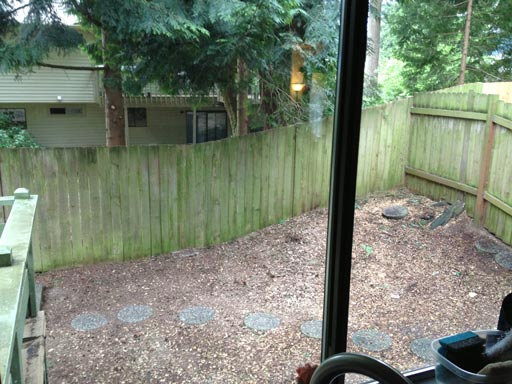
We kicked off Saturday with some early morning planning in the backyard.  Here I’ve used bricks and spigot covers to demonstrate where the arborvitaes might go.

SaturdayYard_Mockup

I later revised this down from six to three for these reasons:

1)  They were too close together (I decided putting them a full 3 feet apart was better)

2)  Planting six is gonna be hella grueling

The mockup was still a good idea though because it gave us a much better sense of where the trees will go.  It also helped me illustrate it to my husband better than pointing “over there” ever could.  With the number determined, we drove to Factory Donuts for OMG BEST DONUTS EVER and then drove to Molbak’s in Woodinville for three arborvitaes.  They keep their arborvitaes in the dirt until sold, which is different from how Home Depot packs them tight crowds of potted plants.  I don’t know much about plants, but it seems like the arborvitaes that came out of the dirt would be better than the ones sitting in pots.  I hope it’s worth the $20 or so more per plant that Molbak’s wants (Home Depot $25 each, Molbak’s $45 each) .

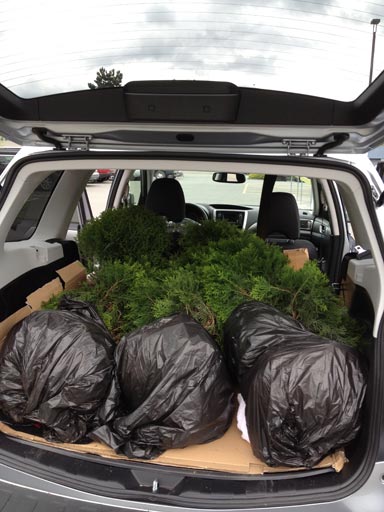
These trees are HEAVY!  Fortunately, Molbak’s is well staffed with tough guys ready to toss trees into hatchbacks the way I might toss a hamburger wrapper.  Obligatory Subie action shot:

SaturdayYard_Arborvitaes

And we’re done, check it out!

SaturdayYard_Mockup2

Lol, just kidding.  We Jim actually had 45 minutes of back breaking digging ahead of us him.  (Stay in school, kids, digging holes sucks ass.)  BTW, ignore the holes closer to the fence corner.  We dug there first and found too many roots, prompting us to change our placement plans.

SaturdayYard_HolesDug

We dug the holes to be about twice the volume of the arborvitae root ball and lined them with several inches of a mixture of fresh garden soil and compost.  Garden soil and compost were separate bags, and we mixed them at roughly a 2:1 ratio of garden soil:compost.  We didn’t get too pedantic about measurements –  it’s just dirt, after all.  Once lined, we dropped the trees into the holes and packed more soil and compost all around followed by a 1″ thick layer of mulch all around.

SaturdayYard_HoleDug

Repeat x3 times and you have:

SaturdayYard_TreesPlanted

High on success and packed with donuts, it was at this precise moment that I went COMPLETELY. INSANE.

I ran off to Home Depot and Molbak’s to purchase a half dozen more plants to place all around the yard, another shovel, a ton of mulch and more dirt.  Here is just some of what two motivated people can accomplish in a brutal weekend long yard work marathon.

Side of house, before:

SatYard_BeforeSide

Side of house, after

  • (I forgot the name of this evergreen, I’ll put it in here when I figure it out):

SatYard_AfterSide

Front yard, before:

SatYard_FrontBefore

Front yard, after:

  • Blue Chip Juniper in mound
  • Yedda Hawthorne to the right of stairs
  • Hetz Midget Arborvitae x 2  in pots by stairs (not yet planted in this shot)
  • Hosta (we nicknamed it The Buddy when we planted it a few weeks ago)

SatYard_FrontAfter

Also: Sami Salmon

SamiSalmon

Garage/fence corner, after:

This area was formerly an old stump and a ton of weeds.  MOST IMPROVED AWARD!

  • Degroot Emerald Spire is the biggie plant, the rest are annual accent flowers that will probably look like crap in 3 months

FrontYard_Potted

Back deck:

Formerly empty, now home to a menagerie of potted plants and yet-to-be-potted plants.

SatYard_PottedPlants

Front yard, by utility pole:

I pulled out a ton of weeds and planted this cute yellow/green shrub.

SatYard_ByCorner

Many places:

I planted several instances of this stuff from Home Depot, which is supposed to spread like creep all over the place and choke out things like grass and weeds, making a low maintenance ground-cover.  Curious to see if it actually works…

SatYard_Creep

Amazingly, this isn’t even all of it.  After posting this I realized I missed at least three more plants, and there are a few more left to plant before we can truly call this done.  From here, we water daily and hope this stuff takes root.  All in all, this wasn’t a bad first plant-something-in-the-ground experience, although it did take all weekend and we are both completely exhausted.