In Part 3 of our DIY kitchen backsplash series I’ll show you all the stuff I bought to make this project possible.
Catch up on our DIY kitchen backsplash series through these links:
- Part 1 – Planning a DIY Kitchen Backsplash
- Part 2 – Choosing the Right Tiles for your DIY Kitchen Backsplash
- Part 3 – DIY Kitchen Backsplash Supply List (You are here)
- Part 4 – Installing Backsplash Tiles
- Part 5 – Grouting Backsplash Tiles

With tiles in-hand, all that was left was to accessorize our them with stuff for the actual installation. Turns out, buying the tiles was just the first 10% of the battle. :D We needed so much more than just tiles. To save you a bunch of separate trips to the store, here’s our all-inclusive DIY kitchen backsplash supply list:
- Tape measure
- Level
- Backsplash Tiles
- Glass Tile Thin-Set Mortar
- Grout
- Scissors
- White paper
- Painter’s tape
- Terrycloth and paper towels
- 2 gallon plastic bucket
- Metal scraper
- V-notch Trowel
- Float trowel(s)
- Grout sponge
- Sealer
- Eye protection & breathing mask
Tape Measure
Essential for planning your DIY kitchen backsplash… and picking a tile that will actually fit under your windowsill, and confirming that yes, you do indeed have enough tile…

This tape measure is indestructible.
Level
A level is essential for determining if the gap you just bridged over your range area is actually level, and for checking your tile work as you go. Uneven tiles are immediately noticeable, so check your work as you go with a small level.

I use a small level like this one for tile work.
Backsplash Tiles
Read more about choosing the right tiles for your budget and kitchen.
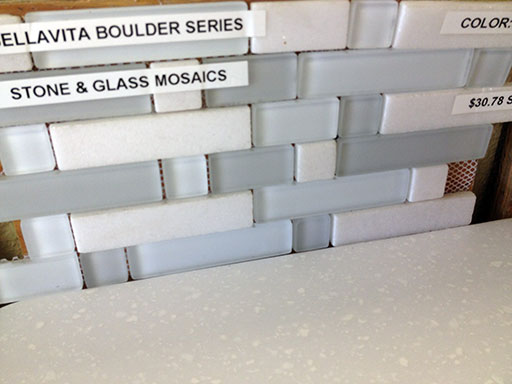
Without tiles, your backsplash is going to be pretty shitty. :P
Glass Tile Thin-Set Mortar
We used CustomLite Technology’s Glass Tile Thin-Set Mortar product (in white) which we purchased at The Home Depot. We cut the mix formula in half (the box holds 4.2lbs, we used 2.1 lbs) and used every last drop for our 8 sq ft backsplash.
If you aren’t sure what kind of mortar you need for your tiles, ask Google or your friendly local tile store. (FYI: Mortar is sometimes called “mastic”.)

Glass tile mortar for our glass tiles. Your mortar may vary.
Grout
Grout is the goop that goes in between your tiles to fill in the gaps. For our glass tiles, we chose non-sanded grout. (The little bits of sand would likely scratch the tile faces.)

There are about as many grout color choices as there are people on the planet, but I always say you can’t go wrong with white.
Scissors
For cutting tile sheets in half and trimming excess mesh off the edges)

Scissors were necessary for cutting sheets in half, trimming mesh edges, and filling gaps with one-off tiles.
White paper
We used it to protect the countertop underneath the tile edges

Paper used to protect the few inches of counter top adjacent to our work area.
Painter’s tape
We used Scotch blue painter’s tape to secure protective sheets of paper between the tile and the countertop. We also used the tape to mask off the top of the mortar area to protect the painted wall above the backsplash.

This stuff is completely worth it.
Terrycloth and Paper Towels
Used throughout the installation to wipe our fingers and clean up smudges.
Two Gallon Bucket
Used to mix our mortar. Our 8 square feet worth of mortar hardly began to fill the bucket:

Don’t use your prom bucket for mixing mortar, it’s going to get messy and scratched.
Metal Scraper
Our all-purpose metal scraper was used to mix the mortar in the bucket (it gets pretty stiff, a paint stick won’t cut it) and spread the mortar onto the wall.

Get a tough one, you’ll use it in every other DIY project you do.
V-Notch Trowel
The v-notch trowel was essential for carving thin lines into the mortar once we’d applied the mortar to the wall. The lines help the tiles squish onto the wall and adhere using a thin, even layer of mortar.

Don’t skip this tool like I almost did, the little notches of the v-notch trowel make a HUGE difference in how nicely your tiles squish onto the wall.
Float Trowel
Your float trowel is for spreading grout over the delicate tile surfaces. A float trowel is smooth and soft to protect your tiles from scratches. We had two: a wide one and a narrow one (for fitting the short area under the window ledge).

Not to be confused with the metal scraper (which might scratch your tiles) or your v-notch trowel (which will definitely scratch your tiles).
Grout Sponge
Question: What’s the difference between a normal sponge and a grout sponge?
Answer: About $6.
Your grout sponge is for gently wiping grout off the face of your tiles as it cures. These cost somewhere between a buck and ten dollars. We used one that cost somewhere in the middle of that range and everything went fine.

Amazon’s cheapest grout sponge – $2 for this bad boy

A fancier grout sponge with built-in haze buffer.
Whether you splash out on a Cadillac sponge or get one from the dollar store, use a clean, new sponge. You don’t want particles from your last sponge project getting into your nice grout or marring your pretty tiles.
Sealer
For sealing your tiles against stains and other unpleasantness. Match the sealer type to your type of tiles. Our tiles are some kind of stone (quartz, maybe?) and glass.

We used a spray bottle of grout and tile sealer from Home Depot
Eye Protection & Breathing Mask
Mixing the mortar is dusty but unless you’re mixing a ton of it, it probably won’t be a problem. Protection is up to you – I wore science class goggles and a cloth breathing mask, but my two helpers went without and everyone was pleased with their choices.
To help you find the right products quickly, links on this page are Amazon affiliate links. As always, LevelUpHouse and I encourage you to shop around, shop local, and shop wherever you like. If you decide to shop at Amazon, your purchase through any of these links helps support LevelUpHouse!