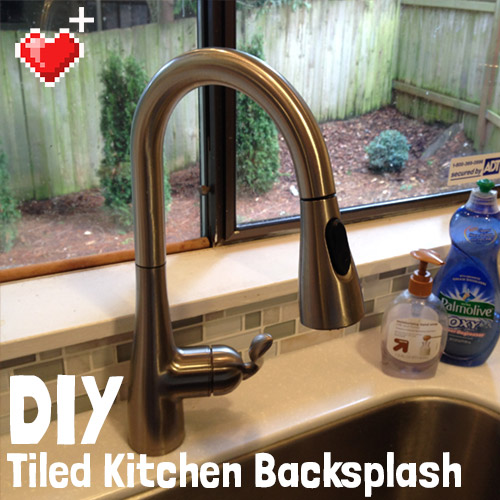
Welcome to Part 1 of our DIY tiled kitchen backsplash project! This first post is about planning a kitchen backsplash.
See the entire DIY kitchen backsplash series:
- Part 1 – Planning a DIY Kitchen Backsplash (You are here)
- Part 2 – Choosing the Right Tiles for your DIY Kitchen Backsplash
- Part 3 – DIY Kitchen Backsplash Supply List
- Part 4 – Installing Backsplash Tiles
- Part 5 – Grouting Backsplash Tiles
A year ago we replaced our kitchen’s old with a super nice Staron solid surface countertop from Home d’Pot and planned to tile our own backsplash. Now it’s time to finish the backsplash!

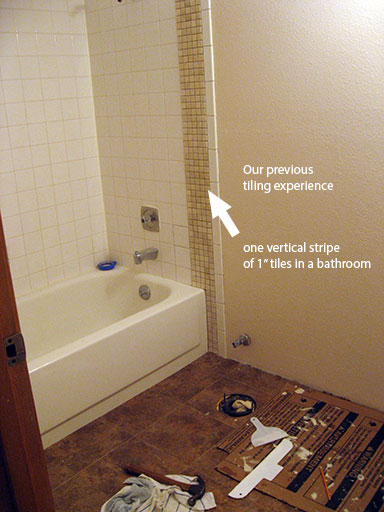
To be frank, the idea of permanently gluing little bits of ceramic and glass to our kitchen walls is super intimidating. We’ve only tiled one thing before (a stripe down our bathroom wall) and that was a messy and intense experience. You just don’t get much room for messing up when you’re working with tile (but everything went fine in our bathroom tiling project).
It took us some time (and a bunch of YouTube videos) to get the confidence that we could tile our own kitchen backsplash.
Kitchen Ambition
The best place to begin is to determine how ambitious (translation: expensive) the project will be. This is true of virtually any kind of project you might plan, but it’s especially true when working with expensive materials that the store won’t let you return.
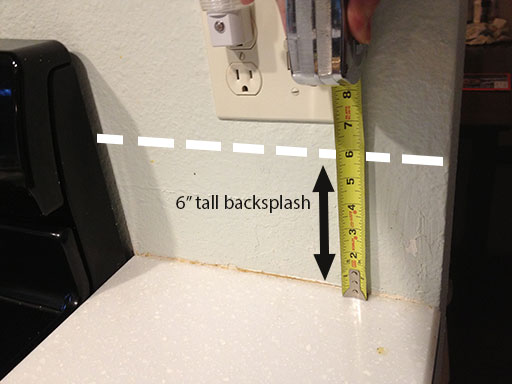
We decided to keep our kitchen backsplash project very modest. Our backsplash will be 6” tall with varying width tiles, which should allow us flexibility to fill in gaps and avoid cutting tiles. Hopefully, simplicity will pay off in the end.
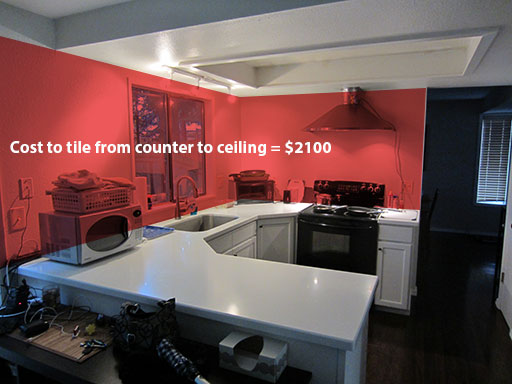
Why not tile the whole wall? Well, for one, it’s a trend I just don’t like that much. I think a wall of tile is overwhelming, and it doesn’t let you repaint the kitchen walls (which is something I like doing :D).
Two, it’s expensive. To tile our entire wall would require 66 square feet of materials, which would cost over $2000 in materials alone. Our 6” backsplash materials came in around $320.
Three, we probably couldn’t do a fully tiled wall ourselves. We would have to remove and re-install the range hood over the tile, and cut the tiles to accommodate the electrical outlets.
So I’ll leave the fully-tiled-wall look to the pros and I’ll stick with what I can actually do myself.

Figuring these things out before you begin is super important. Knowing the scope of your project lets you estimate costs, which is usually why we DIY these things in the first place. We got two professional quotes for the kitchen backsplash, and both came at around $650 and $800. Yeah, thanks, but we’ll pass on that. Doing it ourselves should come in under $400, for a savings of at least $250. (I don’t know about you, but I think that stuff adds up. That’s like, a quarter of the way to another trip to Disneyland!)
I also highly recommend figuring out what you want in terms of color and style before you go to a tile store where you’ll get overwhelmed by the possibilities. Spend an hour on Google figuring out what you like and what you hate. Virtually everything looks nice in the tile store, so make sure you know what looks right in your kitchen before you go there.
Determine Your Backsplash’s Height
This part’s easy: how high do you want your backsplash to be? Some go halfway up the wall, some go to the ceiling, and some are a little more modest and stop about where we’re stopping ours.
We chose 6” because it would let us cut our 12”x12” tile sheets evenly in half and because 6” is slightly lower than our electrical outlets. Not having to cut tiles to fit around outlets sounds like a good time to me.
Determine Your Backsplash’s Width
This part’s easy, too: measure the width of the area you’ll be tiling. In our case, the window wall is 113″ wide and the oven’s wall is 82″ wide.
Calculate the area
Multiply your width by your intended backsplash height to get the square inches you’ll need to fill with tile (in inches). Divide it by 12 to convert the square inches into feet, and then divide by 12 again to convert into square feet. (Unless you’re using metric, in which case you can probably do the math in your head…)
I bought one full extra sheet to be safe, so 10 sheets total. (At $30 a sheet, I didn’t want to go crazy buying extra sheets.)
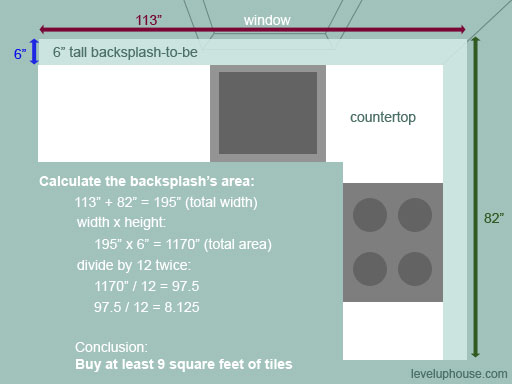
Figure out what you want over the stove
We left the area above the stove empty – it will just be the painted wall it already is. We chose this to save money (less tile to buy) and because I’m not convinced it needs a backsplash. We’re daily cooks and I haven’t felt the need for an elaborate backsplash behind the stove yet, so we’ll leave that to the magazines.
If you do want something over your stove (something taller than the rest of your backsplash, perhaps), be sure to calculate its dimensions as well. If you want it to use a variety of tiles (say, a border or a special design), also calculate the area of those special features.
Any special cases?
Our “special case” is the space between the counter and the window ledge. The space is just a TEENY TINY BIT less than 4″, so we’re gonna try to make it work with 1″ tiles.
Ready to Shop for Tiles!
With our quantity and budget determined, we’re ready to go to the tile store and see what they’ve got! I know we’ll be looking for tiles that can fit under the window ledge and match our countertop.
What to bring with to the tile store:
-
Measuring tape
-
Counter sample, if you have one, for comparisons (a painted sample of your wall color and a cabinet door wouldn’t hurt, either)
-
Kitchen measurements
Once the backsplash was planned, the next step was visiting a tile store and choosing tiles.
Hi, Love your kitchen backsplash-great job! I was so happy to find someone else who did not care for a full wall of tiles. Looking forward to finally updating our kitchen with our fairly small budget.