Thing I Like: Amazon Locker Review

Amazon locker review locker structure

Amazon Lockers provide a secure way to receive packages.

Depending on where you live, if you’ve bought something on Amazon.com lately you might have been offered an “Amazon Locker” as a delivery destination. Instead of selecting your home or office address, you pick a nearby locker and it gets delivered there instead – no signature required.

What is this sorcery?! A magic box I can ship things to and it’ll stay safe and not-stolen until I show up to get it?! Well, okay, that sounds incredible – so I gave the Amazon locker a try.

Verdict: Amazon Lockers are awesome.

Here’s why:

Why use an Amazon Locker?

  • Discreet – don’t want to ship that embarrassing thing to work? Now you don’t have to!
  • Safe – your package doesn’t sit on your porch all day begging to be stolen
  • Flexible pickup times – lockers are available as long as the business is open, which in some cases might be 24 hours a day
  • Plenty of time – the locker will hold your package for 3 business days (plus any weekend those days might encompass)
  • Free – Amazon lockers don’t require an extra fee (or even an Amazon Prime membership)
  • Heck, you can even return certain items to Amazon Lockers

I don’t have a reliable, discreet way to receive packages. Shipping to my house sucks because the package sits on porch all day getting cold and/or wet (not to mention broadcasting to every passerby that my house is currently vacant).  Shipping to the office isn’t discreet and there’s nowhere to comfortably keep a package at my little desk. Plus, everyone wants to know what’s inside it.

Design

Amazon Locker was extremely easy to use. Get this:

  1. Amazon emailed me a short code
  2. I entered it into the touch-screen attached to the lockers
  3. The matching locker popped open automatically
  4. The locker stayed open until I manually closed it
Amazon Locker review Amazon Locker pops open

The locker pops open – and stays open until closed by the human using it.

At 5’8” I was able to reach into even the tallest lockers, but very short people or people with limited mobility might experience some difficulty reaching the top row of lockers, which were face-high for me.

Amazon Locker review height and usability

At 5’8″, I’m able to reach the highest lockers. Your mileage may vary.

Locker Locations

The locker locations are as (or as in-) convenient as the locations they’re installed in.  See if Amazon lockers are in your location by clicking here.

If they’re not near you yet, just sit tight: Amazon is adding more lockers like crazy right now.  If you want to tell Amazon to hurry up, log into your Amazon account and go to Amazon’s Locker page and suggest your zip code.

I shipped my item to a Rite-Aid pharmacy a couple blocks from my office. Rite Aid’s hours, as well as most other businesses participating in the locker program) go late enough for me to drop by and pick up my package after my workday ends.

My only gripe is the locker I used was positioned in the back of the store.  I actually had to spend a few minutes looking for it – the locker is a huge grey metal structure, but it was around the side of the pharmacy and there were no signs inside the store directing me to it.  Obviously, this is designed so that I walk past a lot of Rite Aid merchandise on my way to the locker… but it wasn’t fun to search the store for the lockers.

Delivery Speed

I placed my order on Monday and my item arrived Wednesday. The estimated delivery was Thursday, but Amazon seems to under-promise and over-deliver as a matter of routine as this happens with packages delivered to my house or office as well.

Amazingly, the locker would hold the package from Wednesday ’til Monday. Amazon promises to keep your package available for 3 business days, but I had six full days to come by and get it.

Any Restrictions?

  • Items must weigh less than 10 lbs
  • Items can’t be more than 1 cubic foot or so in size
  • Can’t be a Subscribe & Save item

Amazon doesn’t restrict use of lockers to Prime customers.

To add a locker to your Amazon.com account:

  1. Log into your Amazon.com account
  2. Go to “Search for lockers in your area” and type in your location
  3. Add whichever locker(s) are convenient to you
  4. Next time you order something, that locker will appear as a possible shipping address

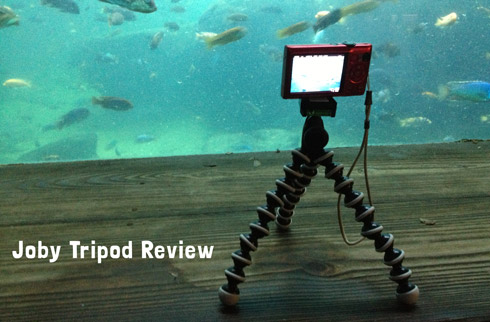
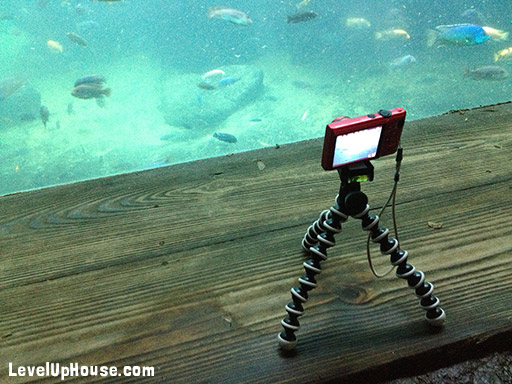
PS: If you’re wondering what I bought – it was a flexible Joby camera tripod!

Read More

Note to readers: This article is about Amazon.com.  Some of the links are my own Amazon Affiliate links – if you purchase something from Amazon.com after clicking one of my links, a small % of your purchase helps support this site.  As always, I encourage you to shop around and price compare to be sure you get the best deal!

Yes, you can have Frontier FIOS without a landline

frontier_logoI know, it’s 2013, who the heck still has a landline?

We did, for two reasons:

  1. Verizon told us we had to get the phone line in order to get FIOS, and we believed ’em. (Verizon has since sold the FIOS service to Frontier, and maybe the rules changed along the way.)
  2. We liked using our Plantronics cordless headset for long weekend phone chats with our parents and didn’t know how to use it with an iPhone (yet)

But it was ridiculous to pay $50 a month for a landline and $250 a month for our iPhones – that’s one more phone line than we have people!

Something had to go.

Now, there seems to be some confusion online about whether it’s possible to have Frontier FIOS without a landline, so I’m writing this to say that yes, you can have FIOS without a landline.  We called Frontier to request dropping the landline, and yes, it was possible (thanks, Frontier).  We are now a FIOS-only home – no landline, no TV, just FIOS internet.  This cut our monthly bill almost in half.

I have been very happy with my FIOS Internet for the last three years and being able to cut a service I wasn’t using is the kind of good service I expect from companies I choose to do business with.

Stay awesome, Frontier.


Thing I Like: Joby GorillaPod Tripod Review

Joby GorillaPod Review Canon Point and Shoot

Joby GorillaPod says “Hello”. Good news: only 1 in 10,000 gains sentience and fires lasers at humans.

I wrote about my Joby GorillaPod tripod last week in my post “5 Best Tech Travel Accessories” but honestly, this flexible travel-friendly tripod is so awesome it deserves its own review!

A flexible tripod? Whut?!

I only discovered it because I was trying to find a tripod compact enough to take into Walt Disney World, and now I’m kicking myself for not getting one sooner!

I spent 10 days twisting, posing, straightening, curling, and oh yeah – taking photos! – with my new Joby GorillaPod on a recent trip to Walt Disney World.  I’m not easy to impress, usually accessories in the sub-$40 category are a disappointment, but I am actually really impressed!

The Joby GorillaPod tripod might be perfect for you if…

  • you take photos with a point-and-shoot or a light-weight DSLR
  • you want to get everyone in the shot without setting up or lugging around a tripod
  • you want to take photos at dusk or nighttime and need the camera to stay steady
  • you want to be in your own photos
  • you want (or need) to travel light
  • you like to take video – a small tripod is handy for stabilizing your camera!

JOBY is a manufacturer of many cool camera accessories.  I wasn’t paid or perked to write this, I just think the tripod is awesome!

joby_tripod_review

Joby GorillaPod Tripod Review

Durability

I usually expect <$40 things to be rather flimsy, however this tripod has now survived four flights in my carry-on bag, a week in Disney World, a few craft photo shoots, and a good deal of idle bending and playing with it just for fun.  I bent and twisted this thing every day. I even took it on roller coasters.  It’s still in one piece!

The camera clip-on mechanism feels strong, and the camera sits tightly on the clip’s pad, never becoming loose or falling out of the tripod on its own.

Each of its legs is made up of a series of ball-and-socket plastic links.  Each “ball” goes into a “socket” to make a stiff chain with rubber feet at the ends, and the rubber rings help with gripping.

joby_ball_socket_closeup

Close-up of the Joby tripod’s ball-and-socket leg design.

It feels pretty rugged to me, especially for something that’s mostly plastic.

Portability

The best tripod is the one you have with you.

Full-size tripods don’t fly well, are a pain to carry all day, and are flat-out unwelcome or unsafe in many places, but the Joby tripod is small enough to go pretty much anywhere.  (Well, I wouldn’t take it to a mosh pit…)

I bought the Joby tripod specifically because I’d be able to bring it into Walt Disney World’s theme parks.  Full-size tripods get rejected at the entrance gate, but I wanted to actually get some decent photos in the parks and this tripod totally made that possible (see my photo examples further down).

It’s lightweight enough to carry all day in a cinch sack on my back, and I also spent a good deal of time just carrying it around in my hand as I looked for good shots.

Where to Use a Joby Tripod

Everywhere!  Once you start looking for places to put this thing, you’ll see the world in a new way.

“Can the Joby attach to that?” 

I found no shortage of objects to stand or wrap the Joby tripod on:

  • metal-top garbage cans
  • wrap around sign posts
  • car roof / hood
  • fire hydrants
  • railings
  • half-height walls
  • benches

You can even angle the legs and use it as a “stick” for your camera for taking selfies at a bit further than arm’s length.

Joby GorillaPod review doing a long exposure shot

Metal-topped garbage cans were my best friends at WDW: ubiquitous and just the right height. Here’s my Canon + Joby setup working on a video.

Additional Features

But wait, there’s more!

  • Bubble level helps you know if your shot is straight
  • Easy-to-eject camera – the camera screws into an eject-able plate, so it comes off quickly
  • Tilt camera 90 degrees for vertical shots.

Joby sells the quick release clip separately, too, so you can have an extra or replace a lost one.

Joby extra quick release clips

Joby sells spare “quick release” clips in case anything, uh, bad happens to yours.

My Joby Photos

My Joby tripod revolutionized my vacation photos.  This section talks about photos I couldn’t have taken without this thing: dusk photos, night photos, group photos, and stable video.

Historically, my photos from a trip are iPhone selfies taken at daytime and scenery shots.  Anything from dusk is a grainy mess and my photos are nothing to get excited about.  I’m not really a “photography enthusiast” (but if a DSLR with nice lenses showed up at my doorstep I would not be sad).  I’m sure some of these duh, it’s-this-simple revelations are old-hat to more experienced photographers, but if you showed me these photos 6 months ago I’d have said, “There’s no way I took that, and there’s no way I did it with such cheap equipment”.

Dusk Shots

Ahh, dusk.  That magical time of day when cameras need to be stabilized with a longer shutter time to take a halfway decent shot.

Compare these two photos –

Joby_Review_iPhone_Tower_Shot

iPhone 4S photo – the typical grainy/blurry kind of photo I usually take on trips, especially at sunset.

Joby_Review_Long_Shutter_Shot

Same time of day, this time using a Canon point and shoot and the Joby tripod to hold it still.

Inexpensive point and shoot camera + small tripod = Oh, my. Wow. Dang. 

Nighttime Shots

To get a decent nighttime shot, your camera has to be able to hold completely still for a few seconds.  Many point and shoots can do this, but without a tripod it’s a lost cause.

Disney’s Magic Kingdom has a cool castle covered in glowing “icicles” in December, but there’s practically nowhere to set a camera down. I wrapped the Joby’s legs around a railing to get this shot.

Joby_GorillaPod_review_night_time_photo

I wrapped the Joby legs around a metal railing to hold the camera steady.

This next shot demonstrates how the camera can be tilted 90 degrees to the left (or right) on the Joby tripod for vertical photos.

best_tech_travel_accessories_joby_tripod_in_action

This photo of my Joby doing its thing was taken with my iPhone. The iPhone 4S did better than I expected in this fairly dark scene.

Joby_GorillaPod_review_long_exposure_nighttime_shot

But here’s the photo the Canon took with its 3 second shutter time and utter stability. I can’t believe *I* took this photo.  So purty!

Group Photos

Here’s another luxury we’ve never had before getting this Joby tripod: vacation photos of both of us! Together! Like we know each other and stuff.

Joby_GorillaPod_Review_EPCOT_group_photo

I put the Joby on a half-height wall near the entrance to the Mexico pavilion in EPCOT for this nice shot of Jim and I together.

The tripod opened up all kinds of possibilities with timer-delayed shots:

Joby_GorillaPod_Hybrid_Shot2

We put the Joby on a nearby fire hydrant (and the camera on a 10 second delay) to create this fun photo at the Gatorland entrance in Orlando, FL.

Joby_GorillaPod_Best_Tech_Accessories

Here’s how we set up the camera for the Gatorland shot. Fire hydrants and railings make really good Joby stands.

Videos

Just because I could, I took a 45-second video of the giant fish aquarium in Disney’s Animal Kingdom. Here’s the setup:

joby_gorillapod_video_fish

Here’s the video – silky smooth.

Choosing a Joby GorillaPod Model

Joby GorillaPod Original in pink

The Joby GorillaPod Original comes in a bunch of colors. Alas, the Original is the “light-duty” model, capable of holding only small cameras (up to 9 ounces).

While my review is specific to the Joby GorillaPod Hybrid Grey (follow Amazon link to see the exact model), there are more Joby models to pick from.  The key difference between the models is the amount of weight that can be supported without sagging, though there’s also a neat-o magnetic version that only holds lightweight cameras.

HOW LARGE IS YOUR CAMERA?

Joby GorillaPod Original: up to 11 ounces (small point and shoot cameras)

Joby GorillaPod Hybrid: up to 2.2 lbs (smaller DSLRs, camcorders)

Joby GorillaPod SLR-Zoom: up to 6.6 lbs (“Pro-sumer” SLR cameras with zoom lenses, heavier camcorders)

Joby GorillaPod Focus: up to 11 lbs (SLR cameras with heavy lenses, bigger camcorders)

If you’re using a point and shoot camera the Original or the Hybrid are both sufficient.  I went “up” a strength because I might upgrade my camera someday, and because I liked the reassurance of having more strength than I really needed.

Note to readers: I’m not affiliated with Joby, I just think their product is super awesome.  Some links are Amazon Affiliate links – a small % of your purchase (if you make one) helps support this site.  As always, I encourage you to shop around and price compare to be sure you get the best deal!

Scammed by Dollar Rent a Car!

We’re normally a bit happier here at LevelUpHouse, but not today.  Today we’re angry at Dollar Rent a Car for RIPPING US OFF.

Scammed by Dollar Rent a Car $200 in damages

My husband and I in Orlando, FL, driving a car we didn’t yet know had been signed up for a$28.99/day “loss damage waiver” by Dollar Rent a Car.

Ripped Off with “Loss Damage Waiver”

Jim and I spent a week in Orlando, Florida, driving what we thought was a $17/day (before taxes and fees) rental from Dollar Rent a Car, until the day we returned it – the bill was HUGE!  We didn’t know it when we picked the car up on Sunday, but the guy at the desk had signed us up for a $28.99 daily charge for a “Loss Damage Waiver” we declined.  My own insurance through USAA covers rentals, and so does the credit card we put it on. We don’t need triple coverage!

One week with this unwanted coverage = $202.  

When we got back we waited in the “pissed customer line” (which was longer than just us) for help, but the “top guy” Bryan wasn’t good for anything but attitude and sass. When I complained that Dollar ripped us off, he said, “If that’s how you want to look at it.”

Well, yes, that is how I look at being charged $202 for something I didn’t agree to pay for.  Who pays $57 a day for a compact Mazda in a competitive car rental market!? We were scammed by Dollar Rent a Car and the so-called “top guy” on staff couldn’t do jack about it! Good grief.

Update: We got a refund!  Complaining on Twitter to @DollarCars got me a full refund of the amount.  

Seeing as the Internet is full of people complaining of not getting refunds out of this company, I guess I’m one of the rare success stories.

My in-person complaint to the so-called manager at the Dollar desk in Orlando International Airport was a waste of time – the dirtbag they have manning the counter is only good for upselling angry customers on future rentals.   Calling their 1-800 number got me nothing more than an offer of a $50 discount on my next Dollar rental (WTF!?  How do you even offer that with a straight face?!).

Complaining on Twitter?  Come on… Well, apparently, Dollar Rent a Car pays attention to Twitter. 

Dollar’s Dark Patterns

A “dark pattern” is a type of user interface designed to trick users into doing things, such as signing up for insurance or installing toolbars they didn’t want. (Read more at http://darkpatterns.org)  If you were scammed by Dollar Rent a Car, it was probably one of these tricks:

Trick #1: Moving Accept/Decline Buttons

As we verbally declined options such as GPS, extra driver, a bigger car, and extra insurance with Dollar’s agent, we confirmed our choice on Dollar’s signature screen.  This screen contained at least one “dark pattern”: the Accept/Decline buttons swapped places as we advanced through the screens.  

But we noticed the changing button locations, so I’m not sure we were victims to this particular trick.   Instead, I think we were victims to either a checkbox that looked unchecked or the agent just added the coverage after we signed everything and hoped we wouldn’t notice (and we didn’t, because the extra charges for extraneous coverage are on the underside of the folded receipt).

Trick #2: Folded Receipt in Booklet

Dollar handed us our receipt folded and in a paper booklet, as shown in the image below.

Scammed by Dollar Rent a Car with a folded receipt trick

Our Dollar rental receipt was handed to us folded to the exact size of the paper booklet it came in. Extra charges are itemized below the fold.

Unfolding the receipt reveals the worst prize ever – HIDDEN CHARGES!

Scammed by Dollar Rent a Car with a Loss Damage Waiver coverage we declined

“OPTIONAL COVERAGES” is on the receipt under the fold.  This is where Dollar hid the “Loss Damage Waiver” for 6 days at $28.99/day.

Why is there such a large space below the estimated total?  It’s probably to push these extra charges under the fold, where unsuspecting victims are less likely to spot them. Our bad – we stopped reading at “estimated charges”, which looks like a total.  Yes, it’s a high total, but we understand that rental car companies put a “hold” on your credit/debit card to cover “incidental charges”, such as you returning the car late.

Dollar’s Useless Desk Agent

We returned the car with a full tank of gasoline and spotless, but our final receipt showed we’d be billed a massive amount -$202 more than I’d expected.

We complained on the spot. We were sent to a special line at the Dollar desk, a line with no one waiting on the end of it. We stood for about 20 minutes before anyone came out to help us, and I’m 99% sure the guy only came out because I started bawling over being ripped off (on my birthday no less) and made a bit of a scene.

Dollar’s “top guy on staff” was some guy named Bryan who is apparently authorized to do absolutely nothing in the name of customer service.  He sassed us (“If that’s how you want to looki at it”) and told us about how “he rents cars and he knows how the screens work”, but he wouldn’t show us what we signed.  The guy was basically a walking “F— You” to Dollar’s customers, and completely useless.  I mean, at least the equally insulting 1-800 number offered a piddly discount off the next car we [never] rent with Dollar.

Dollar’s Useless 800 Number

Bryan was good at one thing: pointing at the back of my rental pamphlet where there is a phone number labeled “Customer Service” printed in red ink.  (Thanks man, you’re a real help!)

Dollar’s customer service number is 800-800-5252, but don’t expect any miracles.  Our call to this number the following Monday netted us an offer of $50 off our next car.  Haha, sure, at Dollar Rent a Car’s rates $50 doesn’t even cover the first day!  We did not accept this offer out of fear because 1) it’s a stupid offer and 2) it might make us ineligible for an actual refund on the amount we were scammed out of.

Dollar’s Surprisingly Helpful Twitter

I knew I was in trouble the moment I loaded up DollarCars’s Twitter stream: herein lies loads of pissed customers all complaining about overcharges and poor customer service. The occasional ad for “deals” punctuates (and pushes down) these complaints, but I think the complainers are winning this war.

With nothing to do but sit and stew in the terminal as I waited for my delayed flight, I started complaining to @DollarCars.  I complained a lot.  I don’t know if the volume had anything to do with it, but I continued to complain the next day, and the next until finally whoever is running the account asked me for my Rental Agreement number and, a day later, refunded me $224.

They even gave me the tax back – how ’bout that?

Happy Ending?

I’m very glad to say this story has a happy ending, but it easily could not have.  Dollar had no reason give me a refund – they burned me bad, and now I’m just an angry customer who will never rent a car from them again.  I’ve shared my story to help others who are now (or will be) in the same situation I was ten days ago –  ripped off and furious at Dollar Rent a Car.

My own Googling found people complaining of $250 cleaning fees on cars returned clean and $9/gal refueling fees on cars returned full.

I’m afraid I haven’t heard the last from this unscrupulous company.  I’ll be scrutinizing my credit card statements.

There’s a reason why Dollar is so much lower priced in the rental matrix – Dollar will just get money out of you some other way.