Updated for 2014! Added even more organizational ideas and some links to helpful products! Let’s get organized!
As a Small Pantry Owner™, I am somewhat of an expert on stuffing a ton of food into a too-small space:
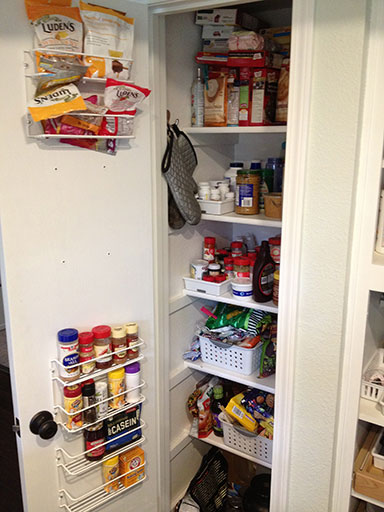
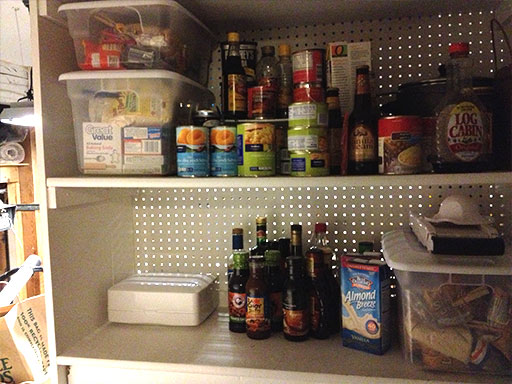
This pantry is little!
Having lived in two places without a pantry, though, I must say I am glad to have a pantry in the first place. My pantry hails from an era of, well, less. Food came in smaller packages in 1977 (as probably did people, too). Maybe people had less of it on hand, too. New construction homes have pantries that are practically walk-in closets, large enough in size to rival some bathrooms.
When we first toured this house in 2010, I could tell that the previous owner was struggling with food storage. Not only was this pantry overstuffed with food, but so were three shelves in the garage.
My Small Pantry Organizational Challenges
- Two-person household with almost no food overlap between us (he eats peanut butter, pasta, cereal, I don’t; I eat popcorn and hoard bake mixes, he doesn’t)
- My kitchen sucks for storage in general with just two tiny drawers and a U-shaped countertop with just a couple cabinets underneath
- I love to cook
- My husband loves to cook even more
- I hate running out of things
This used to be me, but I’ve reformed my ways!
Life without a pantry was brutal and messy.
From my 7+ years of experience, here are my 25 free or cheap ways to get more out of your tiny pantry.
Cheap Pantry Organization: Coming Soon to a Small Pantry Near YOU
1) Short racks increase vertical space
If your pantry’s short but tall, use that height to your advantage! Stackable racks are great for adding “layers” to the vertical space.
I have a few of these humble wire stands. They’re super cheap and basically double the amount of vertical space available for use:

Put plates under it and on it!

Got a lot of vertical space? Get a double deck rack!

An under-shelf wire basket makes use of that often-underutilized space right below a shelf.
2) Keep fewer snack foods on hand
Reducing how much stuff I kept on hand made a huge difference in how overstuffed the pantry was. It also meant fewer things were going stale before I could eat them, which in turn saved me a lot of money.
I used to keep oatmeal, cereal, pasta, chips, Cheez-It, cookies, fruit snacks, candies, canned fruit, jellies, etc, all jammed into my pantry. A dozen or so boxes of all of my favorite snacks so that no matter what I wanted, it was on hand.
But having “one of everything” was bad for a few reasons:
- All those snacks took a lot of space
- It was easy to eat a lot more than I should have since so much was available
- The snacks weren’t that good for me, anyway
The experiment: I picked 2-3 of my favorite “pantry snacks” to keep on hand.
I thought this would be hard and I was sure I’d be sad about it, but it was great. Two or three packages of cookies and chips takes up way less space than twelve; and when I have less on hand I eat less of it. If I buy three bags of popcorn, I eat the first one right away because it’s like an extra “bonus bag”. But if I just buy one bag, I ration it more carefully.
3) Stop buying cake and cookie decorations
Ugh, I had a serious cake decoration addiction. I’m in recovery now.
I wanted to have the cutest cookies and cakes at every party, and that required food dyes and sprinkles in every color. My collection got huge, and my collection was growing faster than I was using it up because every holiday meant a new set of decorations!
Then I had a realization: drunk partiers don’t give a damn about cookie decorations. I used up what I had and downsized my collection to a few versatile color gels, a couple sets of sprinkles, and that’s it.
Sad but true: drunk people don’t give a crap about your adorbs cupcakes.
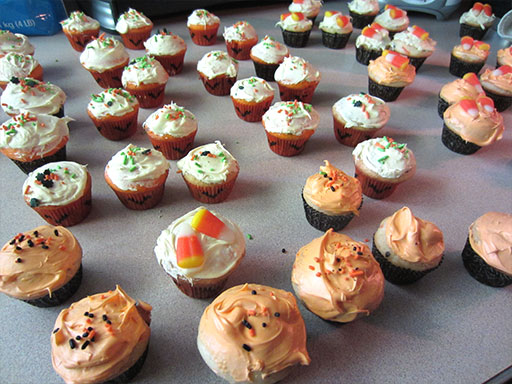
4) Don’t keep bakeware for things you don’t make
For me, this was cupcake tins and cupcake papers, of which I had many. By admitting the truth about my feelings about cupcakes (do not like), I was able to get rid of three cupcake tins and numerous packages of cupcake papers and reclaim the space in my pantry.
But what about muffins?! you say. Eh, muffin recipes can be made as a loaf of bread.
Maybe for you its pie tins, or cookie cutters (I had a giant box full!) or four different sizes of cake pans. Take a serious look at your bakeware and toss anything you don’t absolutely love to use.
5) Downsize your spice collection
You probably have a handful of go-to spices and the rest you wouldn’t miss if it disappeared. Go ahead and toss the weird stuff you only use once a year. Your small pantry will thank you.
These are my essential spices – your preferences may differ:
- salt
- pepper
- Red Robin spice
- cinnamon & sugar blend
- nutmeg
- cumin
- paprika
- onion powder
- garlic powder
- basil
- oregano
6) Label the tops of your spices
I use a black Sharpie marker to write the names of my spices on their caps. This way, I can store them in a drawer (like I did in my apartment) or in a flat organizer. Next time you’re searching for a spice, you can read the tops instead of shuffling them around.
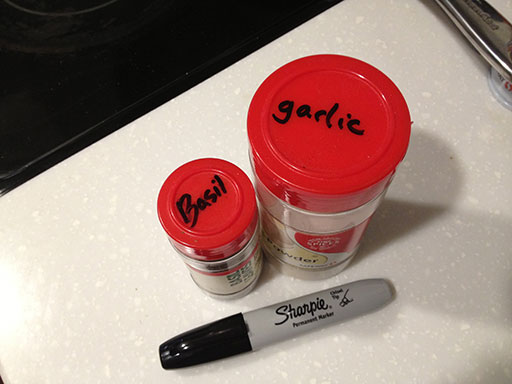
Small pantry organization tip: label your spice caps.
7) Throw out old food
Tossing old food is a no-brainer, but it’s easy to miss as older things get pushed to the back and forgotten about. If it’s old, let it go. How’s that for cheap pantry organization? You don’t even have to buy anything!
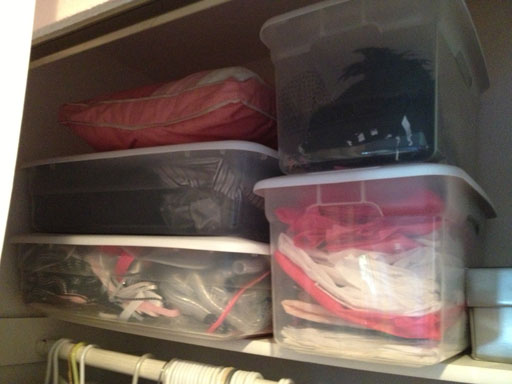
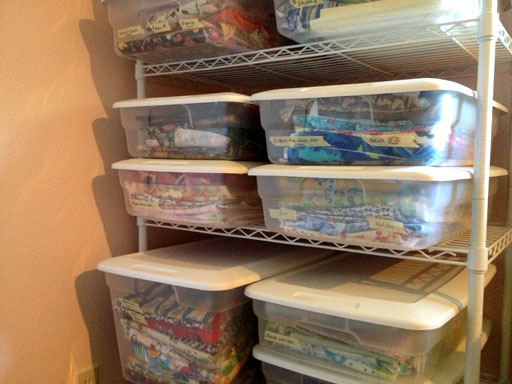
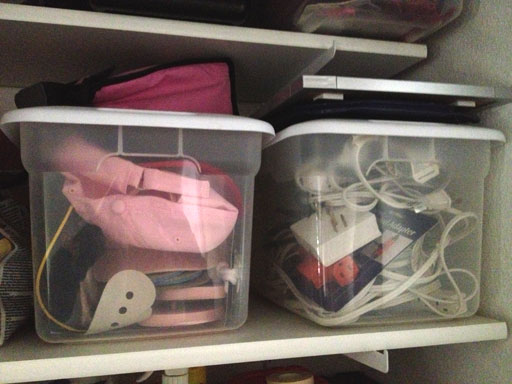
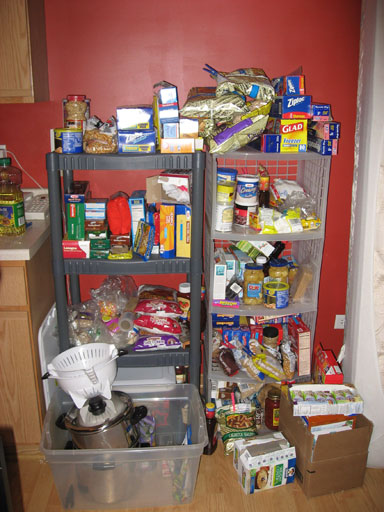
8) Find supplemental storage areas
I use some of the garage shelving to small kitchen appliances, canned goods, unopened bottles of marinades and sauces, and seldom-used kitchen tools like my rolling pin.
I don’t recommend storing foods that might attract pests in your garage.
Supplement your pantry with other storage areas.
9) Use it all the time? Just leave it out.
B- for looks, A+ for functionality! I use these spices, this cooking spray, and this skillet every morning, so they get to live on the countertop. Not having to dig through the pantry for them = win.
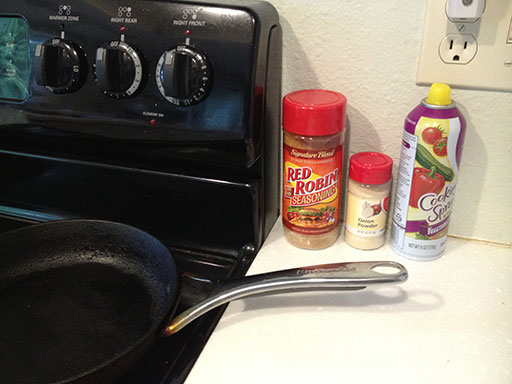
I use these things every day, so I just leave them out.
10) Install door organizers
This back-of-the-door spice rack came with the house, and it’s super useful for storing small items like spices and jellies. The only thing I don’t like about it? It had to be attached to the door with screws, permanently damaging the door.
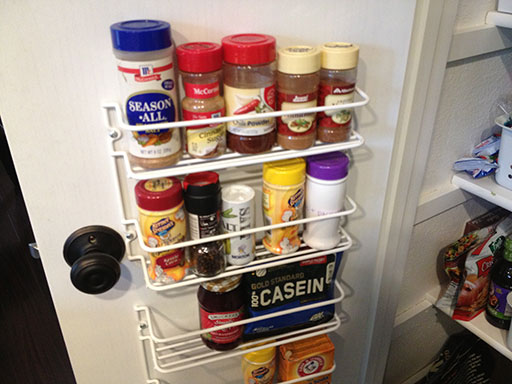
Small pantry organization secret: door racks!
Are you looking for a sweet organizer that won’t damage the door? This deluxe-size over-the-door pantry organizer on Amazon.com is inexpensive, adjustable, and won’t damage your door. I don’t own this, but I like it better than what I have. If I was organizing an apartment pantry or didn’t want to drill holes in my pantry door, I’d buy this in a heartbeat.

To be honest, I’m jealous.
11) Combine food into one box
If you have more than one box of something, putting everything into one container can save you a bit of space. Cheap pantry organization at its finest!
12) Hang things from the pantry walls
This two-pronged bathrobe hook is great for storing oven mitts and pot holders. Bonus: It looks like a lopsided octopus. Another bonus: It’s dirt cheap but doesn’t look it.
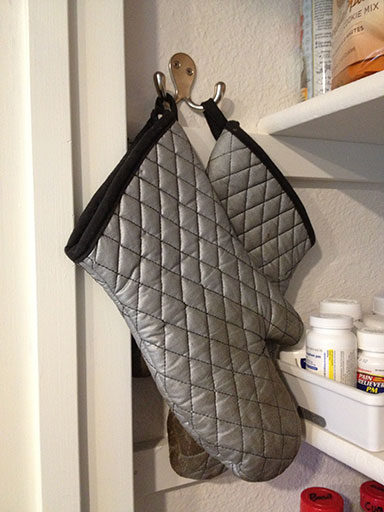
Small pantry organization tip: hang things on hooks! On the opposite side is our fly-swatter. :)
13) Buy the small version

Buy the economy size and save big – on SPACE!
A gigantic tub of cooking oil might cost less per ounce, but there’s a hidden cost at work here: the space requirements are expensive. This is why we don’t shop at Costco or other bulk retailers: I just don’t have the space. And if your house is like mine, you probably don’t either.
Added bonus: Having less of something on hand seems to encourage us to be less wasteful. I won’t cook the whole bag if it’s the only bag in the house, but I will if it’s one of six. I’ll stretch less cooking oil further, use less butter, and eat less overall simply by having less available.
14) Keep only the best supplies

One mitt to rule them all: I tossed my crappy oven mitts and replaced them with one awesome Oxo mitt.
I used to have 1 good oven mitt and at least a half dozen inferior ones. No surprise here: I never reached for the inferior mitts. They just sat in a big pile taking up space. So I donated the inferior ones and bought one more really awesome oven mitt, an OXO Good Grips Silicone Oven Mitt. Now I have 2 great mitts instead of 6+ okay ones.
Same goes for knives: do you favor a particular one? I love my OXO Santoku. Once I realized I’d go out of my way to wash the Santoku instead of using one of the inferior but already clean knives, I rounded up all the inferior ones and donated them.
What about coffee mugs? Do some of yours suck? Toss ’em.
Got a favorite cutting mat? Dinner tray? Scrub brush? Toss the rest and reclaim a ton of space.
15) Get rid of anything you haven’t used in a year+
Sort of related to #14, when I realized I hadn’t used my griddle in nearly 3 years I decided to give it to the local charity drop-off. The griddle was large, but it never got hot enough to compete with cooking in a smaller skillet on the stovetop. Donating this unused appliance freed up half a shelf(!) worth of pantry space.
What’s frustrating though, are items I do actually use a couple times a year. For me, that’s the toaster, the blender, the coffee maker, and electric hand-mixer. The best solution I’ve found for these items are to keep them in their original boxes (so they stay clean and so they can stack with other storage items) and store them somewhere outside the pantry. Since the pantry is so small, it has to be for commonly-used items, not once-in-a-blue-moon items.
16) Stop storing so much food in the first place
Even in this age of 24-hour grocery stores, I find this one super challenging. I include it in this list as a goal to strive for, but I fail at it all the time myself.
I apparently have a lot of hoarding baggage to get over, and it extends to a fear of running out of food. No, I’m not really going to run out of food but this problem is exacerbated by stores like our local Safeway that seem to have inconsistent stock of certain items. I suppose we’re at the end of the shipping lines here in the PNW, but it just drives me nuts to run out of something.
Limited edition/seasonal foods: ugh, limited edition foods are my bane. Those mint M&M that only come out at Christmas? I buy 20 as soon as they hit shelves in November because they aren’t available after mid-December! (And they really are the best mint chocolate candy.)
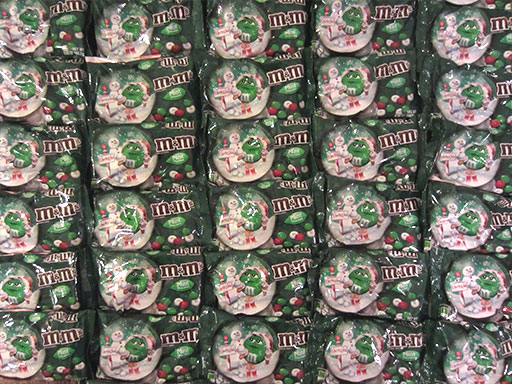
Every Christmas I buy a year’s supply of mint M&Ms. No, the year-round mint variety is not nearly as good.
Also not helping: those items you can only get at stores you don’t go to all the time. For me, that’s DeLallo pizza sauce from Fred Meyer and Quinoa chips from Trader Joe’s. I don’t want to go to these stores every single week, so when I am at one of these stores, I often leave with like 3 or 4 of the item I can only find at this store.
Realistically, the best I can do here is to not stock up on things I know are plentiful or interchangeable with another store’s version. This leaves room for the harder to find items that I buy lots of.
17) Resist bargains
Somewhat related to #16, I find “stock up and save!” and post-holiday deals borderline irresistible.
For example, Halloween Funfetti cake mix gets deeply discounted on November 1st. This is my favorite Funfetti mix because I’m easily entertained and enjoy the novelty of black sprinkles.
How much does this really save me, though? A couple bucks a box? And it comes at the high cost of having to store a stack of cake mixes for months and months.
18) It’s okay to throw perfectly good food away
I definitely struggle with throwing away food that’s technically still good but I don’t like eating. If you don’t like eating it, take it to the office. Or just throw it away. No one will know and the planet won’t suffer.
19) Don’t try new foods all the time
When I first moved out on my own, I wanted to try everything in the grocery store. This resulted in having way more food in the house than I had room for, since I wasn’t eating it fast enough to keep pace with new and exciting stuff coming in. Don’t buy something new until the old one is eaten up / thrown out. You’ve got your whole life to eat your way through the cookie aisle, there’s no rush. :)
21) Don’t buy gimmicky organizers that are larger than you need
You know what I mean – giant knife-holders that take up a square foot of countertop space and giant spice racks that would make the East India Trading Company jealous. I started life on my own with these oversized organizers, but all they did was make me think I was supposed to have 8 specialized knives (when all I ever used was my favorite OXO Santoku) and twenty spices (when I kept reaching for the same three again and again). They also took a lot of space. Ditching the organizers also let me downsize my collections of things, which in turn ended up using way less space.
Note: If you do actually use this much variety in knives and spices – like, you cook all the time and you’ve touched everything in the organizer in the last few months, by all means, keep these things. But don’t keep them around because you feel you have to. I don’t care how you organize it, one good knife always takes up less space than eight.
22) Organizing pots, pans, and skillet lids

This heavy duty Rubbermaid pan organizer lets you stack pans without touching bottoms to cook surfaces.
If you’re like I used to be, you probably have more pots, pans, and skillets than you actually use.
The first step to decluttering your pot/pan collection is to figure out which ones you actually use. You probably have a few favorites, and the rest are just there “in case”. Identify the favorites, and donate the rest to a charity.
Now that your pan collection is more reasonably sized, you might find you already have enough room to store them without stacking them. I don’t like stacking skillets because their cook surfaces are usually some magical non-stick surface that shouldn’t come into contact with metal, such as the bottoms of other pans. If you have to stack your pans to get them to fit in your limited storage space, the Rubbermaid Kitchen pan/lid organizer is a good choice. Heavy enough for cast iron and big enough for two 14″ pans, this thing holds more skillets than most cooks should need.
What to do with lids? I like to put lids on the pans they go with. I’ve futzed around with “lid organizers”, but I don’t like how they separate lids from the pots/pans they belong with. Getting out cookware turns into a lame matching guessing game, usually done at shin-height in a dark cabinet. Boo on that.
Remember, only keep what you actually use. Don’t feel bad about breaking up a set – whoever gets that skillet or too-big-pot you donated because you never use it will be thrilled. :) I have two small skillets, two medium skillets, a cast iron skillet (it’s huge), and two pots (one small, one large-ish). I used to have a gigantic pot, the kind you’d see in an Italian kitchen with an avalanche of pasta spilling out, but I realized pretty quickly that 1) I never cook that much pasta at once and 2) I don’t even like pasta. Ditching what you don’t need is essential for getting everything organized.
23) Pick one food storage system
I’ve known people with, like, four decades worth of Tupperware bowls. The styles change so nothing stacks with anything, and it all takes up a lot of space. When I started out on my own, I bought everything from the same system. I was poor when I was starting out, though, so I bought these cheap Gladware containers. Turns out, I love ’em. They stay on the market for years without changing, and the same-size containers all stack with each other.
Whatever you do, don’t buy a dozen different sizes. This is my chief complaint with most storage systems: you get 2 of this size, 2 of that size, 2 of this other size, and on and on. You don’t need that much variety. I store all my fridge food with just three sizes. Check out the variety at your local store and build your collection slowly. Don’t add a new container type until you’re absolutely sure you need it.
24) Hang your brooms and mops
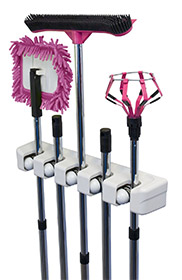
Rolling balls adjust to the handle size and each clamp holds 7.5 lbs of weight.
I used to jam my brooms, mops, dusters, Swiffers (that thing was a waste of money), etc, into whatever corner would hold them. Then I got a broom organizer for my garage and now they’re neat and tidy. (I immediately bought another for my rakes and shovels, they’re seriously awesome.)
Oh, and as long as we’re on the subject of brooms and mops – consider whether you have too many. I did – three brooms was excessive, so we tossed the worst one and kept the nicest broom for inside the house and the second-best for the garage. I hate mopping, so I donated my mop while I was at it. I’d rather crawl around with a bucket and a rag.
I had a wet Swiffer but that thing was an exercise in futility. Maybe our home is dirtier than most, but those wet pads just didn’t do anything. My floors have to be scrubbed with elbow grease to make any difference.
25) Eat it!
If you don’t have room for it, you gotta eat it, right?
At least, that’s the logic we use when we discover the last four cookies on the sheet won’t fit in the container we’re using to store them.
Made more than you can store? Well, you know what you gotta do…
Note to readers: Some of the links in this article are Amazon Affiliate links. They are provided to help you go straight to the recommended product. If you shop through an affiliate link, a tiny % of your purchase (if you make one) helps support this site with a tiny kickback at no cost to you. As always, I encourage you to shop around and price compare to be sure you get the best deal!