$1000 DIY Bathroom Remodel: Finishing Touches and Budget Breakdown

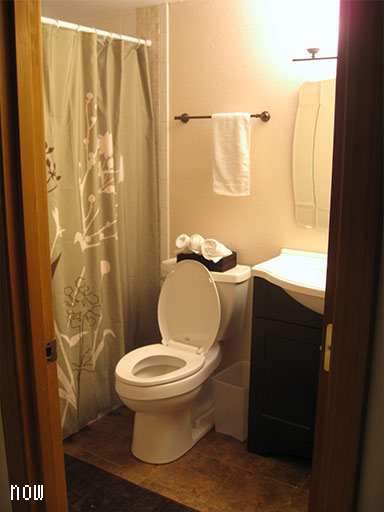
Our $1000 DIY bathroom remodel is complete! This was our first major home remodeling project in which we replaced a floor, a vanity, a toilet, and sliding glass shower doors (plus lots of little accessories).

Our upstairs bathroom “before” featured:

  • annoying vanity corner to bang your elbow on while using the toilet
  • glass shower door frame to bang your head on
  • storage cabinet that was both huge and too small to really store anything in
  • wobbly toilet that struggled to flush even the tiniest of loads
  • gold… everything

Our “before” was dated and the vanity and cabinet were crowding the toilet.

We ripped it all out and replaced everything with fixtures bought right off the shelf at Home Depot.  Our budget was $1000, and almost half of it went into the toilet and the vanity.  The other half of the budget went into <$100 stuff that added up, like grout paint, tiling supplies, a faucet, a mirror, and a new fan motor.


Our $1000 DIY Bathroom Remodel Budget

  • Demolition: free!
  • Disposal fees for old sink and potty: $20
  • American Standard Champion toilet: $230 (Update: 3 years later, this toilet is still a beast. I bought a second one for another bathroom.)
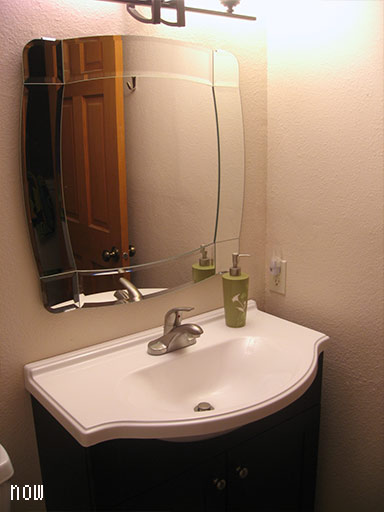
  • St. Paul vanity and sink combo: $200  (Update: 3 years later it still looks great.)
  • Moen Banbury dual shower head: $50 (Update: 3 years later we still love it, 100% recommend)
  • Flooring: about $70 worth of tiles, glue, tools, and related supplies
  • Delta single-handle faucet: $45
  • Plush rug: $30
  • IKEA Mirror: $30
  • Wall paint: “free” I mixed several color remnants I had in the garage into some white KILZ primer
  • Lighting fixture: $90
  • Shower curtain: Already owned (maybe $20 originally?)
  • Wall tiles: about $60 worth of tiles and grout supplies
  • Grout paint: $20
  • Caulk and caulk tools: about $10
  • Towel bar: $30
  • Towel hooks: $6
  • Trash bin: $10
  • Shower rod: $20
  • Can of wall texture spray: $12
  • Floor trim and miter box:  $40

Project total: About $993

The little things (especially tools!) add up, but considering this project began with a budget of $1000 I’d say we did pretty well!   We did all the work ourselves, relying heavily on the experience and insane work ethic of my dad.  Still, this project took several solid days of work, sometimes with all three of us contributing.  Many “loose ends” didn’t get tied up until weeks later.

Lessons Learned

Our first DIY bathroom remodel was nothing if not educational. Here’s some “pro” tips straight from the battlefield:

  • You really will need ALL of your tools.  Seriously, just bring every last screwdriver and wrench upstairs and dump it all in the hall before beginning.  Our entire upstairs became a shin-high flood of tools.
  • You will go back to the hardware store daily, sometimes twice daily, to keep the project moving along.
  • Demolition is 10% of the job…no, 5%.  Don’t get optimistic just because the room’s gutted.  You’re still watching the ads before the trailers even begin!
  • Removing a shower door framework does bad things to tile!
  • It’s impossible to match tile. Once tile has fallen off the wall (and shattered), you’ll never find a match.  Don’t even waste 3 days trying like we did.
  • Just give up trying to clean grout to original condition and paint it instead – looks great!  (Update: 3 years later, it looks as good as it did the day we painted it.)
  • Being without your only functional shower for two weeks sucks, even when you are already accustomed to showering at the gym 5 days a week.  We discovered our master shower was leaking and stopped using it, but we also couldn’t shower in this new one until it was fully sealed, which we couldn’t do until we repaired the grout and painted the existing grout.  I love the gym, but going every single day just so I could use the shower was brutal.
  • Disposing of your garbage is a real challenge. The garbage pickup won’t take it and the city disposal event wanted $10 a pop for the toilet and sink.  We had to haul it all to the dump ourselves.
  • Dad is a floor-gluing, toilet-installing, tile-buttering, plumbing-fixing GENIUS MACHINE.  Couldn’t have done it without him!!

Cutting Down the Driveway Hedge

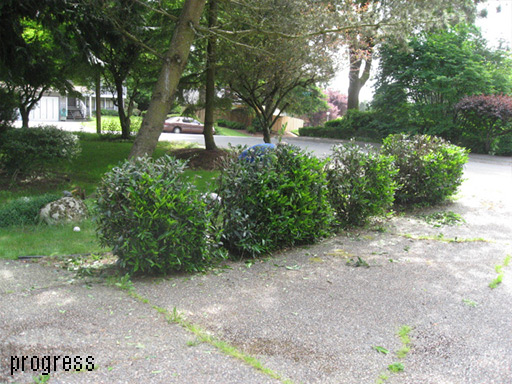
Another weekend, another hedge attack!

Hedge….

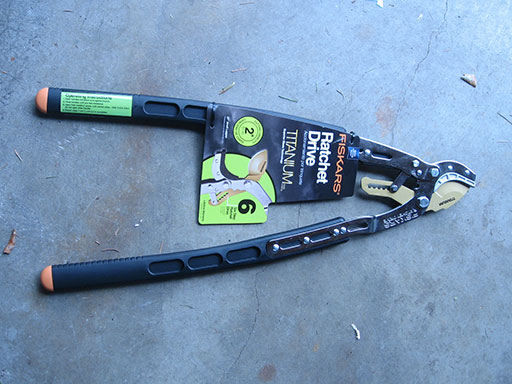
+ new clippers…

equals…

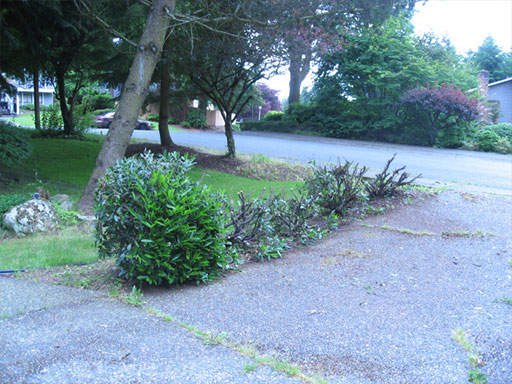
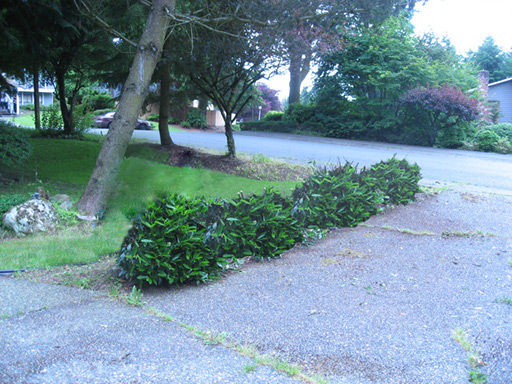
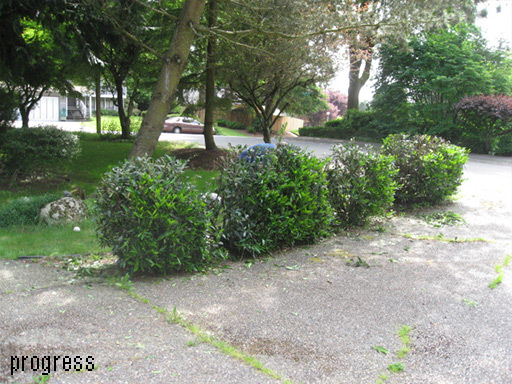
…wait, where’d the hedge go?!   At last, I can see the road as I back up!  The biggie on the end will have to wait until next time – as it is, this (plus cleanup) took nearly 2 hours and I’m pretty worn out now.  If the hedgelings survive this buzzcut (and I hope they do!) then I shall continue to shape them into neat little nubs, like so (I made this in Photoshop to get an idea of what it might look like):


But if they don’t survive, that’s okay too – I wouldn’t mind digging them up and putting a column of flowers or even decorative bricks into this space instead.

Decorating with Small White Picture Frames

Bare walls have a way of driving me nuts after a while, and since this weekend was “finish unfinished projects” weekend the first thing I did was hit up these stacks of picture frames laying about the computer room.  See below for an example of such a pile (of which I had at least three cluttering up good space that could be used for other clutter):

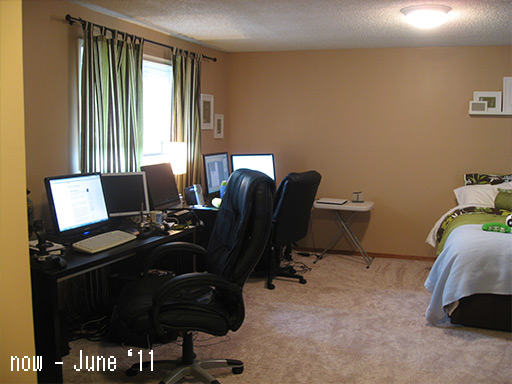
First stop, the guest bed!  Our computer room does double duty as both a guest room and, well, a computer room.  This works out surprisingly well.  We both love flopping down on a bed to read while the other sits at a computer!

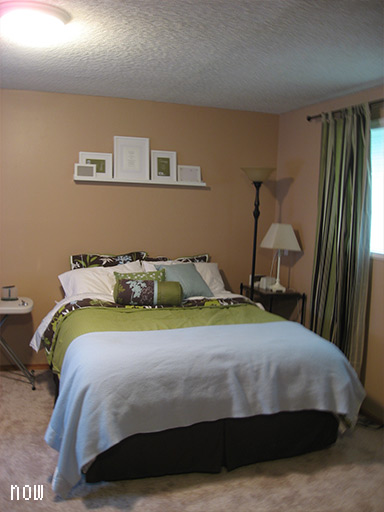
I mounted a thin picture shelf we snagged from IKEA a few weekends ago over the bed like so, which became home to several of the recently-homeless frames.  Getting the shelf up was easy – just three screws to drill in.  (I also made the bed and cleared off the last few week’s worth of papers.  It also doubles as a huge desk for papers that ought to be filed.)  The frames sit in the shelf very nicely.

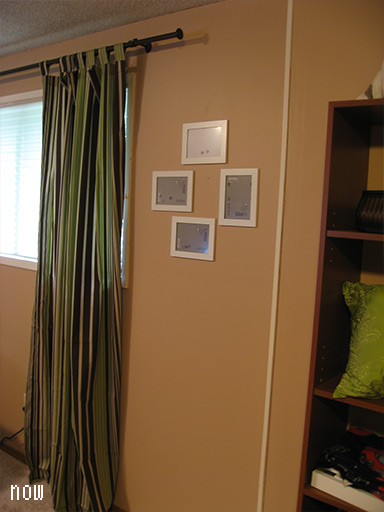
Using a few small nails I hung some slim IKEA frames like so next to the back window.  I just made up the arrangement as I went and it turned out ok!  I left one nail in the center to hang something small from.  The frames are too slim/small to use the usual picture hanging hooks, but nails worked fine for getting them flush with the wall.

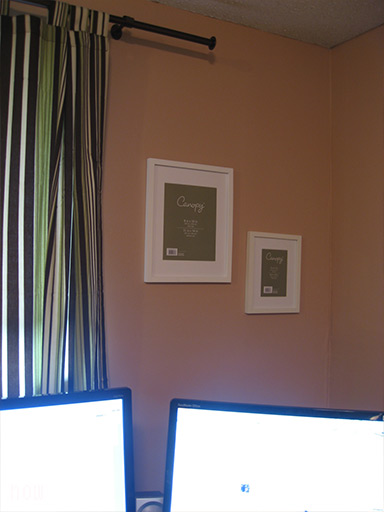
And in the corner near my computers I hung two more frames, this time hung with actual picture mounting hardware instead of nails.  Below is my in-home tanning bed… I mean, computer screens!  … with some frames to fill in the empty corner behind them.

And finally, here’s the whole room (because individual pictures don’t really show how everything goes together):

There we go!  Much better on the wall than in piles around the floor.

But in solving my picture-frame-pile problem I created a new one: what to put inside the frames!   For now, the room is decorated with Canopy and IKEA logos but that’ll change soon.   Walgreen’s lets you submit photos online to pick up at any store, printed at any size, so I think I’ll end up picking a few of our favorites and having ’em printed large for the big frames.  That’s how these projects always go when the time for working on ’em is somewhat limited: do a bit, do other stuff, then come back and do a bit more.

On the bright side, at least the room’s walls aren’t stark naked anymore!

Hedge Trimming

Our house came with a crazy huge hedge that separates the front yard from the driveway.  This is the kind of hedge you craft into 10-foot-tall hedge mazes.   A hedge maze sounds pretty sweet until you realize it completely blocks your view of the street and sidewalk when backing up into cars, neighbors, dogs, small children, gnomes…

So a few weekends ago I carved a hole into the end of the hedge.   It took me about an hour, equipped only with the level 1 hedge trimmer that we found in the garage on closing day.

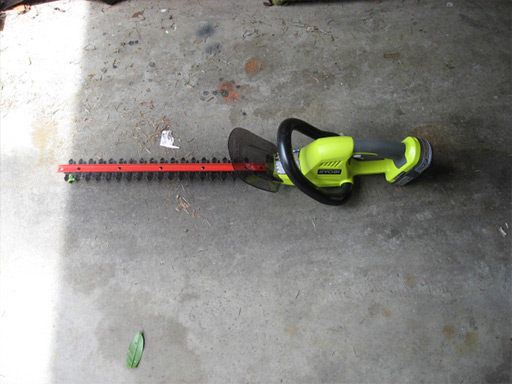
And there it stood, a giant “!” along our driveway as if the house had a leafy quest to offer.  Until this weekend!  Enter our new Ryobi bad boy:

My own dear Dad recommended this brand for its use of lithium batteries and the interchangeable-ness of the batteries between multiple Ryobi yard appliances.   As we expand our tool collection (ALL THE TOOLS!!) it’ll be nice to need only one type of battery that all the machines can share.  That, and the whole no-gasoline/no-oil thing is right up my alley.

As it turns out, the madness that overtakes me when I have a paintbrush in hand (inspiring me to paint EVERYTHING in sight) also applies to hedge trimmers.  VRROOOOOOM!  An hour later I’d reduced our hedge to its individual components.   It even yielded some loot in the form of a tennis ball and a wiffle ball.

The mad rampage of hedge trimming was ended when the battery ran out of juice.  I suppose an hour or so of hedge annihilation really ought to be enough for anyone.  What the hedge now lacks in artistry it makes up for in functionality!   I finally feel good about backing up off my own driveway.

PS: I’ll even it out when my right arm regains sensation.  :D