Budget DIY Kitchen Remodel Progress: July

I don’t think I’ve written an update on our budget DIY kitchen remodel in a while.  Here’s what we’ve been up to these last couple months.

February: I started refinishing the cabinets and tearing out cabinets to make room for the range hood
March: Purchased and installed range hood
April: Spent this month tearing up the many floor layers
May: Popcorn ceiling removed, countertop installed, laminate flooring installed

Unfortunately, I have a crappy tradition of getting sick at the start of summer.  Being sick and recovering knocked the motivation out of me for about five weeks.  During this time I didn’t do jack on the house, but now we’re back at it.

July: Installed the cabinet pulls and reattached most of the doors to the frames.

Here’s a snapshot I took today:

budget diy kitchen remodel progress

To Do: 

  • Paint the interior of the ceiling lighting recess (Dad and Jim installed two LED can lights into here, they’re awesome)
  • Hide the cord from the range hood
  • Hide the range hood’s duct
  • Install wall shelving to the left of the range hood
  • Tile a backsplash around the kitchen

By spreading the work out over a long period of time we’re preserving our sanity (kitchen has experienced nearly 100% uptime through all this work) and putting months between major expenses.  I don’t know how people spend 50-100 grand on a kitchen. Those fortunate people live in a different world than I do.

Budget DIY Kitchen Remodel: Why We Chose a Solid Surface Countertop

We’ve scheduled a contractor to come out on March 15th and give us an estimate for all of the following:

  • new countertops
  • new sink + new faucet
  • laminate flooring in dining room, kitchen, drop zone, and hallway
  • lighting changes – just something that isn’t three ugly fluorescent bulbs

That means we have until March 14th to procrastinate on choosing colors need to make a decision on this counter top!

Our new counter top must-haves:

  • Undermount sink!
  • No bizarre cleaning regimens (I don’t want to seal / buff / oil anything)
  • Reasonably durable, though neither of us is particularly destructive nor do we intend to chop food or put hot pans on the counter
  • Must be cleanable with normal cleaning solutions, like Lysol kitchen spray
  • Affordability – our budget for this kitchen update is around $5000
  • Stain resistant – we can be messy

This kitchen’s a work zone. We both cook twice daily.  I don’t know where some of these counter top manufacturers get off making counter tops that aren’t rugged or stain proof but I suppose if you don’t actually use the counter top for cooking, it’s fine if it’s made of paper mache.

Corian solid surface counter top quickly became a front-runner.  Young House Love first drew my attention by choosing it for their kitchen.   (I swear I am not stalking them.  Okay, maybe a little.)

We eventually decided on Corian for all of the following reasons:

  • Non-porous (stain resistant!) and solid all the way through, so if terrible things happen they can be sanded/buffed out
  • Highly rated by Consumer Reports
  • Works with undermount sink, wooo
  • I just like the feel of Corian.  As in, I REEEEEALLY like the FEEEEEEL of it.  It’s so soft and smooth.   (Actually, forget I said that, that was creepy.)

The next challenge was figuring out what color to go with.  I hate agonizing over colors, I really do, but with the counter top making up about half our kitchen update budget, I couldn’t afford to just choose on whim.

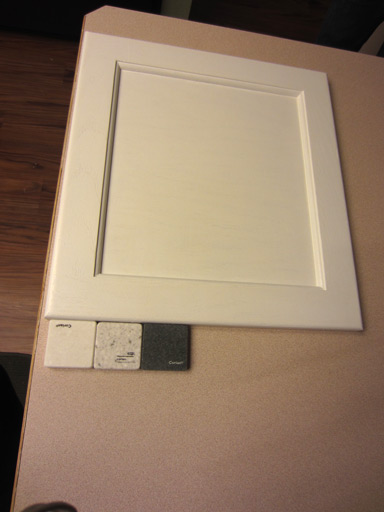
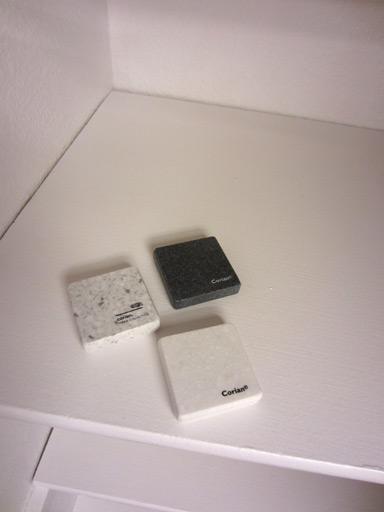
Here are our samples, chillin’ on the pantry’s painted shelves.


There’s a slight “warm” tone to the less-speckled white Corian sample which clashes just a tad with the cabinet paint color.  (But seriously, that observation can safely be filed under “shit only Mandi would notice”.)

Ehh?  I feel like no matter which one I pick, it’s going to be WAY better than the aging off-pink laminate with scuffed up wood border that we have now.  I think the speckly grey/white one is my favorite.  The ‘Pot had a sample similar to it with tiny black flecks, but it looked way too much like Oreo crumbs in milk.  Not that I don’t love Oreos or milk or the combination thereof, I just worry about the world’s Oreo supply should I crave Oreos every time I go through my kitchen.  Ultimately, we chose a bright speckled white (and it was perfect).

When we went to make the purchase at Home Depot, we discovered Samsung had a promotion on their version of Corian that brought the price of a Samsung Staron counter top several hundred under the cost of the same counter top in Corian.  There we were, presented with another option we hadn’t even considered after hours of ruling out other choices.  A quick look at online reviews revealed Staron is just as well reviewed as Corian and chemically quite similar, so we said what the hell and went with it.

Our gorgeous Staron counter top was installed a few weeks later!

Budget DIY Kitchen Remodel: Pantry Makeover (Part 2)

… I continue my quest for a pantry that isn’t nicotine-colored!

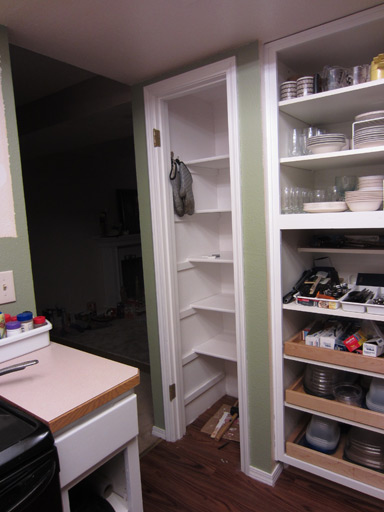
The shelves were first primed on both sides (with 2 days or so of dry time in between), and then painted with the same Benjamin Moore enamel stuff on both sides.  With nearly 7 days of drying time completed now for the undersides of the shelves, it was time to return them to their rightful place in the pantry.

Behold, a crisp, white pantry!

I want to be good and sure the shelves are fully cured before I jam all my crap back into the pantry, so I’m going to let the shelves continue to dry for a few more days.

Budget DIY Kitchen Remodel: Pantry Makeover (Part 1)

Our kitchen includes a narrow pantry.  Judging by the craftsmanship, it was probably some previous owner’s project.  All they did was nail some thin strips of wood to the walls and set shelves on top.  Not bad.  I would’ve done it differently, but I don’t have bandwidth to change it up significantly.  So I’m going to just give it a makeover, rather than complete cosmetic surgery.

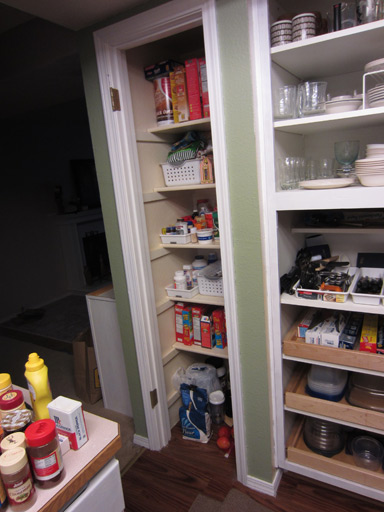
Here’s a “before”:

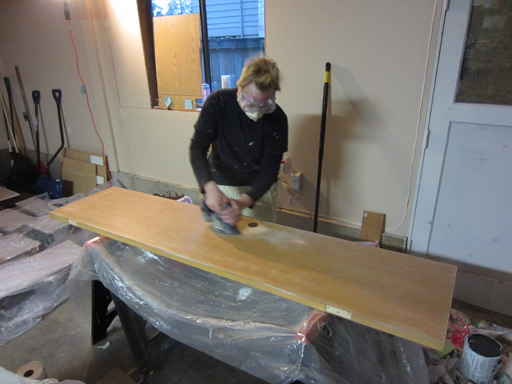
First thing I did was pull all our food out and put it in the living room.  Jim worked inside, deglossing the pantry interior and shelves while I got to work on sanding the pantry door.

Next up: priming the door, the shelves, and the interior of the pantry.  All told, it only took about an hour and a half or so to accomplish all that and get back to the “waiting” step as it all dries!  Best of all, these were the last primer-related steps.  On to enamel!