DIY Kitchen Backsplash (Part 2): How to Choose Kitchen Backsplash Tiles

Welcome to Part 2 of our completely modest, totally DIY kitchen backsplash project!  In this post, I’ll tell you what to think about when picking out tiles and how to choose kitchen backsplash tiles for your DIY kitchen remodel.

Catch up on our DIY kitchen backsplash series through these links: 

When I was researching kitchen backsplash ideas, I found that most of what I was reading assumed I had a sky-high budget and a kitchen straight out of Better Homes & Gardens.

high end kitchen

Gasp-inducing kitchen is lovely but so not in my budget! Photo credit: suturi.com

My kitchen’s from 1977, and it’s about what you’d expect from a single family standalone home built 30+ years ago.

level up house kitchen solid surface countertop mint color

My actual kitchen!

Contractors we discussed possibilities with wanted to tear out walls and completely change the layout of our downstairs to “modernize” it, but I can’t afford that.  So we’re facelifting this kitchen instead of gutting it, spreading the costs out, and doing as much as we can ourselves.

This DIY kitchen backsplash project’s goals are:

  • Simple design – like Legos!

  • Easy DIY installation

  • No tile cutting

  • No tools we don’t already own

  • Under $400 for the whole shebang (most of the cost is in the tiles themselves)

I don’t want (and can’t afford) those crazy counter-to-ceiling tiled walls with glittery tiles cut from slabs found in the enchanted quarry. :)

If yours is too, then read on for Part 2 of our DIY Kitchen Backsplash series: choosing the right backsplash tile!

Your Tile Budget

expensive tile

This diamond tile will set you back just $1 million per square meter

Your tiles will be the single largest expense of your DIY kitchen backsplash.  Tile is usually priced by the square foot, and most prices we found were between $18/sq foot and $90+ sq/foot (omg).

If you haven’t yet, take a minute to estimate how much square footage of tile you actually need.

Next, figure out how much you’re willing to spend.  The cheapest you’ll probably get away with is $250-$500 (USD) for a modest, short backsplash.

Divide your budget by how many square feet you’ll need.  If your budget is $300 and you need 15 square feet, your sheets should cost about $20/each. 

budgetformula

Figuring this out before you step into a tile store will save you a ton of time: you can just look at the price first, and if it’s too much, keep looking.  You won’t waste time on tile you can’t afford.

Where to Shop for Tiles

We’re in the Pacific Northwest, and our favorite places for tile are The Home Depot (which is where we got our bathroom tiles from) and Tile for Less (which is where we shopped for this project).  If Home Depot is the McDonalds of tiles, then Tile for Less is the Olive Garden.  Neither are particularly expensive, and both have enough variety for just about anyone, but it’s a lot easier to “splash out” and spend a fortune at Tile for Less.

There are two more reasons to visit Tile for Less.

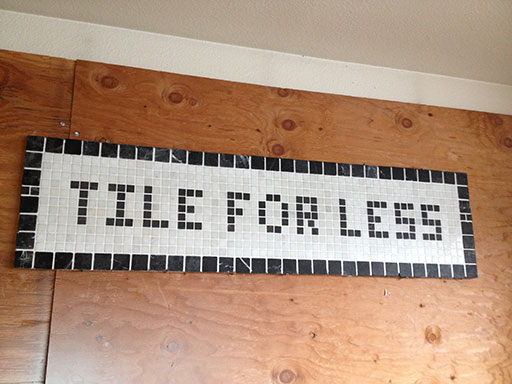
Reason #1 – This awesome Tile for Less mosaic sign:

Tile for Less sign mosaic tiled

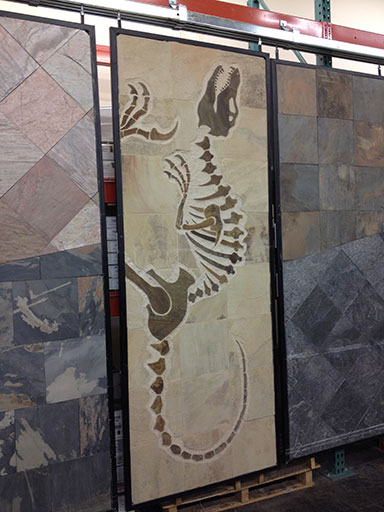
Reason #2 – This faux dinosaur fossil mosaic I pay homage to every time I visit Tile for Less:

tile_for_less_dinosaur

There are also tons of online tile stores.  I didn’t shop for tiles online; I just wanted to see the tiles in person and find something locally, but I would have ended up online if Tile for Less couldn’t deliver the goods.

What Kind of Tiles To Buy

There are about as many choices in tiles as there are people buying tiles, so a lot of this is up to personal preference.

This is my advice to anyone trying to choose tiles:

  • Neutral colors (white and grey in our case) because I hate experimenting with expensive things that get glued to the wall.  Bland colors for things that are permanent, that’s my motto. :)

  • Under $30/sq foot.  Just a simple budget preference. Some sheets we liked were $70+ per sq. ft which I think is just insane for a bunch of rocks you glue to a wall. Your mileage will vary here.

  • Must fit under our window sill which is 3 ¾” because I don’t want to turn a countertop project into a window project as well

  • Must include 1” tiles for filling in gaps because I don’t want to cut tiles if I can avoid it

  • Flat surfaces because I don’t want to scrub grime out of wavy tiles or sculpted designs

  • It’s hard to go wrong with subway tiles

So, with all that in mind, you’d probably be surprised to know those criteria didn’t severely limit our choices.

Our Tile Choice (and Runners-Up)

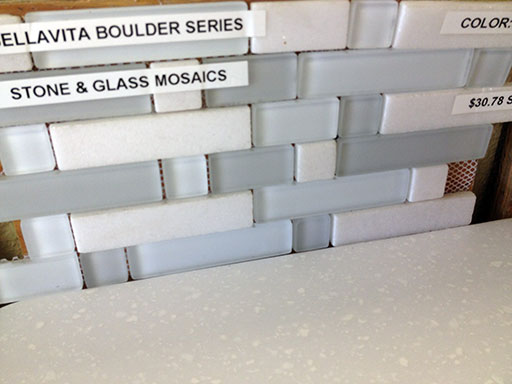
This is the tile I liked as soon as I stepped into the store.  Bellavita Boulder Series in “Snow” checks all our boxes. I love it.

bellavita_stone

But just to be sure, we wasted another 2 hours looking at more tiles to make sure it was The One (it was).

In the interest of sharing our decision-making process, here are some runners-up that didn’t make the cut. The one on the left was nice, and the 1″ tiles were perfect, but it was way more expensive.  The one in the middle was ultimtely too dark and also too many fiddly bits to deal with individually for the edges/corners.

runners_up

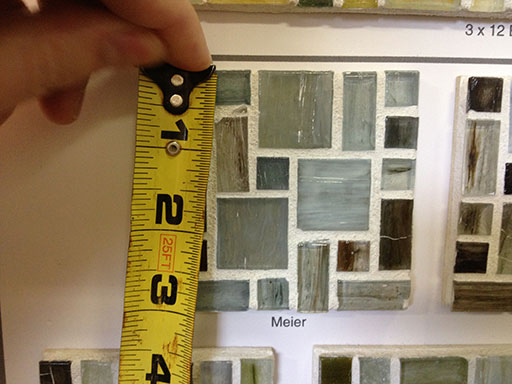
I super loved the look of this Meier tile but I didn’t super love its price, which if I recall was like $60 a square foot or something crazy.  But I did seriously consider it for a few minutes.

meir_tile

We also brought a sample home to look at it there, because I like to be super-duper sure before I spend $300 on a nonrefundable box of rocks.  Finally, we bought our 9 sheets and left satisfied with our decision.  Our grand total for 9 sheets+tax came to $320.

Since these tiles are stone, we’ll have to seal them as well.  (We’ll talk more about sealing when we get to the supply-buying and installation steps.)

The Tiles Arrive!

Tile for Less had our tile order ready for pickup in like, four days, so they arrived weeks ahead of our planned November installation. The tiles came in a square box and none of the sheets were broken or chipped.

Our box of rocks is home!

Stay tuned for Part 3, where we stick our box of rocks to the wall.

My Halloween Plush 2013

The tradition continues!  Halloween Plush 2013 is here!  I’ve been super busy with blogging and traveling so I skipped doing a costume this year (BOOO, I know), but I couldn’t let the best holiday of the year go un-plushed.

My Plush Candy Corn Pattern!

As a part of my ongoing effort to completely crowd my home with plush, I designed a new pattern this year: plush candy corn!

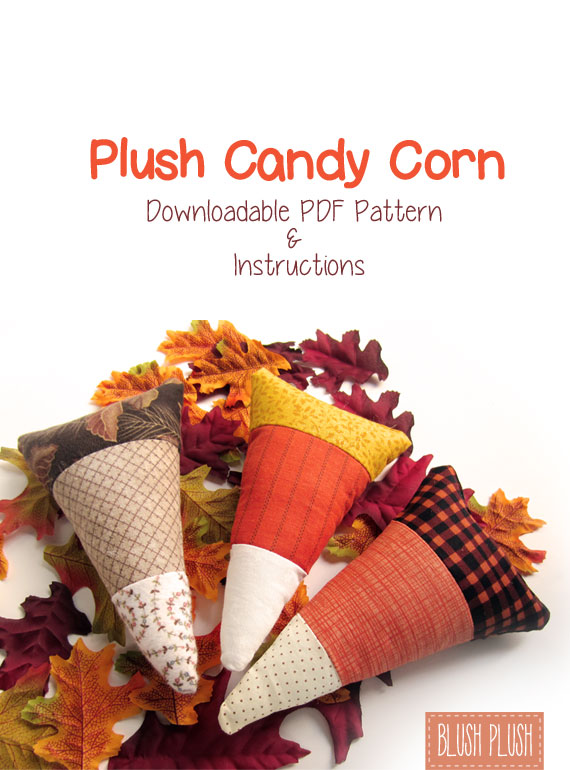
Halloween Plush 2013 candy corn pattern

I love candy corn, and I always thought it’d be fun to create and sell a sewing pattern on Etsy.  At the beginning of October I launched my very first downloadable PDF pattern on my Etsy shop, WeirdLittleFriends.etsy.com. If you’re a sewing beginner, this pattern’s for you!

Plush Candy Corn sewing pattern pdf downloadable instructions

Plush Candy Corn pattern downloadable pdf instructions

Lucy!

What’s cuter than an albino snake?  A two-headed albino snake!

Lucy might spook some folks but she’s actually super friendly. Lulu (the left snake) and Cici (the right snake) like fluffy blankets and strawberry ice cream.  Lucy’s kind of a one-off design that I probably won’t add to my Etsy shop unless some crazy demand for adorable two-headed plush snakes comes out of nowhere. :)

two headed snake albino pink Lucy cute
Lucy is totally inspired by “Medusa”, a thirsty but conflicted two-headed snake.  This video just melts my heart:

DIY Kitchen Backsplash (Part 1): Planning a Kitchen Backsplash

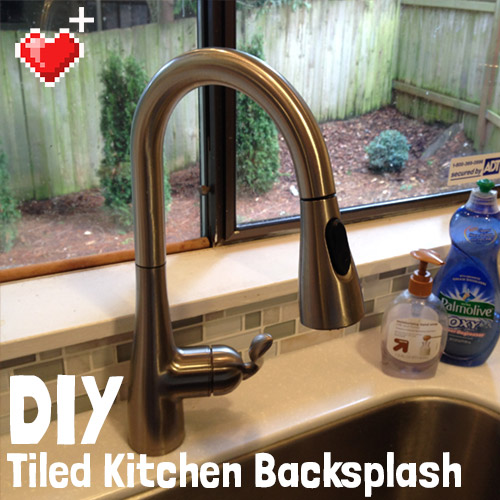
DIY kitchen backsplash tiling project

Welcome to Part 1 of our DIY tiled kitchen backsplash project! This first post is about planning a kitchen backsplash.

See the entire DIY kitchen backsplash series:

A year ago we replaced our kitchen’s old with a super nice Staron solid surface countertop from Home d’Pot and planned to tile our own backsplash. Now it’s time to finish the backsplash!

DIY kitchen backsplash planning a kitchen backsplash

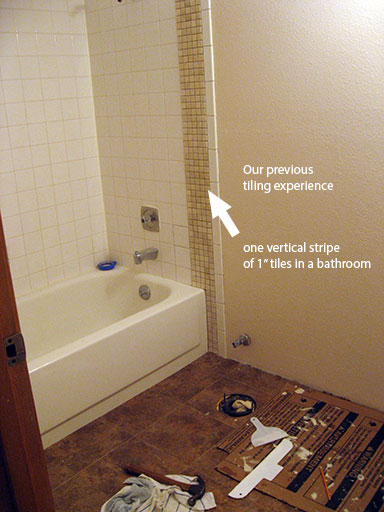
To be frank, the idea of permanently gluing little bits of ceramic and glass to our kitchen walls is super intimidating.  We’ve only tiled one thing before (a stripe down our bathroom wall) and that was a messy and intense experience.  You just don’t get much room for messing up when you’re working with tile (but everything went fine in our bathroom tiling project).

our previous tiling experience in a bathroom

It took us some time (and a bunch of YouTube videos) to get the confidence that we could tile our own kitchen backsplash.

Kitchen Ambition

The best place to begin is to determine how ambitious (translation: expensive) the project will be.  This is true of virtually any kind of project you might plan, but it’s especially true when working with expensive materials that the store won’t let you return.

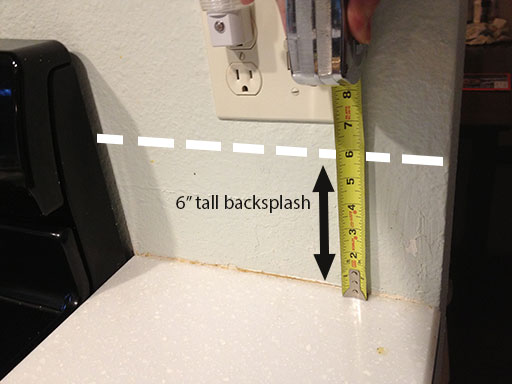
We decided to keep our kitchen backsplash project very modest.  Our backsplash will be 6” tall with varying width tiles, which should allow us flexibility to fill in gaps and avoid cutting tiles. Hopefully, simplicity will pay off in the end.

Why not tile the whole wall?  Well, for one, it’s a trend I just don’t like that much. I think a wall of tile is overwhelming, and it doesn’t let you repaint the kitchen walls (which is something I like doing :D).

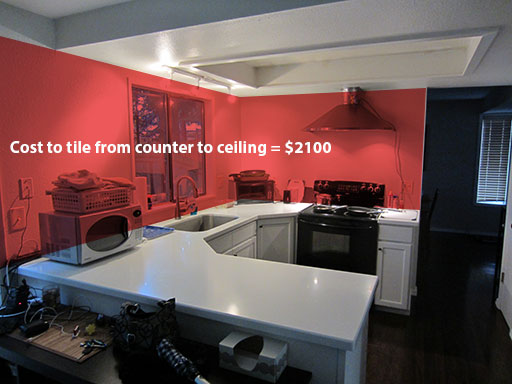
Two, it’s expensive.  To tile our entire wall would require 66 square feet of materials, which would cost over $2000 in materials alone.  Our 6” backsplash materials came in around $320.

cost to tile entire kitchen wall is too expensive

Three, we probably couldn’t do a fully tiled wall ourselves.  We would have to remove and re-install the range hood over the tile, and cut the tiles to accommodate the electrical outlets.

So I’ll leave the fully-tiled-wall look to the pros and I’ll stick with what I can actually do myself.

6 inch backsplash is much more affordable

Figuring these things out before you begin is super important.  Knowing the scope of your project lets you estimate costs, which is usually why we DIY these things in the first place.  We got two professional quotes for the kitchen backsplash, and both came at around $650 and $800.  Yeah, thanks, but we’ll pass on that.  Doing it ourselves should come in under $400, for a savings of at least $250.  (I don’t know about you, but I think that stuff adds up.  That’s like, a quarter of the way to another trip to Disneyland!)

I also highly recommend figuring out what you want in terms of color and style before you go to a tile store where you’ll get overwhelmed by the possibilities.  Spend an hour on Google figuring out what you like and what you hate.  Virtually everything looks nice in the tile store, so make sure you know what looks right in your kitchen before you go there.

Determine Your Backsplash’s Height

This part’s easy: how high do you want your backsplash to be?   Some go halfway up the wall, some go to the ceiling, and some are a little more modest and stop about where we’re stopping ours.

We chose 6” because it would let us cut our 12”x12” tile sheets evenly in half and because 6” is slightly lower than our electrical outlets.  Not having to cut tiles to fit around outlets sounds like a good time to me.

6 inch tall backsplash avoids electrical outlets

Determine Your Backsplash’s Width

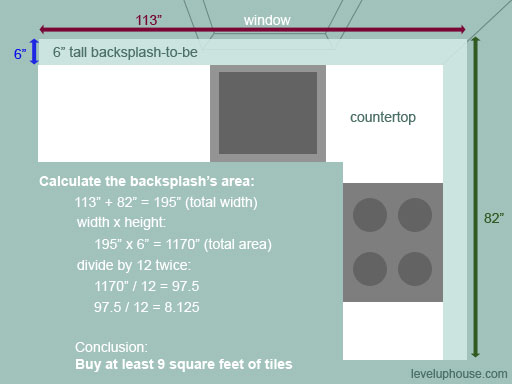
This part’s easy, too: measure the width of the area you’ll be tiling. In our case, the window wall is 113″ wide and the oven’s wall is 82″ wide.

Calculate the area

Multiply your width by your intended backsplash height to get the square inches you’ll need to fill with tile (in inches).  Divide it by 12 to convert the square inches into feet, and then divide by 12 again to convert into square feet.  (Unless you’re using metric, in which case you can probably do the math in your head…)

I bought one full extra sheet to be safe, so 10 sheets total. (At $30 a sheet, I didn’t want to go crazy buying extra sheets.)

planning a kitchen backsplash

Figure out what you want over the stove

We left the area above the stove empty – it will just be the painted wall it already is.  We chose this to save money (less tile to buy) and because I’m not convinced it needs a backsplash.  We’re daily cooks and I haven’t felt the need for an elaborate backsplash behind the stove yet, so we’ll leave that to the magazines.

If you do want something over your stove (something taller than the rest of your backsplash, perhaps), be sure to calculate its dimensions as well.  If you want it to use a variety of tiles (say, a border or a special design), also calculate the area of those special features.

Any special cases?

Our “special case” is the space between the counter and the window ledge.  The space is just a TEENY TINY BIT less than 4″, so we’re gonna try to make it work with 1″ tiles.

Ready to Shop for Tiles!

With our quantity and budget determined, we’re ready to go to the tile store and see what they’ve got!  I know we’ll be looking for tiles that can fit under the window ledge and match our countertop.

What to bring with to the tile store:

  • Measuring tape

  • Counter sample, if you have one, for comparisons (a painted sample of your wall color and a cabinet door wouldn’t hurt, either)

  • Kitchen measurements

Once the backsplash was planned, the next step was visiting a tile store and choosing tiles.

Preventing Yard Ornament Rust!

Updated 4/2014! The clear Rustoleum did nothing to slow the rust, but I found an even better technique to prevent yard ornament rust. Alas, it does involve painting the ornaments. I updated this post with all the details!

I’m not usually into yard ornaments, but I might have discovered my gateway drug when I found these big metal salmon-shaped yard ornaments at Bad Blanche in Poulsbo, WA.

yard_ornaments_rust_treatment

YARD. FISH.

The acquisition of one’s first yard ornament is probably where the path into old ladyhood begins, but I don’t care, I freaking LOVE my yard fish!

Alas, you don’t have to be a metal fish expert to know my new yard ornaments are probably going to start rusting the moment I put them into my yard.   Here’s what I did to prevent yard ornament rust and keep my yard fish looking adorable.

Supplies

Here’s what DIDN’T work…

The vast majority of Rustoleum products are actually paints.  But I didn’t want to paint my yard ornaments a different color, I just wanted to give them a coat of anti-rusting goodness.  I tried this Rustoleum “Rust Inhibitor” stuff first – I followed all the directions and gave them plenty of time to dry. I stuck ’em in my yard and within 24 hours they were rusting worse than ever before. DID NOT WORK! If anything, it made them rust faster.

preventing yard ornament rust Rustoleum rust inhibitor spray

Rustoleum Rust Inhibitor spray: all that stands between my metal fish and the water that will ruin them. How ironic.

Round 2: Preventing Yard Ornament Rust with PAINT and CAR WAX

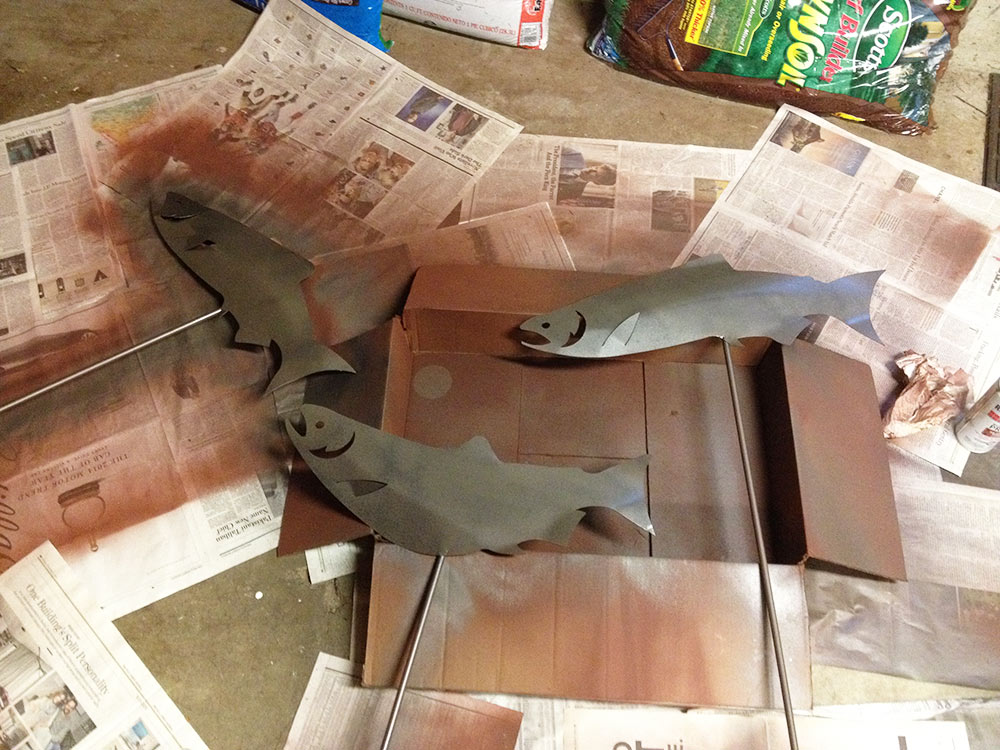
I brought my fish indoors and let them dry. Meanwhile, I went back to the Big Orange Box and bought a can of Rusty Metal Primer Spray. Each fish (I have four now, btw – I went back to Bad Blanche  and covered each one in several coats. You know what’s ironic? Covering rust with rust-colored paint. But it looked so good, I considered stopping here.

rust_yard_ornament_paint_1

The rust primer step took several days, since I had to paint one side and let it dry before flipping the fish over to paint the back side.

I did 2 coats of rust primer on each side before switching to the Rustoleum hammered metallic paint. I had both a silver-colored paint and a black-metallic paint, and I couldn’t decide which one I liked better so I just alternated and got a nice blend. The can promises a “hammered” look but all that really means is you get little splurts of uneven paint, which worked well for fish but maybe not for things that are actually supposed to be smooth.

Here’s my fish with a couple coats of the metallic outdoor paint:

rust_yard_ornament_metallic_Hammered_paint

rust_yard_ornament_closeup

I gave the fish a good hour+ between coats and I split this project up over the course of a couple weeks (if you were in a hurry, I imagine the whole thing could be done in as little as 2 days).

Workspace Preparation

My first workspace was a neat little box that I carried outside in the grass.

preventing yard ornament rust workstation

My high-budget elevated workstation allows for moving the fish without touching them.

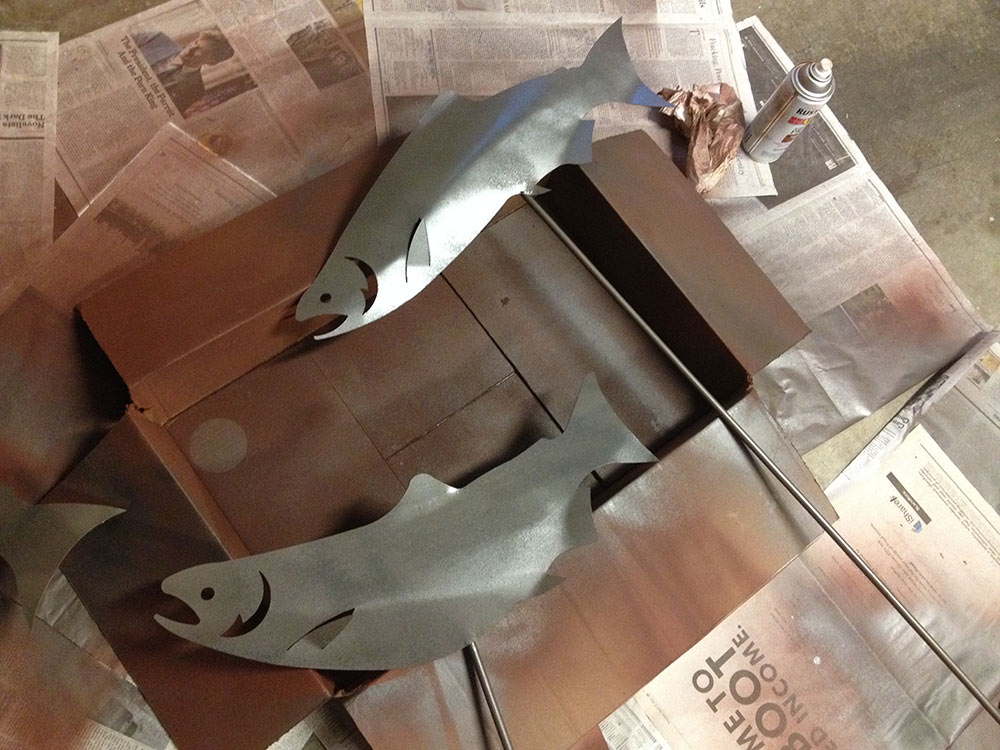
On round 2 of this project, I knew I’d have to do a LOT more painting so I brought the whole thing into my garage. My second workspace was a giant mess of newspaper and paint inside my garage.

fish_yard_ornaments_getting_painted

No time to explain, help me wax this fish!

Right about the time I was finishing my last coat my dad suggested I wax them like a car. Damn, that’s a good idea!

turtle_wax

Turtle Wax goes on my cars AND my fish.

Too bad we didn’t think of it before I spent hours painting the fish! I bet car wax alone would have been enough to keep these fish from rusting. I wax my cars with Turtle Wax, so I already had a pot laying around.

I applied the car wax to both sides of the fish and their posts.

car_wax_metal_fish

Finally, a chance to use my degree.

Once the wax was buffed off, it was finally the moment we’ve all been waiting for: time to put the fish in the yard! Best of all, thanks to the wax, the water just beads up and runs off ’em.

preventing yard ornament rust coated salmon

All that’s missing is MORE FISH?