Budget DIY Kitchen Remodel: Removing Flooring

I’ve threatened it for over a year now, and that time is finally here!  The final reckoning for our house’s mosaic of downstairs flooring!

We’ve already carpeted everywhere we intend to carpet, but the “hard” floors have remained untouched until now.  We’ll be replacing old hardwoods in the entry and the bathroom, and cheap Allure/vinyl in the kitchen, and ancient carpet in the dining room.  Restoring the hard woods was an option, but I would rather have one seamless floor downstairs instead of a bunch of mismatched flooring. The transition pieces are awkward to step over.  I don’t know why the previous owner stopped the hardwoods where they did, because the steams are awkward and ugly.  So alas, the hardwoods are out.  Perhaps they can be removed without damaging them, and donated to a good cause?

This weekend was the first major step towards completing our flooring.  The more we remove ourselves, the more we save, so out came the crowbars!

Over the last few days we:

  • pulled up all of the Allure flooring in the kitchen and hall (it is now a giant scrap pile in the garage)
  • removed all carpeting and padding from the dining room
  • removed most of the woodwork trim from the kitchen, dining room, and hallway
  • tried (and mostly failed) to remove the hardwood flooring from the bathroom
  • removed all the brassy joiners that acted as seams for our patchwork flooring
  • ordered our Corian countertop for our kitchen
  • scheduled a measure with Haight Flooring for tomorrow

We are pooped!  But things are moving again, and that’s awesome!!  Here are some photos of our work:

Allure flooring gone!  Fortunately, it was only glued to itself, not the vinyl underneath.


This vinyl has seen MUCH better days. I have no idea what f’d this floor up so bad.  This damage is actually torn into the vinyl, and no, it wasn’t just pulled up by the Allure.  Whatever happened, it must have been pretty awesome to watch.

In the bathroom we removed the wood trim (revealing more of my favorite wallpaper ever) and pulled out a few of the hardwood planks to reveal what has got to be the final word on hideous vinyl.  And not just one layer, but TWO!  TWO ugly vinyls right on top of each other!!  It’s like an ugly vinyl sandwich.  The wood boards are nailed in, which makes pulling them out pretty difficult.  They break up when removed, which is a bummer.  We didn’t get too far.  We may have our new flooring installers take this one out.  It’s pretty beastly.

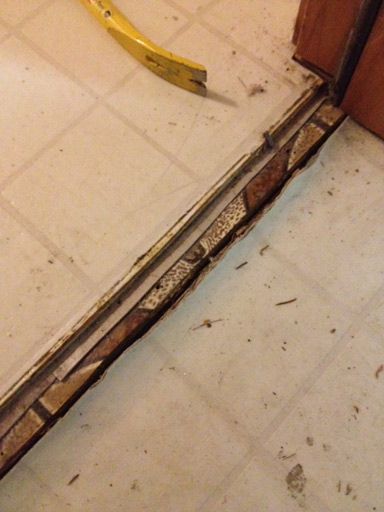
Pulling up the metal threshold transition between our garage stairs and our hallway revealed another ugly vinyl sandwich with a different ugly pattern.  I can’t imagine the eyesore that this house apparently was at some point in its 34 year life.

And finally, a large sample of our laminate flooring!  Shaw brand “Brazillian Vue” isn’t quite as red as it looks in this photo, and should be stunning next to white trim and our pale green and beige walls.  I like that it’s made in the US, too.

With this in place our former patchwork of 4 different floors will be transformed into one smooth and silky chocolately brown laminate covering.  Hooray!

Click here for more of our adventures in DIY flooring removal.

Budget DIY Kitchen Remodel: Professional Range Hood Installation

Welcome to our Budget DIY Kitchen Remodel project. Links to each step of the project can be found on our Budget DIY Kitchen Remodel home page.

Hello, it’s the crazy couple again, still knee-deep in our kitchen renovation!

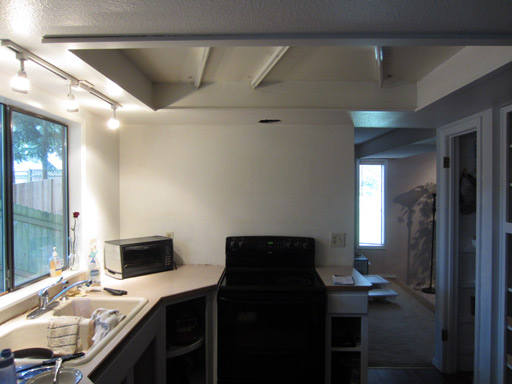
It’s March, and we’ve since removed the last of the cabinets from this wall. The giant gaping hole in the wall above the range has been patched, and I primed the whole wall just to give it some extra oomph. This is the wall “before” the range hood went in. We let a pro handle this one.

Before:

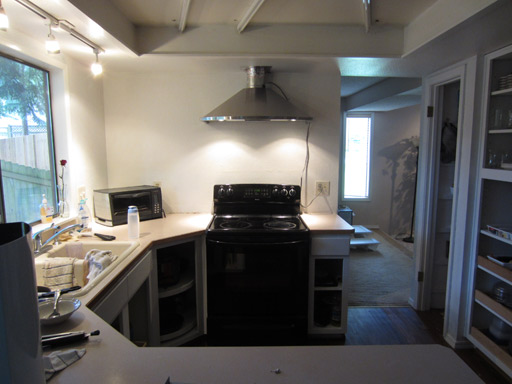
After: 

Ta-da! I always dreamed of an awesome range hood, and this Zephyr-brand range hood is pretty deluxe. We bought it from Bothell Home Appliance (in Bothell, WA) and the two dudes they sent had it installed in about an hour – if you live in the Puget Sound area, say wut up to them for me, they’re my favorite place for appliances.

But what’s with that cord? Hooking up the electrical to anything other than an outlet is outside the scope of their services, so alas, we have a long dangling cord for now.  Also, the ventilation  duct remains exposed because the stainless steel covered provided by the manufacturer is about a foot or so too tall for the space.  I get why they provided a super long cover, but I hope they offer some sort of cutting service because this is incomplete until we figure out a solution.

In the meantime, though, the appliance itself works GREAT!  Super quiet and super effective ventilation for our twice-daily cooking. Hooray!!

Any guesses as to what we will work on in March? If you guessed “the backbreaking labor of tearing up our own floors”, you’re correct!

Patching a Large Drywall Hole

We ordered our range hood Monday! It’ll arrive this coming Thursday, so I gotta get to work on this wall situation!

First up: wall repair and priming. I primed the wall (and the ceiling) first, and then got to work on patching the big hole over the range. The old wall mounted microwave had burninated some holes in the wall (at least, that’s what I imagine happened):

And because killing a fly with a grenade is the only way I do things, I cut around all the damage to make a big empty box and reveal two studs onto which I would later mount a new chunk of drywall.


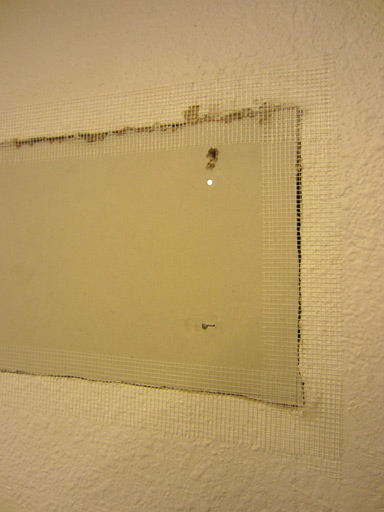
This was easy to repair – all I had to do was cut a rectangle of new dry wall to match the size of the hole and nail it to the studs. Screws didn’t work (pardon the large hole above the nail, lol). I then applied some crazy wall repair mesh tape to cover where the edges meet, and then slathered on a load of spackle.


Walls and ceiling freshly primed, rectangular hole repaired and drying!

(No, the kitchen was not magically this clean when I finished. This is after about an hour of cleaning up the mess that painting and drywall repair made. :P)

And in other news, we’ve evacuated the dining room furniture into the living room, which is surprisingly cozy!

This was done in preparation for removing the old carpet from the dining room platform. Everything we do or remove before our contractor starts work on our kitchen sometime in April saves us $$, so we do as much as we can ourselves! Besides, demolition is fun! :)

Budget DIY Kitchen Remodel: Why We Chose a Solid Surface Countertop

We’ve scheduled a contractor to come out on March 15th and give us an estimate for all of the following:

  • new countertops
  • new sink + new faucet
  • laminate flooring in dining room, kitchen, drop zone, and hallway
  • lighting changes – just something that isn’t three ugly fluorescent bulbs

That means we have until March 14th to procrastinate on choosing colors need to make a decision on this counter top!

Our new counter top must-haves:

  • Undermount sink!
  • No bizarre cleaning regimens (I don’t want to seal / buff / oil anything)
  • Reasonably durable, though neither of us is particularly destructive nor do we intend to chop food or put hot pans on the counter
  • Must be cleanable with normal cleaning solutions, like Lysol kitchen spray
  • Affordability – our budget for this kitchen update is around $5000
  • Stain resistant – we can be messy

This kitchen’s a work zone. We both cook twice daily.  I don’t know where some of these counter top manufacturers get off making counter tops that aren’t rugged or stain proof but I suppose if you don’t actually use the counter top for cooking, it’s fine if it’s made of paper mache.

Corian solid surface counter top quickly became a front-runner.  Young House Love first drew my attention by choosing it for their kitchen.   (I swear I am not stalking them.  Okay, maybe a little.)

We eventually decided on Corian for all of the following reasons:

  • Non-porous (stain resistant!) and solid all the way through, so if terrible things happen they can be sanded/buffed out
  • Highly rated by Consumer Reports
  • Works with undermount sink, wooo
  • I just like the feel of Corian.  As in, I REEEEEALLY like the FEEEEEEL of it.  It’s so soft and smooth.   (Actually, forget I said that, that was creepy.)

The next challenge was figuring out what color to go with.  I hate agonizing over colors, I really do, but with the counter top making up about half our kitchen update budget, I couldn’t afford to just choose on whim.

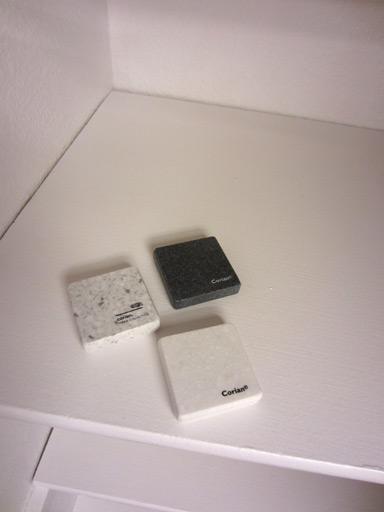
Here are our samples, chillin’ on the pantry’s painted shelves.


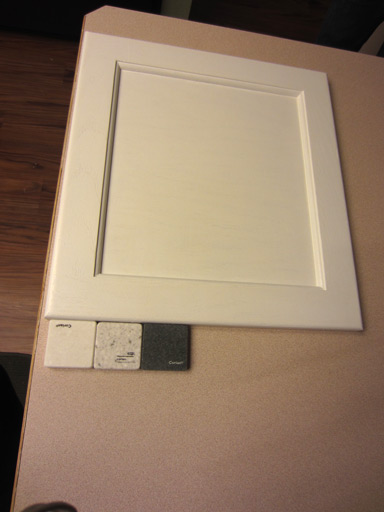
There’s a slight “warm” tone to the less-speckled white Corian sample which clashes just a tad with the cabinet paint color.  (But seriously, that observation can safely be filed under “shit only Mandi would notice”.)

Ehh?  I feel like no matter which one I pick, it’s going to be WAY better than the aging off-pink laminate with scuffed up wood border that we have now.  I think the speckly grey/white one is my favorite.  The ‘Pot had a sample similar to it with tiny black flecks, but it looked way too much like Oreo crumbs in milk.  Not that I don’t love Oreos or milk or the combination thereof, I just worry about the world’s Oreo supply should I crave Oreos every time I go through my kitchen.  Ultimately, we chose a bright speckled white (and it was perfect).

When we went to make the purchase at Home Depot, we discovered Samsung had a promotion on their version of Corian that brought the price of a Samsung Staron counter top several hundred under the cost of the same counter top in Corian.  There we were, presented with another option we hadn’t even considered after hours of ruling out other choices.  A quick look at online reviews revealed Staron is just as well reviewed as Corian and chemically quite similar, so we said what the hell and went with it.

Our gorgeous Staron counter top was installed a few weeks later!