Black Friday Tips for Sane People

black friday tips for sane people
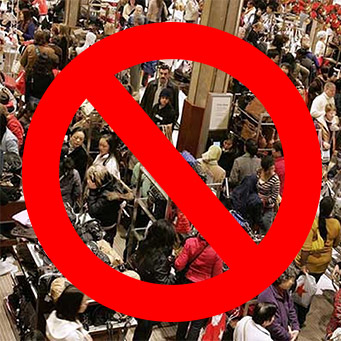
I love a deal, but I hate Black Friday. The annual shopping frenzy that encourages people behave like animals for discount microwaves and video games is consumerism at its worst. But it sure is hard to argue with saving a ton of cash.

Three years ago, we closed on our house right before Thanksgiving – the timing couldn’t have been better: our refrigerator, washer, and dryer were all Black Friday deals, which saved us several hundred bucks, and many of the tools we needed were found on discount in December. We also filled out our gaming collection for the year thanks to Steam sales. :D

So what’s a sane person to do? I can’t stand joining the midnight mobs, but I have found ways to take advantage of holiday season sales without going crazy.

Welcome to Black Friday tips for sane people!

black-friday-meme

Plan Your Shopping Ahead of Time

If you must go out on Black Friday, don’t arrive at a store without a plan. Remember, retailers want you to go into the store for one thing and come up with 15 other things.

Browse Black Friday circulars as they become available (or get leaked) on sites like blackfriday.com and theblackfriday.com. Nearly all major retailers have released theirs by mid-November.

Making an Amazon wishlist, even if you also intend to shop in person, can help you track your shopping if you’re shopping for a bunch of people. I like to curate mine all year long to track what I might get when and if it ever goes on sale.

Shop Online

“Cyber Monday” has become more and more of a thing, with retailers holding back some online-only deals until the Monday following Thanksgiving.

Shopping online can net you some nice deals, especially on items in the $20-$100 range. I’m a big fan of Amazon, but you have to keep checking back to find what you need. You also need to be flexible – the deals aren’t predictable, so if you’ve got your heart set on a very particular item, you might not want to wait for Amazon to maybe put it on sale.

Amazon black Friday deals

Time Your Electronics Purchases

Appliances are fine and dandy but what most of us really want are toys! We here at LevelUpHouse are big electronics fans, but we’re only happy when we get a deal. Here’s what I’ve learned in some 8 years of buying electronics during the Holiday season:

Smartphones

Smartphones are expected to go on sale just before Thanksgiving.

It used to be that the only deal you could hope for on an Apple device was a free Apple Store gift card with your purchase. But times are changing: Walmart, Radio Shack, and Best Buy in particular are getting aggressive with their pricing on last year’s iPhone 5 model as well as this year’s iPhone 5C. The previous generation iPad is also on sale at many retailers. If you’ve been thinking about getting an iOS device, this is a good time to grab one.

If you’re thinking about any other phone, pretty much every major carrier is offering some kind of smartphone deal along with a 2-year service plan. Research which phone you want ahead of time, and hit the cellular store with a goal on Friday and you should come out a winner.

Laptops, Computer Monitors, and Computer Accessories

black friday tips laptop dealLaptops and computer accessories usually show up as “doorbusters” on Black Friday itself. I’ve you’ve been waiting all year to upgrade your monitor, this is your chance to do it at a record low price. I’ve personally spent a couple Black Friday mornings camped out (in the freezing cold) for the sake of a good deal on LCD monitors and video game consoles.

Dell.com has a somewhat ominous-looking Black Friday countdown showing the minutes remaining until they reveal their deals. The Big Reveal is a few days before Black Friday, so if you can still try your luck in the stores if you don’t find what you’re looking for online.

Televisions

Thanksgiving Day itself is the best day to snag a deal on a new HDTV. Deals continue into Black Friday. If you want a new TV but you’re not ready quite yet, don’t worry – Superbowl Sunday isn’t far away, so TVs will go on sale again real soon in February.

Video Game Black Friday Deals

black friday for sane people2013 is a special year: two new gaming consoles are coming out this holiday season, the XBox One and the Playstation 4. But don’t expect any deals on the consoles themselves – new consoles never get discounted on their debut Black Friday.

But deals on games are a given – Thanksgiving and Black Friday are the days to shop (in person, alas) for video games. Cyber Monday doesn’t get quite the same discounts, probably because retailers are using video game deals to lure people into stores where they can buy bigger, more expensive things.

We’re PC gamers in this house, so we usually stock up on the Steam sales, which offer discounts on games, DLC, and game bundles. It’s unusual to find a discount on brand new releases, but if you want to back fill your catalog a bit and pick up some of the games you missed out on over the last year, the prices get crazy low (like, under $10 for lots of titles).

The best part of shopping on Steam? You don’t even have to freeze your ass off in the cold like we did for our Wii many years ago.

wii_camping

Black Friday for insane people: Back in 2008, Jim and I got up early to stand sub-zero Chicago temps for a Wii ticket.

Shop the “Other” Days

Black Friday isn’t the end of the discount season – it’s the beginning! The weekend after Thanksgiving in particular is known for appliance deals, and the entire month of December usually gets good discounts on house tools.

The weekdays following Black Friday, December 4th in particular, have lower store traffic and better customer service, with many of the same great holiday deals.

Start Shopping Now

It used to be that the deals didn’t start until Black Friday itself, but in the colossal effort to out-do each other, retailers are rolling out sales earlier and earlier.

A walk around the mall in early November shows plenty of sales already in effect. Shopping ahead of Black Friday might not guarantee you the lowest price, but it might help guarantee you leave the store with what you came for.

Dealnews.com styles itself as a “year round” Black Friday site. If nothing else, getting an early start on your shopping can save you stress and anxiety as the holidays approach.

Hit up Smaller Retailers

black friday tips for sane people shop local businessIn 2010, American Express (the credit card company) started promoting “Small Business Saturday” – which is ironic because small retailers are the most likely to not accept my AmEx card.

Regardless of the origin of Small Business Saturday, doing some of your holiday shopping at a local business can help you avoid the crowds, connect you with good service, and support your local community.

Two Ways to Skip Black Friday Entirely

The easiest way to stay sane on Black Friday is to just not participate. Obviously, this article was written for folks who do want to participate, just without going crazy, but for the truly bold I give you two strategies that Jim and I have utterly fallen in love with now that our needs are taken care of:

Help Someone in Need

KITH-Logo

KITH, my favorite charity, helps the local homeless start anew. No matter where you live, there’s a charitable group near you who would love your support this holiday season.

Here’s an easy and inexpensive way to feel good this holiday season: buy a toy for a toy drive. Give $25 to a cause you believe in. Put your money somewhere where it can do good, and you’ll feel good year after year.

I want to help the homeless, so I donate to Seattle Union Gospel Mission and KITH, two organizations right here in my own neighborhood giving homeless people meals, safe places to stay, and assistance in starting a new lives. It’s super inspiring to think that money I’d have spent filling space under the tree is helping someone feel hopeful about their life instead. I love giving to these organizations.

Focusing on your own needs counts, too. Skip the trinkets and buy yourself or your family that practical thing you’ve been wishing for, whether it’s a new appliance, tires for the car, or some cash in a savings account. Sure, it’s not as glamorous, but it sure is practical – and you’ll thank yourself come January.

Go somewhere!

Here’s a tip: many tourist destinations are complete ghost towns in the weeks between Thanksgiving and Christmas (including Disney World!). Airfare is low, lodging is cheap, and you get the airport to yourself. Skip the shopping and go lay on a beach. Or ski the mountains. Whatever you do, it’s probably cheaper (and more memorable) than anything you could buy on Black Friday.

Travel between Thanksgiving and Christmas - no one else does!

Travel between Thanksgiving and Christmas – no one else does! I took this photo on December 7th, 2012, of SeaTac International Airport. I’m sure it was a zoo two weeks later.

PS: And whatever you do, don’t shop at Walmart. Walmart is for jerks.

DIY Kitchen Backsplash (Part 5): Grouting Backsplash Tiles

DIY Tiled Kitchen Backsplash: Part 5. How to grout your DIY kitchen backsplash. It's like spreading frosting over little glass tiles!

Here are are in Part 5 of our DIY kitchen backsplash – the homestretch!  In this detailed post, I’ll show you all the steps to grouting your backsplash tiles.

Catch up on our DIY kitchen backsplash series through these links: 

The tiles have been mortared to the wall, and after 20 hours of dry time we’re ready to fill the gaps between the tiles with a non-sanded grout.

grout_before_after

Let’s get started!

Mixing Grout

Just like making mortar, making grout involves a box of grout powder from the local hardware store, water, and a bucket.  We cut the box’s formula in half, figuring that our 8 sq feet of tile didn’t need 20 sq feet worth of grout. (We still had plenty left over.)

Tip: Don’t start this step unless you have the next 4+ hours available.

Water + non-sanded grout powder + bucket = grout. We followed the box’s instructions and mixed it up with a metal scraper. (See the Supply List for a detailed list of everything we used.)

DIY Kitchen Backsplash: Mixing grout. If you can make brownies from a mix, you can make your own grout.

A bucket ‘o grout

It’s like a thick frosting, except not delicious.

Applying Grout

Get a nice big glob of grout onto the float trowel and smear it on!  Grouting is messy, tiresome business: apply it with a firm, strong arm so it squishes into the gaps between the tiles.  Continue around the entire backsplash.  Use your fingers to get grout into corners or places the trowel won’t fit.

Our 8 square foot backsplash took the two of us well over an hour to get grout into every crack.

Tip: Remember, you’re working against time here because the grout is slowly drying and hardening as you work.  A sheet of plastic wrap over the grout bucket can help slow the drying. If you have a very large area to grout, consider working in phases or getting more helpers.

DIY kitchen backsplash: spreading wet grout over tiles.

It began with a glob of grout.

I used my fingers to stuff grout into the corner where the tiles meet..

DIY kitchen backsplash: grouting the corner where the tiles meet.

Fingers are useful for getting grout into tight areas, such as corners.

…as well as into the tight area behind the faucet:

DIY kitchen backsplash: spreading grout into tiny cracks using my own fingers.

Fingers: the other home improvement tool

Cleaning Grout off Tile Faces

When about 75% of the cracks were filled, my helper switched to using a moist sponge to wipe grout off tile faces as I continued applying grout to un-grouted areas.

Tip: Go slowly and use a moist, not a wet sponge.  Remove grout in layers.  If the grout in the cracks starts to flow out of the cracks when it gets wet, wait 10 minutes before trying this step again.

DIY kitchen backsplash: wipe grout off tile faces using a moist sponge.

Using a moist sponge to slough grout off tile faces

Once the bulk of the grout was removed from the tile faces, I switched to using moistened paper towels to remove the final thin layers of grout from the tile faces, paying extra attention to the corners. This was tedious, careful work, but it left the tiles looking crisp.

DIY kitchen backsplash: remove haze from tiles using a moist paper towel.

Using a paper towel to remove haze and excess grout from tile faces.


DIY kitchen backsplash: polish grout off the tile corners so they look nice and crisp.

Grout is drying as I polish the corners.

Polish, polish, polish – this step is super tedious but 100% worth it.  Get those corners sharp, it makes a difference!

Grout Drying

We let the grout dry for just over an hour before returning to wipe any remaining haze off the tile fronts.  The grout now has to dry for three days before applying a coat of sealer.

DIY kitchen backsplash: another home improvement project, another mess! (Good thing we have Cheez-It!)

Grouting’s done, but there’s still an hour of clean up work to do.

DIY kitchen backsplash: Our 6" backsplash, freshly grouted and looking sharp.

Here’s how one of the backsplash edges turned out .

DIY kitchen backsplash: complete!

Kitchen cleaned up and looking sharp as the grout dries!

DIY Kitchen Backsplash (Part 4): Installing Backsplash Tiles

DIY kitchen backsplash: In part 4 of our "how to install your own tiled backsplash" series, we glue tiles to the wall using a bucket of mortar. Installing your own backsplash is easy - follow along!

A DIY kitchen backsplash is one of those projects where most of the work is in the planning and preparation.  The actual process of sticking the tiles to the wall took less than two hours.  Installing backsplash tiles can get tense – Will the tiles fit? Do we have enough of them? Hurry, the mortar is drying!  But thanks to our (my) careful (OCD level) planning, sticking tiles onto the wall was a success!

Catch up on our DIY kitchen backsplash series through these links: 

Drywall Surface Preparation

We degreased the painted drywall we’d be tiling over with a spray bottle of Bix TSP and a towel.  Just spray it on and wipe – super simple.

DIY kitchen backsplash: prepare your walls with a bit of BIX TSP and a rag.

Cutting the Tile Sheets

Note to self (and everyone else): cut your sheets to size and trim the excess along the edge before you mix your mortar.

DIY kitchen backsplash: cut tile sheets to the appropriate height. In our case, that height is 6".

Testing the Arrangement

A few days before our mortar party I cut up and laid out all the tiles on the living room floor (our hardly-furnished room comes in handy sometimes!).

DIY kitchen backsplash: test the tile layout before you mix up the mortar to be 100% sure you have enough tile.

Testing the tile layout on the living room floor.

Testing the arrangement was good for seeing and fixing unwanted patterns and ensuring there was enough tile (for the third time).

Masking Off the Work Area

If you thought you were ready to get to work, think again! Next up is masking off your work area with painter’s tape.  This was a good idea, don’t skip this step. Keeping your mortar contained to a nice little mortar playpen will save you a ton of tedious scraping and repainting later.

DIY kitchen backsplash: masking off the work area with painter's tape and printer paper.

Before you spread any mortar, mask off the work area with painter’s tape. This will make cleaning up your walls a lot easier.

Mixing the Mortar

Finally, a step that makes it look like we might actually put tiles on this wall!

The box of mortar promised 20 sq feet, so we guessed that we would need half of its contents for our 8 sq feet project.  We used our kitchen scale to weigh out 2.1 lbs of the mortar and halved the liquid measurement.  Everything went into our 2-gallon bucket for hand mixing with a metal scraper (the paint stick pictured was useless for stirring).

Mixing mortar got tiring, so I was glad to take turns with Jim.

DIY kitchen backsplash: follow the instructions on the box to mix your mortar.

Mixing mortar with a metal scraper in a big plastic bucket. (The paint stick was uselessly weak for this task.)

We let our tile batter sit 5-10 minutes as per the box’s instructions and then mixed it again.  Done!

The sheer amount of steps pictured on the box had me worried at first, but mixing mortar was butt simple, probably the easiest part of this whole project.  If you can make a brownies from a box mix, you can make mortar.  Tasy, tasty mortar.

installing backsplash tiles bucket of tile mortar mixed

Big bucket ‘o mortar, made as per the box’s instructions (just add water!)

Applying Mortar to Wall

Grab a glob and put it on the wall.  Repeat x 100.  Use the v-notched trowel to carve lines (and if you have time, dirty words or pictures) into your mortar.  Keep the mortar layer thick enough to fully cover the wall, but no thicker than that.

installing backsplash tiles spreading mortar on wall v notch trowel

Spreading mortar with a metal trowel.

The grooves will help the tiles adhere without a ton of excess oozing out when you press tiles into the mortar.

DIY kitchen backsplash: this is how mortar should look when applied to the wall. Quickly stick your tiles to it before it dries.

Mortar on the wall, waiting for sheets of tiles to get pressed onto it.

Where to Start Tiling?

The corner seemed like a good place to start because the interior corner is inherently trickier than anywhere else we’ll be tiling.  We wanted both sheets to touch in the corner but not overlap.  We had measured each wall independently, not realizing we were expecting both sets of tiles to go all the way to the edge – oops.

DIY kitchen backsplash in progress. Figuring out how to meet the tiles in the corner was a brief challenge, and we decided not to overlap them.

Our first few tile sections complete!

Here’s how the tiles fit together in the corner:

DIY kitchen backsplash: tiles meeting in the corner. We decided not to overlap them and plugged the gap with grout in the next step.

We decided not to overlap the tiles and plugged the gap with grout in the next step.

Tiling

Putting sheets on the wall was straightforward and quick from here.  We used the level to check our work as we went.  It’s ironic that the part of this project that most looks like actually tiling a backsplash was probably 10% of the total time spent.

Most of the time went into filling the little holes with “one off” tiles.

Filling Gaps

To fill the gaps that inevitably occured, we used the 1×1 squares and the 2×1 rectangles.  The gap-patching process was simple:

  1. Cut the “one off” tile free from the mesh and trim excess mesh around edge
  2. Butter the backside of a tile with a thin layer of mortar
  3. Plug the tile into the gap
  4. Mush it around until it’s level and evenly spaced from tiles around it
installing kitchen backsplash spare tiles for gaps

Our backsplash had a number of “holes” in it from too-long pieces having to be removed in order to fit to wall edges, corners, and the window ledge. 1×1 and 1×2 pieces were used to fill those gaps.

Tiling Behind the Range Oven

gecafeOur current range oven has a big built-in backsplash (with control panel), but we’d like to upgrade our range to a gas model with controls in front (the GE Cafe is our favorite pick right now).

The “controls in front” type of range typically lacks a built-in backsplash, so we continued our tiled backsplash behind our existing range, even though it won’t be seen until we upgrade.  We even tiled a couple inches below the top of the range to keep it looking seamless behind the appliance.


DIY kitchen backsplash: tiling behind the range in anticipation of a future range upgrade.

You should probably tile behind your range.

Letting it Dry

The easiest step of all.

DIY kitchen backsplash: the easiest step of all is letting it dry.

With all the tiles mortared to the wall, all we had to do was wait 24 hours before the grouting could begin.

We’ll be back in a day to grout and finish ‘er off!

DIY Kitchen Backsplash (Part 3): DIY Kitchen Backsplash Supply List

In Part 3 of our DIY kitchen backsplash series I’ll show you all the stuff I bought to make this project possible.

Catch up on our DIY kitchen backsplash series through these links: 

DIY kitchen backsplash supply list

With tiles in-hand, all that was left was to accessorize our them with stuff for the actual installation.  Turns out, buying the tiles was just the first 10% of the battle.  :D We needed so much more than just tiles.  To save you a bunch of separate trips to the store, here’s our all-inclusive DIY kitchen backsplash supply list: 

Tape Measure

Essential for planning your DIY kitchen backsplash… and picking a tile that will actually fit under your windowsill, and confirming that yes, you do indeed have enough tile…

diy kitchen backsplash supply list tape measure

This tape measure is indestructible.

Level

A level is essential for determining if the gap you just bridged over your range area is actually level, and for checking your tile work as you go. Uneven tiles are immediately noticeable, so check your work as you go with a small level.

diy kitchen backsplash supply list level

I use a small level like this one for tile work.

Backsplash Tiles

Read more about choosing the right tiles for your budget and kitchen.

diy kitchen backsplash supply list tiles

Without tiles, your backsplash is going to be pretty shitty. :P

Glass Tile Thin-Set Mortar

We used CustomLite Technology’s Glass Tile Thin-Set Mortar product (in white) which we purchased at The Home Depot.  We cut the mix formula in half (the box holds 4.2lbs, we used 2.1 lbs) and used every last drop for our 8 sq ft backsplash.

If you aren’t sure what kind of mortar you need for your tiles, ask Google or your friendly local tile store.  (FYI: Mortar is sometimes called “mastic”.)

diy kitchen backsplash supply list thin set mortar

Glass tile mortar for our glass tiles. Your mortar may vary.

Grout

Grout is the goop that goes in between your tiles to fill in the gaps. For our glass tiles, we chose non-sanded grout.  (The little bits of sand would likely scratch the tile faces.)

DIY kitchen backsplash non sanded grout polyblend

There are about as many grout color choices as there are people on the planet, but I always say you can’t go wrong with white.

Scissors

For cutting tile sheets in half and trimming excess mesh off the edges)

diy kitchen backsplash supply list scissors

Scissors were necessary for cutting sheets in half, trimming mesh edges, and filling gaps with one-off tiles.

White paper

We used it to protect the countertop underneath the tile edges

DIY kitchen backsplash paper to protect countertop

Paper used to protect the few inches of counter top adjacent to our work area.

Painter’s tape

We used Scotch blue painter’s tape to secure protective sheets of paper between the tile and the countertop.  We also used the tape to mask off the top of the mortar area to protect the painted wall above the backsplash.

diy kitchen backsplash supply list painter's tape

This stuff is completely worth it.

Terrycloth and Paper Towels

Used throughout the installation to wipe our fingers and clean up smudges.

Two Gallon Bucket

Used to mix our mortar.  Our 8 square feet worth of mortar hardly began to fill the bucket:

Don't use your prom bucket for mixing mortar, it's going to get messy and scratched.

Don’t use your prom bucket for mixing mortar, it’s going to get messy and scratched.


Metal Scraper

Our all-purpose metal scraper was used to mix the mortar in the bucket (it gets pretty stiff, a paint stick won’t cut it) and spread the mortar onto the wall.

metal_scraper

Get a tough one, you’ll use it in every other DIY project you do.

V-Notch Trowel

The v-notch trowel was essential for carving thin lines into the mortar once we’d applied the mortar to the wall.  The lines help the tiles squish onto the wall and adhere using a thin, even layer of mortar.

v notch edge trowel for DIY kitchen backsplash installers

Don’t skip this tool like I almost did, the little notches of the v-notch trowel make a HUGE difference in how nicely your tiles squish onto the wall.


Float Trowel

Your float trowel is for spreading grout over the delicate tile surfaces.  A float trowel is smooth and soft to protect your tiles from scratches.  We had two: a wide one and a narrow one (for fitting the short area under the window ledge).

float_trowel

Not to be confused with the metal scraper (which might scratch your tiles) or your v-notch trowel (which will definitely scratch your tiles).

Grout Sponge

Question: What’s the difference between a normal sponge and a grout sponge?
Answer: About $6.

Your grout sponge is for gently wiping grout off the face of your tiles as it cures. These cost somewhere between a buck and ten dollars. We used one that cost somewhere in the middle of that range and everything went fine.

cheap grout sponge

Amazon’s cheapest grout sponge – $2 for this bad boy

pro_plus_grout_sponge

A fancier grout sponge with built-in haze buffer.

Whether you splash out on a Cadillac sponge or get one from the dollar store, use a clean, new sponge.  You don’t want particles from your last sponge project getting into your nice grout or marring your pretty tiles.

Sealer

For sealing your tiles against stains and other unpleasantness.  Match the sealer type to your type of tiles.  Our tiles are some kind of stone (quartz, maybe?) and glass.

grout_and_tile_Sealer

We used a spray bottle of grout and tile sealer from Home Depot

Eye Protection & Breathing Mask

Mixing the mortar is dusty but unless you’re mixing a ton of it, it probably won’t be a problem.  Protection is up to you – I wore science class goggles and a cloth breathing mask, but my two helpers went without and everyone was pleased with their choices.

 To help you find the right products quickly, links on this page are Amazon affiliate links.  As always, LevelUpHouse and I encourage you to shop around, shop local, and shop wherever you like.  If you decide to shop at Amazon, your purchase through any of these links helps support LevelUpHouse!