DIY Floor Removal: Surprise! Electrical Outlet in Floor

Floor outlet = floutlet

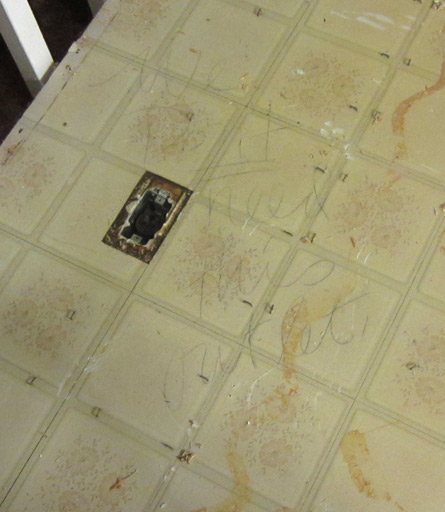
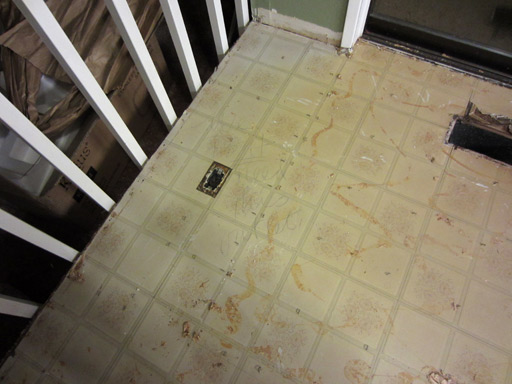
Found this outlet near the slider door.  The handwriting says “We don’t need this outlet”.

My elite carbon dating skills have dated this floor to 1993, so this outlet has been boarded up and un-loved for nearly 20 years.  Will it still work?

Sweet!

2013 Update:  We cut the new flooring around this outlet, but finding a cover for it was an $80 nightmare.  Unfortunately, a year later, I still have yet to find a use for it. I had dreams of a “charging station” over it, but I use the railing as a coat rack and am loathe to give that up for a thin table.  Maybe the previous owners were right to cover it up?  I don’t know.
DIY Floor Removal: We struck MOLD!

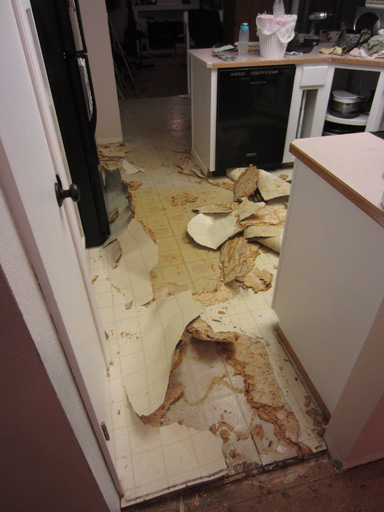
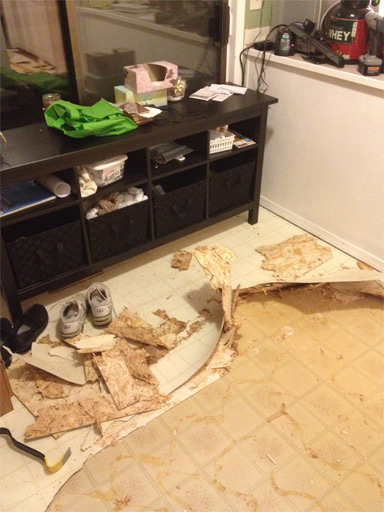
I tore a path through the plywood and vinyl to the dining area, just to say I did. Now it looks like the Tazmanian Devil tore through the kitchen:


But what’s this?! Moisture under the plywood? And MOLD?? Uh oh…


I broke off the plywood, threw it out, and wiped up the moisture. I’ve heard scary things about black mold in WA state, but … well, it can’t be harmful if we get rid of it really fast, can it? :D I have no idea how it got in there – maybe a dishwasher leak?

DIY Floor Removal: Hardwood, Laminate, and Vinyl

Our floor contractor is arranged!  We considered installing it ourselves to save money (half the total flooring cost), but there’s just too much of it and with both of us working full time it’s just not going to be feasible to install flooring into our kitchen, dining room, hall, and bathroom.  Alas.  But – we can still save a lot of money by ripping up the existing flooring.  There are many layers of existing flooring in this house, and each room is different.

Since we want a consistent flooring throughout the downstairs, we’ll have to say goodbye to the hardwoods in the entry and the bathroom.  There’s no way to match so we’d just as well tear it all out down to the subfloor and put the same floor into all areas.

Now it’s time to RIP UP SOME FLOORS!

Tearing up Hardwood & Vinyl Floors

Bathroom flooring layers:

  1. Hardwood
  2. Hideous brown vinyl
  3. Newspaper from 1993 (I shit you not, wtf)
  4. Hideous orange vinyl
  5. Subfloor

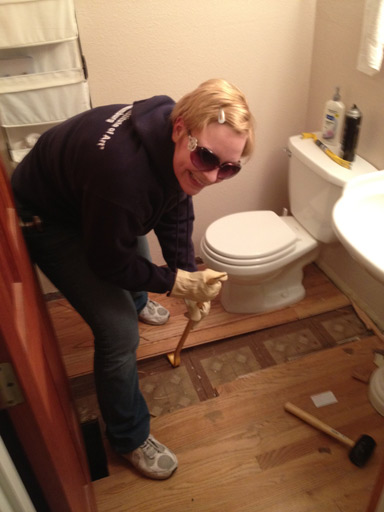
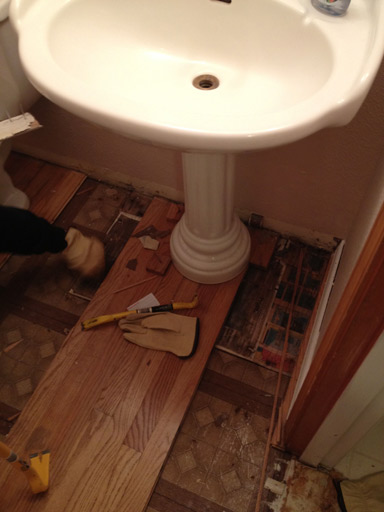
It was hard to figure out where to start in the bathroom.  There was no obvious edge to work from.  We pulled up a couple small pieces near the heating vent, and then just smashed one board with a crowbar until we got it out. From there, we had access to the rest of them. We pulled out as many as we could without removing the toilet or sink (that’s a project for this weekend).

I don’t know why there is newspaper (from 1993) under the sink. I don’t want to know why.

Tearing up Hardwood Floorboards

Entry hall flooring layers:

  1. Hardwood
  2. Subfloor

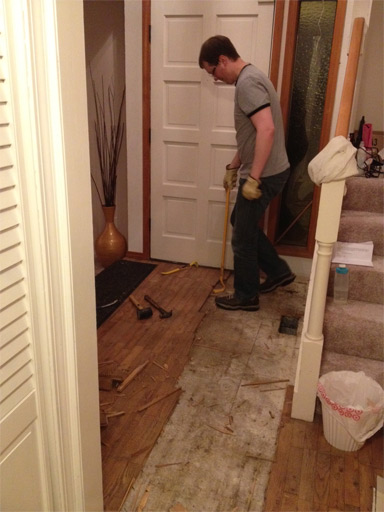
Same technique worked in the entry way: destroy one board, pull out its shattered remains, and use the gap to get at the adjacent ones. Removing each board is not easy work, but at least it is doable. We took turns leveraging the boards out one by one. Each one has several nails through it, and not a single one has come out without splintering.

Tearing up Vinyl Floors

Kitchen flooring layers (top to bottom):

  1. Allure
  2. White vinyl
  3. Plywood
  4. Purple vinyl
  5. Plywood
  6. Subfloor

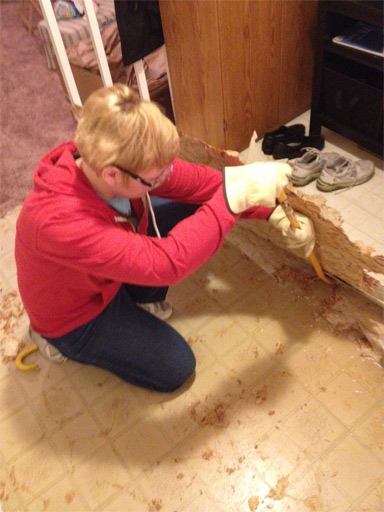
Unfortunately, the hardwoods ain’t got nothing on the plywood and vinyl combo in the kitchen. This crap comes up in tiny bits, requires several swings of the crowbar, a lot of leveraging, and it makes a huge splintery mess. Here I am prying up the largest piece we’ve managed to pull out at once (which took a lot of two-crowbar teamwork).

*BONUS FEATURE* A bizarre ramp made out of white vinyl and plaster to try to make up for the difference in floor thickness where hall meets bathroom.  Why? Why not just do it right? :(

1990s vinyl, meet 1980s vinyl. Below that: 1970s vinyl.

Our warzone:

This process took us weeks of chipping away at it before and after work.  We saved a fortune, but our sanity is another matter.

Budget DIY Kitchen Remodel: Choosing a Kitchen Sink

With the countertop chosen and a measure scheduled with our installers (The Home Depot), the next order of business in our DIY kitchen remodel was to choose a sink and have it available for the measuring appointment.  Somewhat surprisingly, none of the sinks at the d’Pot really fit our requirements:

  • single bowl
  • huge size
  • under-mount
  • stainless steel

TO THE INTERNET!

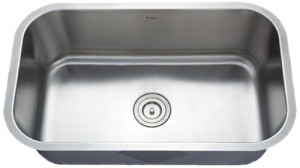
On Amazon we found this beauty: a Kraus brand single bowl stainless steel under-mount sink.  70+ reviews and 5 stars?  Yeah, I’m there.

The Kraus sink checks all our boxes (including price – at $300, it left budget for a classier faucet) and it’ll arrive with plenty of time to spare before the measure in two weeks.

choosing a kitchen sink kraus stainless steel


We also checked Home Depot’s website, which boasts of its 4000+ sink inventory, but none of those 4000 sinks met our needs, either.  I don’t know how that’s possible.

Some of the things we grappled with while choosing a kitchen sink:

Single Bowl vs. Double Bowl

This was an easy decision: I want a huge sink.

Like, the biggest sink that will fit in this kitchen, because I am done fighting with runt sinks designed for washing nothing larger than a drinking cup!

I have always been unhappy with double bowl setups in previous homes, and I can’t think of a single positive thing to say about them. I don’t do a lot of dishes by hand, but when I do it’s because I’m washing a couple one-off items like cookie sheets… and I don’t want soapy cookie sheets hanging halfway out the sink, dripping water and soap everywhere.

I really didn’t know what I’d do with a narrow bowl or a corner bowl or any of the other oddities I saw on display in the sink aisle.

Sink Size

I got the biggest sink that would fit, and it was completely worth it.  Go big, there’s no disadvantage to a large sink.  Just make sure of two things:

  • You’ve left enough space for a faucet
  • The bottom of your new sink won’t be lower than the drain pipe underneath your current sink

Under-Mount

Under-mount has changed my life. An under-mount sink eliminates any “bump” between countertop and sink, so wiping crumbs off the countertop and into the sink is effortless.  Just wipe and in they go.  Future buyers will love you for your under-mount sink choice.

Also: no caulk rim around the sink edge to get dirty (or moldy).

Stainless Steel

Stainless just looks and functions better.  I’ve lived with two beige colored sinks that must’ve been painted or coated with something to give them that look, and they both looked nasty all the time no matter how much I scrubbed.