Budget DIY Kitchen Remodel: Contractors for Heavy Lifting

There are some things beyond our abilities/time as DIYers.  Those things are:

  • Countertop installation
  • Sink installation
  • Range hood installation
  • Flooring installation
  • Popcorn ceiling removal

To make ourselves go extra crazy, four of those things are going in over the course of the next five days.  Here are two last looks at our kitchen in its “before” state.

Bidding Adieu to Laminate Countertops

I think laminate gets an unfairly bad reputation.  Knowing that we were soon going to replace this countertop, we started going rough on it just to see what it could take.  Tools, hot pans, sharp knives – this counter survived it all!   We couldn’t destroy the laminate even when we tried.

For like, 10 bucks a square foot or whatever it is, this stuff is kitchen gold.  Sure, you won’t brag about it in your real estate listing, but it’s functional stuff!

The real villain here is the sink: its double bowl design means that our larger cookwear can’t fit into either bowl, making dish duty even more sucky than usual.  It’s a weird coated surface sink, too, and the pale surface shows every bit of dirt. Furthermore, the over-mount design means the seam between it and the countertop collects loads of filth and mold.  As far as First World middle-class problems go, this one is pretty crappy.

So, don’t feel bad about getting laminate countertops.  Do feel bad about getting a too-small double-bowled not-stainless sink.

20120423-081443.jpg


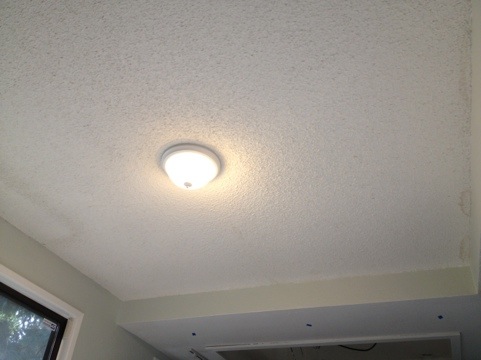
Smell ya later, popcorn ceiling

Apparently this junk looked good in the 70s, but it’s just a horrid trap for cobwebs and water stains (which cannot be scrubbed off or painted).   It’s disgusting, and it falls down on its own, bit by bit.  Our contractor will be removing the popcorn, “re-mudding” the ceiling, and then painting it in the kitchen, dining room, and living room.

20120423-081535.jpg


And so it begins…

DIY Floor Removal: Surprise! Electrical Outlet in Floor

Floor outlet = floutlet

Found this outlet near the slider door.  The handwriting says “We don’t need this outlet”.

My elite carbon dating skills have dated this floor to 1993, so this outlet has been boarded up and un-loved for nearly 20 years.  Will it still work?

Sweet!

2013 Update:  We cut the new flooring around this outlet, but finding a cover for it was an $80 nightmare.  Unfortunately, a year later, I still have yet to find a use for it. I had dreams of a “charging station” over it, but I use the railing as a coat rack and am loathe to give that up for a thin table.  Maybe the previous owners were right to cover it up?  I don’t know.

DIY Floor Removal: We struck MOLD!

I tore a path through the plywood and vinyl to the dining area, just to say I did. Now it looks like the Tazmanian Devil tore through the kitchen:


But what’s this?! Moisture under the plywood? And MOLD?? Uh oh…


I broke off the plywood, threw it out, and wiped up the moisture. I’ve heard scary things about black mold in WA state, but … well, it can’t be harmful if we get rid of it really fast, can it? :D I have no idea how it got in there – maybe a dishwasher leak?

DIY Floor Removal: Hardwood, Laminate, and Vinyl

Our floor contractor is arranged!  We considered installing it ourselves to save money (half the total flooring cost), but there’s just too much of it and with both of us working full time it’s just not going to be feasible to install flooring into our kitchen, dining room, hall, and bathroom.  Alas.  But – we can still save a lot of money by ripping up the existing flooring.  There are many layers of existing flooring in this house, and each room is different.

Since we want a consistent flooring throughout the downstairs, we’ll have to say goodbye to the hardwoods in the entry and the bathroom.  There’s no way to match so we’d just as well tear it all out down to the subfloor and put the same floor into all areas.

Now it’s time to RIP UP SOME FLOORS!

Tearing up Hardwood & Vinyl Floors

Bathroom flooring layers:

  1. Hardwood
  2. Hideous brown vinyl
  3. Newspaper from 1993 (I shit you not, wtf)
  4. Hideous orange vinyl
  5. Subfloor

It was hard to figure out where to start in the bathroom.  There was no obvious edge to work from.  We pulled up a couple small pieces near the heating vent, and then just smashed one board with a crowbar until we got it out. From there, we had access to the rest of them. We pulled out as many as we could without removing the toilet or sink (that’s a project for this weekend).

I don’t know why there is newspaper (from 1993) under the sink. I don’t want to know why.

Tearing up Hardwood Floorboards

Entry hall flooring layers:

  1. Hardwood
  2. Subfloor

Same technique worked in the entry way: destroy one board, pull out its shattered remains, and use the gap to get at the adjacent ones. Removing each board is not easy work, but at least it is doable. We took turns leveraging the boards out one by one. Each one has several nails through it, and not a single one has come out without splintering.

Tearing up Vinyl Floors

Kitchen flooring layers (top to bottom):

  1. Allure
  2. White vinyl
  3. Plywood
  4. Purple vinyl
  5. Plywood
  6. Subfloor

Unfortunately, the hardwoods ain’t got nothing on the plywood and vinyl combo in the kitchen. This crap comes up in tiny bits, requires several swings of the crowbar, a lot of leveraging, and it makes a huge splintery mess. Here I am prying up the largest piece we’ve managed to pull out at once (which took a lot of two-crowbar teamwork).

*BONUS FEATURE* A bizarre ramp made out of white vinyl and plaster to try to make up for the difference in floor thickness where hall meets bathroom.  Why? Why not just do it right? :(

1990s vinyl, meet 1980s vinyl. Below that: 1970s vinyl.

Our warzone:

This process took us weeks of chipping away at it before and after work.  We saved a fortune, but our sanity is another matter.