Budget DIY Kitchen Remodel: Why We Chose a Solid Surface Countertop

We’ve scheduled a contractor to come out on March 15th and give us an estimate for all of the following:

  • new countertops
  • new sink + new faucet
  • laminate flooring in dining room, kitchen, drop zone, and hallway
  • lighting changes – just something that isn’t three ugly fluorescent bulbs

That means we have until March 14th to procrastinate on choosing colors need to make a decision on this counter top!

Our new counter top must-haves:

  • Undermount sink!
  • No bizarre cleaning regimens (I don’t want to seal / buff / oil anything)
  • Reasonably durable, though neither of us is particularly destructive nor do we intend to chop food or put hot pans on the counter
  • Must be cleanable with normal cleaning solutions, like Lysol kitchen spray
  • Affordability – our budget for this kitchen update is around $5000
  • Stain resistant – we can be messy

This kitchen’s a work zone. We both cook twice daily.  I don’t know where some of these counter top manufacturers get off making counter tops that aren’t rugged or stain proof but I suppose if you don’t actually use the counter top for cooking, it’s fine if it’s made of paper mache.

Corian solid surface counter top quickly became a front-runner.  Young House Love first drew my attention by choosing it for their kitchen.   (I swear I am not stalking them.  Okay, maybe a little.)

We eventually decided on Corian for all of the following reasons:

  • Non-porous (stain resistant!) and solid all the way through, so if terrible things happen they can be sanded/buffed out
  • Highly rated by Consumer Reports
  • Works with undermount sink, wooo
  • I just like the feel of Corian.  As in, I REEEEEALLY like the FEEEEEEL of it.  It’s so soft and smooth.   (Actually, forget I said that, that was creepy.)

The next challenge was figuring out what color to go with.  I hate agonizing over colors, I really do, but with the counter top making up about half our kitchen update budget, I couldn’t afford to just choose on whim.

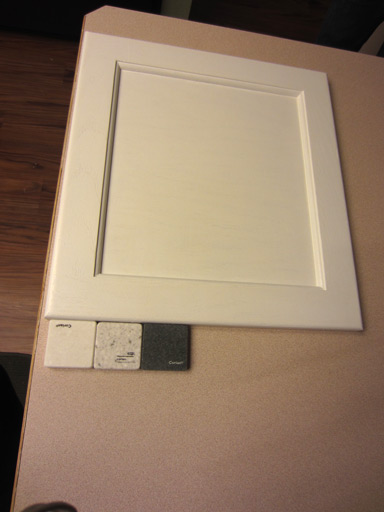
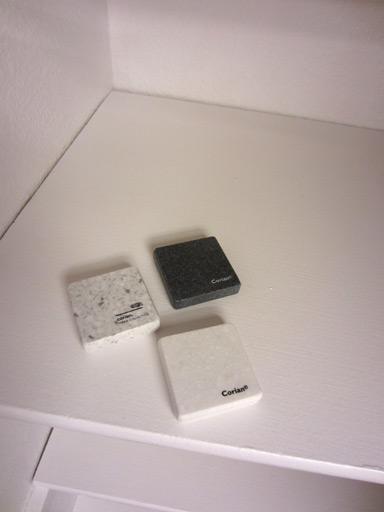
Here are our samples, chillin’ on the pantry’s painted shelves.


There’s a slight “warm” tone to the less-speckled white Corian sample which clashes just a tad with the cabinet paint color.  (But seriously, that observation can safely be filed under “shit only Mandi would notice”.)

Ehh?  I feel like no matter which one I pick, it’s going to be WAY better than the aging off-pink laminate with scuffed up wood border that we have now.  I think the speckly grey/white one is my favorite.  The ‘Pot had a sample similar to it with tiny black flecks, but it looked way too much like Oreo crumbs in milk.  Not that I don’t love Oreos or milk or the combination thereof, I just worry about the world’s Oreo supply should I crave Oreos every time I go through my kitchen.  Ultimately, we chose a bright speckled white (and it was perfect).

When we went to make the purchase at Home Depot, we discovered Samsung had a promotion on their version of Corian that brought the price of a Samsung Staron counter top several hundred under the cost of the same counter top in Corian.  There we were, presented with another option we hadn’t even considered after hours of ruling out other choices.  A quick look at online reviews revealed Staron is just as well reviewed as Corian and chemically quite similar, so we said what the hell and went with it.

Our gorgeous Staron counter top was installed a few weeks later!
Budget DIY Kitchen Remodel: Pantry Makeover (Part 2)

… I continue my quest for a pantry that isn’t nicotine-colored!

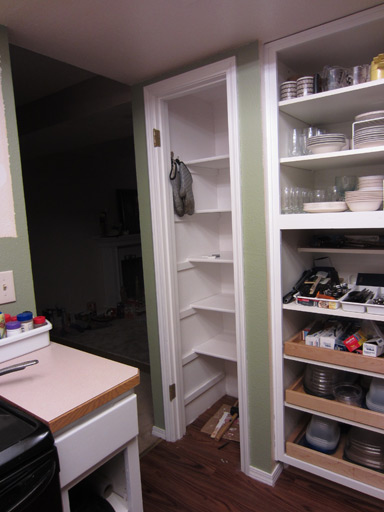
The shelves were first primed on both sides (with 2 days or so of dry time in between), and then painted with the same Benjamin Moore enamel stuff on both sides.  With nearly 7 days of drying time completed now for the undersides of the shelves, it was time to return them to their rightful place in the pantry.

Behold, a crisp, white pantry!

I want to be good and sure the shelves are fully cured before I jam all my crap back into the pantry, so I’m going to let the shelves continue to dry for a few more days.

Budget DIY Kitchen Remodel: Pantry Makeover (Part 1)

Our kitchen includes a narrow pantry.  Judging by the craftsmanship, it was probably some previous owner’s project.  All they did was nail some thin strips of wood to the walls and set shelves on top.  Not bad.  I would’ve done it differently, but I don’t have bandwidth to change it up significantly.  So I’m going to just give it a makeover, rather than complete cosmetic surgery.

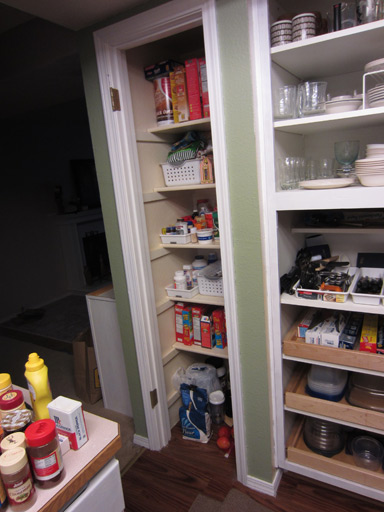
Here’s a “before”:

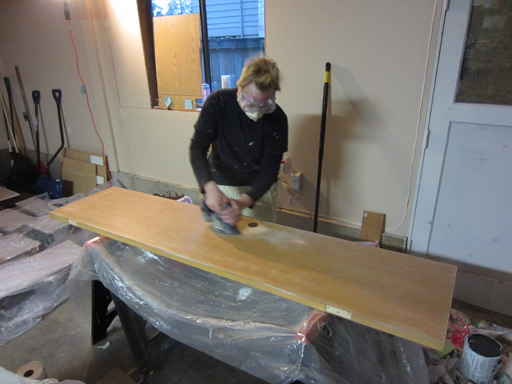
First thing I did was pull all our food out and put it in the living room.  Jim worked inside, deglossing the pantry interior and shelves while I got to work on sanding the pantry door.

Next up: priming the door, the shelves, and the interior of the pantry.  All told, it only took about an hour and a half or so to accomplish all that and get back to the “waiting” step as it all dries!  Best of all, these were the last primer-related steps.  On to enamel!


Budget Kitchen Renovation: Watch Us Wreck Our Kitchen and Put it Back Together

Level Up House's budget kitchen renovation. We repainted our cabinets, replaced our floors, installed a range hood, replaced the dated fluorescents with can lights, and tiled our own backsplash. And we did it for $6000 - WAY less than any contractor would've done it for!

Welcome to our largest project to date: a budget-friendly, semi-DIY kitchen renovation.

Why “semi-DIY”? Well, we won’t make or install the countertop ourselves, and we’re going to let the pros install the floor, but we’ll handle the demolition, cabinet refinishing, cabinet knobs, tiled backsplash, all patching and painting. We’re somewhere between “hand it all off to a contractor” and “cast our own countertop out of concrete”. If you can swing a hammer and know your way around Home Depot, you’re as skilled as we were when we started this project!

To give you a sense of time, most of this project was completed over the course of 2 months (and we both work full time, so we did most of this in our evenings and weekends).

If you’re reading this in 2014, good news: I’ve recently updated these articles to tell you how our renovated kitchen has held up over the past 2 years!

Budget DIY Kitchen Remodel To-Do List

  1. Tear out cabinets – Completed 2/2012!
  2. Strip varnish off cabinet doorsCompleted 2/2012!
  3. Sand cabinet doorsCompleted 2/2012!
  4. Prime cabinet doorsCompleted 2/2012!
  5. Final coat of paint on cabinet doors – Completed 2/2012!
  6. Paint the pantry door – Completed 2/2012!
  7. Install a powerful range hood – Completed 3/2012!
  8. Tear out mix of vinyl and hardwood flooring – Completed 3/2012!
  9. Laminate flooring professionally installed – Completed 4/2012!
  10. Remove popcorn ceiling – Completed 4/2012!
  11. Replace countertop, sink, and faucet – Completed 4/2012!
  12. Update lighting in the ceiling recess – Completed 1/2013! (Yes, we took an 8-month break from the kitchen project)
  13. Add pull knobs to kitchen cabinets and drawers – Completed 1/2013!
  14. Patch the ceiling hole adjacent to range hood duct – Completed 1/2013!
  15. Tile a new 6″ backsplash – Completed 4/2013! 

Kitchen remodel total cost:

  • Countertop, sink, faucet – About $2600
  • Range hood & installation – $1000
  • Electrical fixes – $200
  • Tiled backsplash – About $350
  • Cabinet refinishing supplies – $150
  • Ceiling lights, patching – About $50
  • Popcorn ceiling removal – About $300 for kitchen’s part of it, but we had popcorn removed in several rooms at once
  • Laminate Flooring – About $900 for the kitchen’s part, but we did the whole downstairs

All told, we spent about $6,000 on this kitchen remodel. Some things, like the flooring and popcorn ceiling removal, were actually done to many rooms (not just the kitchen).

What to prioritize in a kitchen remodel?

Make a list of what really irritates you in your kitchen. Maybe everything irritates you, but if you can pick just 3 or 4 things it’ll help you focus your budget.

In my kitchen, those things were:

  • The too-small 2-bowl sink. I went with a gigantic stainless steel undermount sink.
  • Overwhelming “orange and yellow” color palette
  • Bare fluorescent bulbs on the ceiling  – Total eyesore
  • Weak ventilation – I really wanted a rangehood.

When in doubt, prioritize usability. Make your kitchen enjoyable to use with a big sink and flexible faucet. Also, your choice of materials matters a lot – a few $ difference per square foot for a thing like flooring or a countertop doesn’t sound like much until you look at the full price. We were constantly trying to strike a balance between quality and savings.

Things I wanted but didn’t get:

  • A better layout – it was just too expensive to gut the whole kitchen
  • Remove the drop ceiling – too expensive for another 8″ of ceiling
  • New range/oven – Maybe later, the one I have now works fine, even if it’s worn out and not as stylish as a new one

We also didn’t replace any appliances. So many kitchen remodels involve chucking an entire set of perfectly good appliances just to get more modern features or a stainless steel finish. If your appliances are like ours and they work fine, consider replacing them when they break, not when they’re perfectly fine, and you’ll find a kitchen remodel much more affordable.

Can you DIY your kitchen renovation?

Renovating your own kitchen is hell. Everybody loves “before and after”, but not many people like to show off the ugly in-between. A DIY renovation of this scope is not for the weak. But I’m guessing if you’re reading this blog, you’re not a pansy who outsources everything short of dressing yourself in the morning to someone else. If you love rolling up your sleeves and saving thousands of dollars, you might have what it takes!

But here’s some fair warning. Our kitchen – no, most of our downstairs floor – looked like this for over 2 months. 

kitchen_renovation

For various stretches of time, we lived with holes in the wall, torn up floor (for a month!), and tools on every horizontal surface. 

kitchen_torn_up_floor

Oh, and at least a few things won’t go as you planned. Your floor will be harder to remove than you’d thought, the electrical won’t be set up the way you need it to be, an installer will get delayed. Be ready for some surprises! I warn you, do not undertake your own DIY kitchen renovation project unless you know you work well with your partner and possess an almost insanely badass work ethic. Tough work lies ahead. :)

Let’s get started!

Okay then! On that happy note, let’s get going!!!

It’s time to UPDATE THIS KITCHEN!!  YEAH LET’S DO IT, RAWWWRRR!!!! AND LET’S DO IT ON A TINY BUDGET!!! 

Will I ruin my cabinets?  Will I glue my hand to the counter? Follow along with our budget kitchen renovation and find out! Next stop, cabinet tear-out!